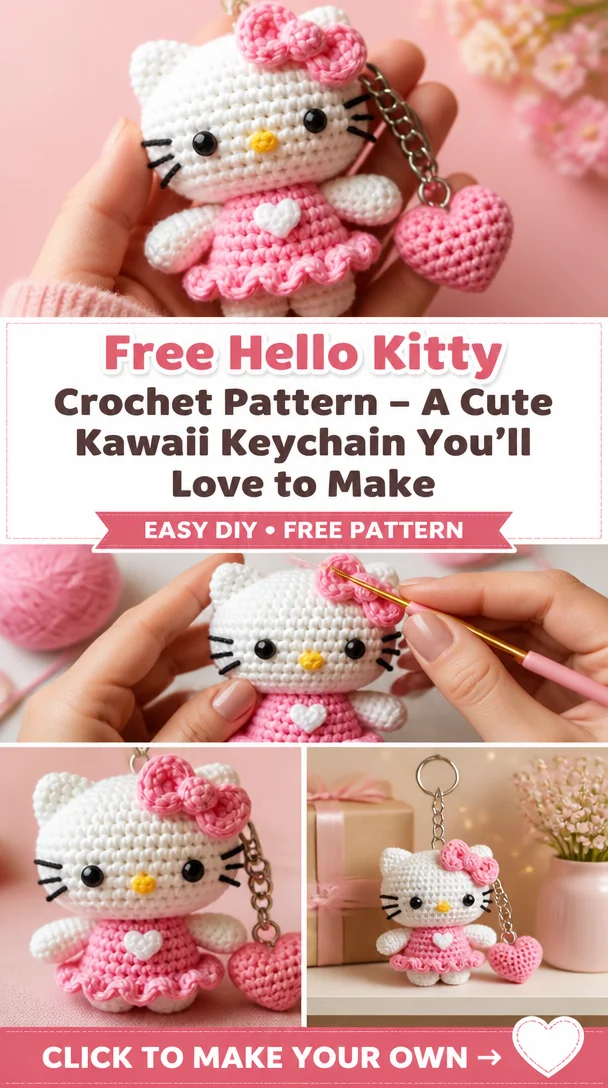
Amigurumi Kitty Keychain: A Cute and Fun Crochet Project
Welcome to our delightful crochet adventure! The Amigurumi Kitty Keychain is an adorable project that perfectly captures the kawaii essence of Hello Kitty. This charming little keychain not only makes for a practical accessory but is also a whimsical decoration for your bag or keys. Crocheting this keychain is an enjoyable experience, suitable for crafters of all skill levels, especially beginners. It’s a wonderful way to express your creativity, and once completed, it makes a thoughtful homemade gift for friends and family. So grab your crochet hook and let’s create something truly special!
Hello Kitty Crochet Pattern Overview
- Skill Level: Beginner-friendly
- Finished Size: Approximately 3 inches (7.6 cm) tall
- Crochet Hook Size: 3.0 mm (D or E hook recommended)
- Yarn Type: Acrylic yarn
- Yarn Weight: Worsted weight (medium)
- Main Colors: White, pink, yellow, black
- Construction Method: Worked in rounds
- Approximate Completion Time: 2-4 hours
- Finished Item Type: Amigurumi keychain
Materials You’ll Need
- Worsted weight acrylic yarn in white, pink, yellow, and black
- 3.0 mm crochet hook
- Yarn needle
- Stitch markers
- Scissors
- Stitch stuffing (e.g., polyfill)
- Safety eyes (optional)
- Keychain hardware
Crochet Abbreviations
- MR = magic ring
- ch = chain
- sc = single crochet
- inc = increase
- dec = decrease
- st = stitch
- sl st = slip stitch
Before You Start
Before diving into your Amigurumi Kitty Keychain, it’s useful to familiarize yourself with a few crochet techniques. Since this project is worked in continuous rounds, using a stitch marker to track your rounds can be beneficial. Additionally, maintaining even tension will ensure a neat finish. Prepare your stuffing and materials so you’re ready to assemble your keychain once all parts are crocheted.
Free Hello Kitty Crochet Pattern
Foundation or Magic Ring
- Start with a magic ring.
- Secure with a stitch marker to keep your first round.
Head
- Round 1: 6 sc into the magic ring (6).
- Round 2: inc in each st (12).
- Round 3: sc, inc repeat around (18).
- Rounds 4-6: sc in each st (18).
- Round 7: sc, dec repeat around (12).
- Begin to stuff the head.
- Round 8: dec around (6).
- Fasten off and securely weave in ends.
Body
- Round 1: 6 sc into a magic ring (6).
- Round 2: inc in each st (12).
- Round 3: sc, inc repeat around (18).
- Rounds 4-6: sc in each st (18).
- Round 7: sc, dec repeat around (12).
- Stuff the body and fasten off, leaving a long tail for assembly.
Ears (Make 2)
- Round 1: 4 sc in a magic ring (4).
- Round 2: inc in each st (8).
- Round 3: sc in each st and fasten off.
Bow
- Ch 8 and sc in each ch. Fasten off, leaving a long tail to tie in the center.
Keychain Attachment
Attach keychain hardware to the top of the head using a yarn tail for secure placement.
Joining the Pieces
Carefully sew the head onto the body. Position the ears on the top of the head and securely stitch them in place. Attach the bow above the face for added charm.
Facial Features and Decorative Details
Add the safety eyes to the face if desired. To complete the features, use embroidery thread to create a small nose and stitch the whiskers.
How to Use Your Hello Kitty Crochet Project
Your Amigurumi Kitty Keychain is perfect as a delightfully cute accessory! Use it on your bag, as a zipper charm, or gift it as a thoughtful handmade present. It’s a fantastic way to share your love for Hello Kitty and crafts alike!
Tips for a Better Result
- Maintain even tension for a uniform appearance.
- Make sure to place safety eyes symmetrically and securely.
- Keep the assembly aligned to avoid a crooked look.
Customization Ideas
Consider experimenting with different colors to create a unique version of your keychain. Try adding various textures or embellishments for a personal touch!
Common Problems and Troubleshooting
- If your stitches are uneven, practice consistent tension.
- For crooked features, re-position and secure them carefully.
- Ensure that your keychain hardware is securely attached to prevent losing your adorable creation.
Care and Safety
To keep your keychain looking its best, check the yarn manufacturer’s instructions for cleaning. Additionally, ensure that any small parts are safe for the intended age group, especially if the keychain is given as a gift.
Frequently Asked Questions
-
Is this Hello Kitty crochet pattern beginner-friendly?
Yes, this pattern is perfect for beginners! -
What yarn is best for this crochet project?
Worsted weight acrylic yarn works wonderfully for this project. -
How long does it take to crochet this design?
It typically takes around 2-4 hours to complete. -
Can I make this crochet project larger or smaller?
Yes, you can adjust your hook size and yarn weight accordingly. -
How do I attach the bow?
Use the yarn tail to secure the bow firmly above the facial features.
Conclusion
Creating your Amigurumi Kitty Keychain is a fun, rewarding endeavor that results in a delightful accessory. This project showcases the beloved Hello Kitty in a unique, collectible form, perfect for gifting or personal use. So gather your materials, follow the pattern, and enjoy crafting something cute and memorable!
SEO Title: Adorable Amigurumi Kitty Keychain Crochet Pattern
Meta Description: Create your own whimsical Amigurumi Kitty Keychain with this beginner-friendly crochet pattern. Perfect for gifts or as a cute accessory!
URL Slug: amigurumi-kitty-keychain
Primary Keyword: Amigurumi Kitty Keychain
Secondary Keywords: Hello Kitty crochet pattern, cute crochet project, Hello Kitty amigurumi, crochet gift ideas
Image 1 Alt Text: Finished Amigurumi Kitty Keychain with cute facial features
Image 2 Alt Text: Close-up of the crochet bow attached to the Kitty Keychain
Leave a Reply