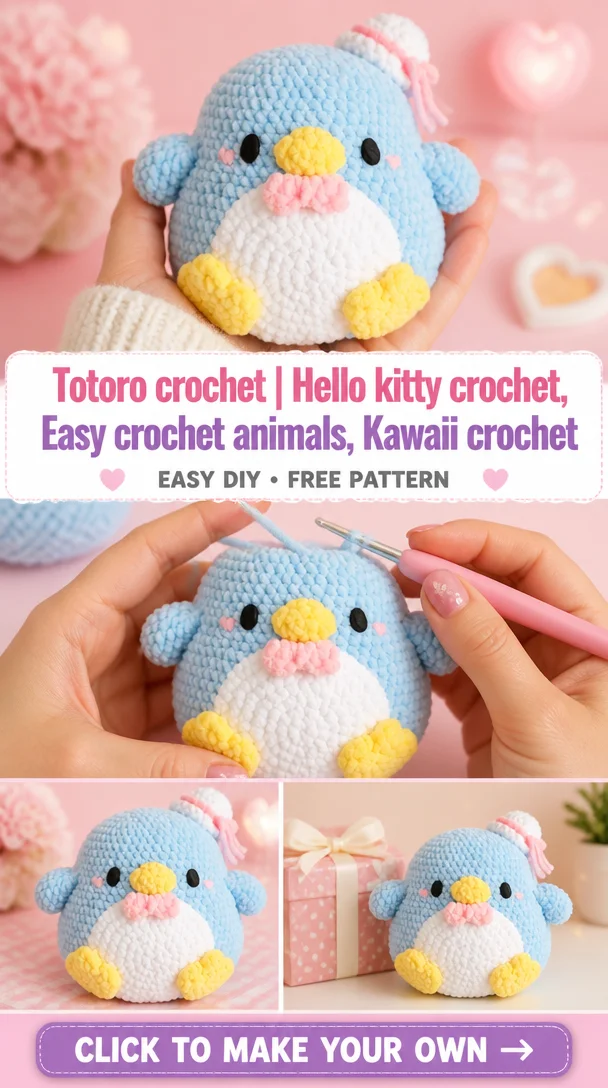
Totoro crochet | Hello kitty crochet, Easy crochet animals, Kawaii crochet
If you’re a fan of crochet and adore all things kawaii, you’ll fall in love with this Hello Kitty crochet project! This adorable design captures the essence of Hello Kitty, making it a perfect addition to any collection or a delightful handmade gift. Crafted in soft yarn, this crochet creation features Hello Kitty’s signature bow and sweet facial expression, making it not only cute but also a fun project for crocheters of all skill levels. Whether you’re making it as a decoration for your home, a unique accessory, or a charming gift for a friend, this Hello Kitty design brings a touch of joy to any occasion. Let’s dive into this cuddly project that’s suitable for anyone looking to add a little whimsy to their crochet repertoire!
Hello Kitty Crochet Pattern Overview
- Skill Level: Easy
- Finished Size: Approximately 7 inches tall
- Crochet Hook Size: 3.5 mm (E)
- Yarn Type: Acrylic
- Yarn Weight: Worsted
- Main Colors: White (for body), Pink (for bow), Yellow (for nose)
- Construction Method: Worked in rounds
- Approximate Completion Time: 2-4 hours
- Beginner-Friendly: Yes
- Type of Finished Item: Amigurumi plushie
Materials You’ll Need
- Worsted weight yarn in white, pink, and yellow
- 3.5 mm crochet hook
- Yarn needle
- Stitch markers
- Scissors
- Safety eyes (if applicable)
- Stuffing material
Crochet Abbreviations
- MR = magic ring
- ch = chain
- sc = single crochet
- inc = increase
- dec = decrease
- st = stitch
- rep = repeat
Before You Start
Before you begin crafting your Hello Kitty, here are a few tips to keep in mind:
- Use a Stitch Marker: Keep track of your rounds, especially since this pattern is worked in continuous rounds.
- Yarn Tension: Maintaining even yarn tension is essential for a uniform look.
- Assembly Planning: Plan your assembly in advance to ensure neat placement of all features.
- Stuffing: Make sure to stuff your pieces well to give Hello Kitty a nice shape.
Free Hello Kitty Crochet Pattern
Foundation or Magic Ring
Start with a magic ring:
Round 1: 6 sc into the MR.
Head
Round 2: Inc in each st around (12 sc).
Round 3: *Sc in next st, inc in next st; repeat from * around (18 sc).
Round 4-6: Sc in each st around (18 sc for 3 rounds).
Round 7: *Sc in next st, dec; repeat from * around (12 sc).
Round 8: Dec around (6 sc). Finish off leaving a long tail for sewing.
Body
Round 1: 6 sc into a magic ring.
Repeat Rounds 2-6 as completed for the head.
Round 7: *Sc in next st, inc; repeat from * around (12 sc).
Round 8: Sc in each st around (12 sc).
Round 9: Dec around (6 sc). Finish off and leave a long tail.
Ears (Make 2)
Round 1: 5 sc into a magic ring.
Round 2: Inc in each st around (10 sc).
Round 3: Sc in each st around (10 sc). Finish off, leaving a tail for attaching.
Arms (Make 2)
Round 1: 6 sc into a magic ring.
Round 2: Sc in each st around (6 sc). Finish off.
Legs (Make 2)
Round 1: 6 sc into a magic ring.
Round 2-3: Sc in each st around (6 sc for 2 rounds). Finish off.
Bow
Round 1: Ch 5, join to form a ring.
Round 2: Ch 2, 4 dc into ring; join.
Round 3: Ch 2, 4 dc into ring; tie off, leaving a long tail for attachment.
Assembly
- Attach the head to the body using the long tails.
- Sew on the arms and legs, ensuring they are positioned symmetrically.
- Position the ears on top of the head.
- Attach the eyes and sew on the nose.
- Place the bow atop the head.
Facial Features and Decorative Details
Add the following characteristics to complete the Hello Kitty look:
- Sew on safety eyes or embroider eyes with black thread.
- Use yellow thread for the nose.
- Add whiskers with black embroidery thread.
How to Use Your Hello Kitty Crochet Project
- Use it as a keychain charm, a decorative piece in your room, or as a personalized gift for a friend.
- It’s also perfect as a cute accessory for bags or backpacks.
Tips for a Better Result
- Keep your stitches tight to avoid stuffing showing through.
- Ensure facial features are evenly positioned for a balanced look.
- Use neat, invisible stitches for assembly.
Customization Ideas
- Experiment with different colors for the bow or body.
- Add embellishments such as sparkly yarns or different textures for a varied look.
Common Problems and Troubleshooting
- Uneven Stitch Counts: Check your stitch markers periodically.
- Visible Stuffing: Make sure to stuff firmly and tightly.
- Misaligned Features: Position features before sewing and check symmetry.
Care and Safety
To care for your Hello Kitty plushie, spot clean with a damp cloth. If made with safety eyes or other small parts, ensure they are securely attached, especially if given as a gift.
Frequently Asked Questions
-
Is this Hello Kitty crochet pattern beginner-friendly?
Yes, it’s designed for easy crocheting. -
What yarn is best for this crochet project?
Worsted weight acrylic yarn is recommended for softness and durability. -
How long does it take to crochet this design?
Approximately 2-4 hours, depending on your skill level. -
Can I make this crochet project larger or smaller?
Yes, you can adjust the yarn weight and hook size as needed. -
How do I attach the bow?
Use the long tail left from the bow and sew it securely to the top of the head.
Conclusion
This Hello Kitty crochet project is not only a fun way to enhance your crochet skills but also a charming creation that adds a touch of cuteness to any space. Enjoy crafting your own sweet Hello Kitty and let it bring joy to yourself and others!
SEO Title: Adorable Free Hello Kitty Crochet Pattern for All Skill Levels
Meta Description: Create your own cute Hello Kitty amigurumi with this easy crochet pattern! Perfect for beginners and a fun gift idea.
URL Slug: hello-kitty-crochet-pattern
Primary Keyword: free Hello Kitty crochet pattern
Secondary Keywords: Hello Kitty amigurumi, cute crochet project, Hello Kitty crochet doll, Hello Kitty crochet accessories
Image 1 Alt Text: Finished Hello Kitty crochet doll in white and pink colors
Image 2 Alt Text: Materials needed for the Hello Kitty crochet project
Leave a Reply