Blog

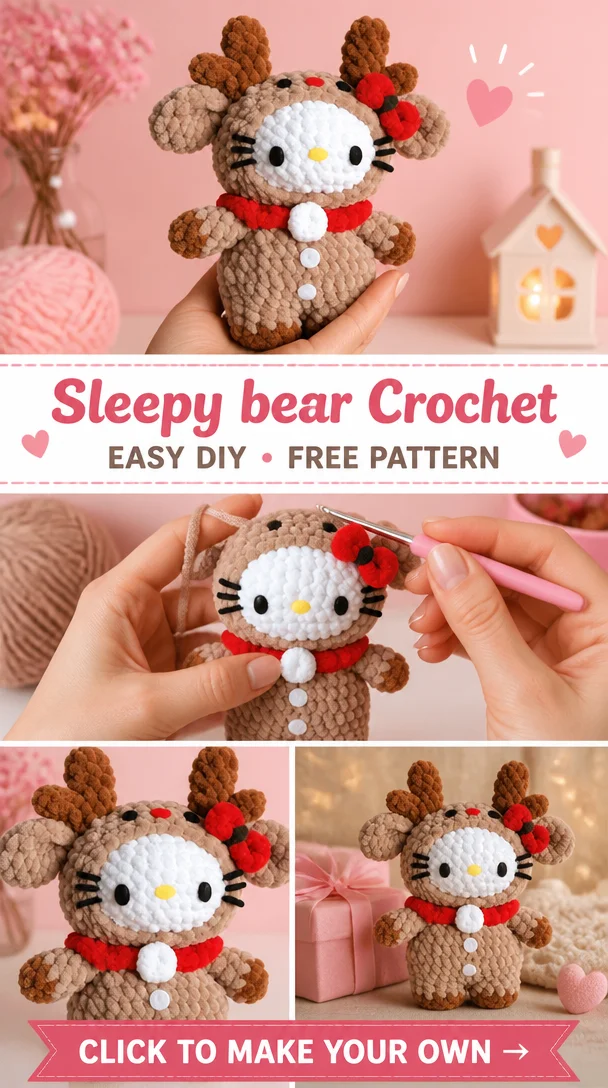
  • Sleepy bear Crochet

    Sleepy bear Crochet

    Sleepy bear Crochet

    Welcome to the delightful world of Hello Kitty crochet, where creativity meets cuteness! This Sleepy Bear Crochet pattern features the beloved character Hello Kitty in a whimsical crochet design that is sure to capture hearts. With her adorable bow and sweet expressions, this crochet project is perfect for fans of all ages. Whether you want to create a charming decoration for your home, a unique accessory for your bag, or a memorable handmade gift, this Hello Kitty crochet project ticks all the boxes. Suitable for crocheters with a range of skills, this pattern offers a lovely way to spend your crafting time while producing something truly special.

    Hello Kitty Crochet Pattern Overview

    • Skill Level: Intermediate
    • Finished Size: 7 inches
    • Crochet Hook Size: 3.5 mm (E)
    • Yarn Type: Acrylic yarn
    • Yarn Weight: DK (Light Weight)
    • Main Colors: White, pink, yellow, black
    • Construction Method: Worked in rounds and rows
    • Approximate Completion Time: 4-6 hours
    • Beginner-Friendly: Some prior crochet experience recommended
    • Project Style: Amigurumi doll

    Materials You’ll Need

    • Yarn (white, pink, yellow, black)
    • Crochet hook (3.5 mm)
    • Yarn needle
    • Stuffing
    • Safety eyes (9mm)
    • Embroidery thread (black for whiskers)
    • Stitch markers
    • Scissors
    • Decorative bow material (optional)

    Crochet Abbreviations

    • MR = magic ring
    • ch = chain
    • sc = single crochet
    • inc = increase
    • dec = decrease
    • st = stitch
    • rep = repeat

    Before You Start

    Before diving into your Hello Kitty crochet project, make sure to maintain even tension in your stitches. If you’re working in rounds, consider using a stitch marker to keep track of your beginning stitch. Always double-check your stitch counts, especially after increases and decreases, to ensure consistent shape. Remember to prepare any decorative accessories or details beforehand so that they can be easily attached during assembly.

    Free Hello Kitty Crochet Pattern

    Foundation or Magic Ring

    1. Round 1: Start with a magic ring and 6 sc in the ring. Pull the ring tight (6).
    2. Round 2: Inc in each st around (12).
    3. Round 3: Sc in the next st, inc in the next st; repeat around (18).
    4. Round 4: Sc in the next 2 st, inc in the next st; repeat around (24).

    Head

    1. Round 5: Sc in the next 3 st, inc in the next st; repeat around (30).
    2. Rounds 6-10: Sc in each st around (30).
    3. Round 11: Sc in the next 3 st, dec; repeat around (24).

    Body

    1. Round 12: Sc in the next 4 st, inc; repeat around (30).
    2. Rounds 13-16: Sc in each st around (30).
    3. Round 17: Sc in the next 4 st, dec; repeat around (24).

    Ears (Make 2)

    1. Round 1: Start with a magic ring and 4 sc in the ring (4).
    2. Round 2: Inc in each st around (8).
    3. Rounds 3-4: Sc in each st around (8).
    4. Fasten off and leave a long tail for sewing.

    Arms (Make 2)

    1. Round 1: Start with a magic ring and 5 sc in the ring (5).
    2. Round 2: Inc in each st around (10).
    3. Rounds 3-5: Sc in each st around (10).
    4. Fasten off and leave a long tail for sewing.

    Facial Details

    • Eyes: Use safety eyes and attach them between rounds 6 and 7, approximately 7 stitches apart.
    • Whiskers: Using black embroidery thread, stitch three whiskers on each side of the face.

    Bow

    1. Ch 16, 1 sc in the 2nd ch from hook, sc across.
    2. Fold the rectangle and stitch the center to create a bow shape.

    Joining the Pieces

    • Sew the ears onto the head, positioning them slightly apart.
    • Attach the arms below the head.
    • Decorate with the bow positioned above the right ear.

    How to Use Your Hello Kitty Crochet Project

    Your finished Hello Kitty crochet project can be a versatile piece! Use it as a charming decor item for your home, a cute keychain or bag charm, or as a special gift for a fellow fan. This sweet doll can bring joy to any room, making it a perfect collectible for Hello Kitty lovers.

    Tips for a Better Result

    • Keep your stitches tight to avoid visible stuffing.
    • Maintain even tension throughout to ensure uniformity in shape.
    • Position facial features symmetrically for a balanced look.
    • Secure all yarn ends neatly to finish your project cleanly.

    Customization Ideas

    Explore different color combinations for your Hello Kitty. You could also create alternate bows for a more personalized effect. Try varying textures in yarn to change the look, and feel free to add small accessories or embellishments to make your plushie truly one of a kind!

    Common Problems and Troubleshooting

    • If you find uneven stitch counts, don’t hesitate to count your stitches at the end of each round.
    • For loose stuffing, ensure that you stuff evenly without overloading any area.
    • If the features seem crooked, adjust their position gently to align them symmetrically.

    Care and Safety

    To maintain your Hello Kitty crochet doll, follow the yarn manufacturer’s care instructions. Always supervise young children if the item has small detachable parts like safety eyes or keychain hardware.

    Frequently Asked Questions

    • Is this Hello Kitty crochet pattern beginner-friendly?
      This pattern is more suitable for intermediate crocheters due to its complexity.

    • What yarn is best for this crochet project?
      Acrylic yarn is recommended for a soft yet durable finish.

    • How long does it take to crochet this design?
      Expect to spend about 4-6 hours depending on your experience level.

    • Can I make this crochet project larger or smaller?
      Yes, you can adjust the hook size or yarn weight to modify the size.

    • How do I attach the bow?
      Simply stitch it securely above the right ear.

    • Can I use different yarn colors?
      Absolutely! Feel free to customize with your favorite colors.

    • How do I keep the finished crochet doll in shape?
      Store it in a flat position and avoid heavy items on top of it.

    Conclusion

    We hope you enjoy creating your very own Hello Kitty crochet doll with this Sleepy Bear Crochet pattern! It’s an adorable project that makes for a lovely decorative item or a heartfelt gift. Get ready to crochet and share your creation with friends and family!


    SEO Title: Free Hello Kitty Crochet Pattern for Adorable Amigurumi
    Meta Description: Create a cute Hello Kitty crochet doll with this free pattern. Perfect for beginners and a delightful handmade gift idea!
    URL Slug: hello-kitty-crochet-pattern
    Primary Keyword: Hello Kitty crochet pattern
    Secondary Keywords: free Hello Kitty crochet pattern, Hello Kitty amigurumi, cute crochet project, handmade crochet doll

    Image 1 Alt Text: Sleepy Bear Crochet Hello Kitty in a cozy setting
    Image 2 Alt Text: Finished Hello Kitty crochet doll next to crafting supplies
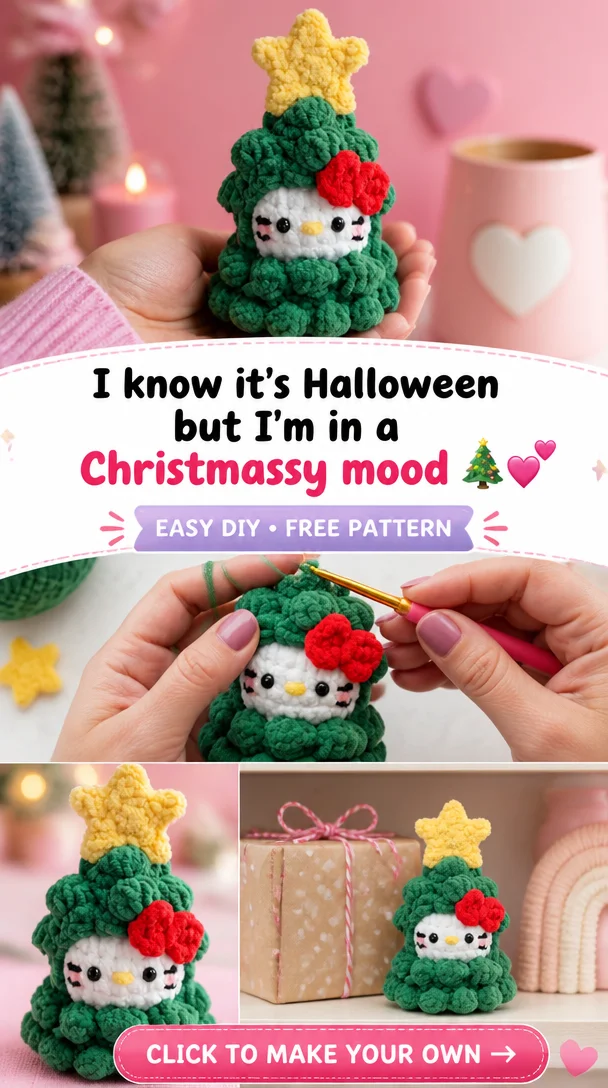
  • I know it’s Halloween but I’m in a Christmasy mood 🎄💕

    I know it’s Halloween but I’m in a Christmasy mood 🎄💕

    I know it’s Halloween but I’m in a Christmasy mood 🎄💕

    Embrace the festive spirit by crocheting a delightful Hello Kitty project, perfect for the upcoming holidays! With its charming design, this Hello Kitty crochet piece infuses a playful, kawaii touch into your décor, making it an irresistible addition to your collection or a heartwarming gift. Whether you’re a seasoned crocheter or a beginner looking to deepen your skills, this project is accessible and fun to create. It can serve as a whimsical decoration, an adorable accessory, or even a unique collectible that captures the essence of Hello Kitty in a Christmasy vibe. Get ready to bring a smile to your face and those around you with this enchanting crochet creation!

    Hello Kitty Crochet Pattern Overview

    • Skill Level: Intermediate
    • Finished Size: Approximately 10 inches tall
    • Crochet Hook Size: 4.0 mm (G)
    • Yarn Type: Medium-weight acrylic yarn
    • Yarn Weight: Worsted (Category 4)
    • Main Colors: White, pink, red, yellow
    • Construction Method: Worked in rounds
    • Approximate Completion Time: 4-6 hours
    • Beginner-Friendly: No
    • Project Style: Amigurumi plushie

    Materials You’ll Need

    • Medium-weight acrylic yarn in white, pink, red, and yellow
    • Crochet hook (4.0 mm)
    • Yarn needle for weaving in ends
    • Stitch markers
    • Scissors
    • Safety eyes (10 mm)
    • Fiberfill stuffing
    • Embroidery thread for facial details
    • Felt for bow details (optional)

    Crochet Abbreviations

    • MR = magic ring
    • ch = chain
    • sc = single crochet
    • inc = increase
    • dec = decrease
    • st = stitch
    • rep = repeat

    Before You Start

    Before diving into your Hello Kitty crochet project, keep a few practical tips in mind. Always use a stitch marker to track your rounds when working in the round. Maintaining even yarn tension is crucial to achieving a neat finish. It’s also recommended to check your stitch counts after each round, ensuring they align with the instructions. If you’re adding colorful elements like the iconic bow or facial features, plan your color changes accordingly. Organizing your materials and understanding the assembly process will make your crocheting experience much smoother.

    Free Hello Kitty Crochet Pattern

    Foundation

    Start with a magic ring.

    Head

    Round 1: 6 sc in MR.
    Round 2: Inc in each st around (12).
    Round 3: sc in next st, inc; repeat around (18).
    Round 4: sc in next 2 st, inc; repeat around (24).
    Round 5-10: sc in each st around (24).
    Round 11: sc in next 2 st, dec; repeat around (18).
    Round 12: sc in next st, dec; repeat around (12).
    Insert safety eyes and stuff the head.
    Round 13: Dec around (6). Fasten off and weave in ends.

    Body

    Round 1: 6 sc in MR.
    Round 2: Inc in each st around (12).
    Round 3: sc in next st, inc; repeat around (18).
    Round 4-8: sc in each st around (18).
    Round 9: sc in next st, dec; repeat around (12).
    Stuff the body.
    Round 10: Dec around (6). Fasten off and leave a long tail for sewing.

    Ears (make 2)

    Round 1: 6 sc in MR.
    Round 2: Inc in each st around (12).
    Round 3-4: sc in each st around (12).
    Round 5: Dec around (6). Fasten off and leave a tail for sewing.

    Arms (make 2)

    Round 1: 6 sc in MR.
    Round 2-4: sc in each st around (6).
    Fasten off and leave a tail for sewing.

    Legs (make 2)

    Round 1: 6 sc in MR.
    Round 2-5: sc in each st around (6).
    Fasten off and leave a tail for sewing.

    Facial Details

    Using embroidery thread, stitch the nose and whiskers. Position and sew on the safety eyes.

    Bow

    Using pink felt, cut a bow shape and attach it to one ear using a yarn needle.

    Stuffing and Shaping

    Stuff all pieces lightly to maintain their shape, ensuring no stuffing is visible.

    Joining the Pieces

    Sew the head to the body securely. Attach the arms and legs at even distances, ensuring they are proportional. Position and sew on the ears.

    Finishing Details

    Ensure all ends are secured and woven in neatly. Add any final touch-ups, like additional embroidery details.

    How to Use Your Hello Kitty Crochet Project

    This Hello Kitty plushie serves as a delightful decoration for your home, a unique collectible for Hello Kitty fans, or even a thoughtful handmade gift. You can place it on a shelf, use it as a plush companion, or incorporate it into your holiday décor for an added kawaii touch.

    Tips for a Better Result

    • Maintain even tension for neat stitches.
    • Keep facial features symmetrical.
    • Use small stitches for a clean finish.
    • Ensure that all pieces are secured properly.

    Customization Ideas

    • Experiment with different yarn colors for a personalized twist.
    • Create alternative outfits or decorative accessories.
    • Vary the size by using different yarn weights.

    Common Problems and Troubleshooting

    • If you find uneven stitch counts, double-check your rounds.
    • For loose stitches, try using a smaller hook size.
    • Ensure all pieces are securely attached to avoid any misalignment.

    Care and Safety

    Clean your crochet project according to the yarn manufacturer’s recommendations. Safety is also essential; ensure that small parts, such as safety eyes, are securely attached to prevent choking hazards.

    Frequently Asked Questions

    • Is this Hello Kitty crochet pattern beginner-friendly?
      This pattern is suitable for more advanced crocheters.

    • What yarn is best for this crochet project?
      A medium-weight acrylic yarn works best.

    • How long does it take to crochet this design?
      Approximately 4-6 hours, depending on your skill level.

    • Can I make this crochet project larger or smaller?
      Yes, simply adjust the yarn weight and hook size accordingly.

    • How do I attach the bow?
      Sew it on using a yarn needle.

    Conclusion

    Crocheting the delightful Hello Kitty project inspired by the festive theme of “I know it’s Halloween but I’m in a Christmasy mood” is a joyful way to celebrate creativity and the holidays. With its charming design and the thrill of crafting your own character, it offers both a fun challenge and a lovely result. Grab your yarn and start crocheting today!


    SEO Title: Adorable Hello Kitty Crochet Pattern for Christmas Fun
    Meta Description: Create your own Hello Kitty plushie with this free crochet pattern! Perfect for holiday decorations or gifts.
    URL Slug: hello-kitty-crochet-pattern
    Primary Keyword: Hello Kitty crochet pattern
    Secondary Keywords: free Hello Kitty crochet pattern, Hello Kitty amigurumi, kawaii crochet project
    Image 1 Alt Text: Adorable finished Hello Kitty crochet doll
    Image 2 Alt Text: Close up of the Hello Kitty crochet bow and facial details

  • Christmas Kitty Amigurumi Crochet Pattern PDF, Santa Cat Doll Tutorial (Digital Download)

    Christmas Kitty Amigurumi Crochet Pattern PDF, Santa Cat Doll Tutorial (Digital Download)

    Christmas Kitty Amigurumi Crochet Pattern PDF, Santa Cat Doll Tutorial (Digital Download)

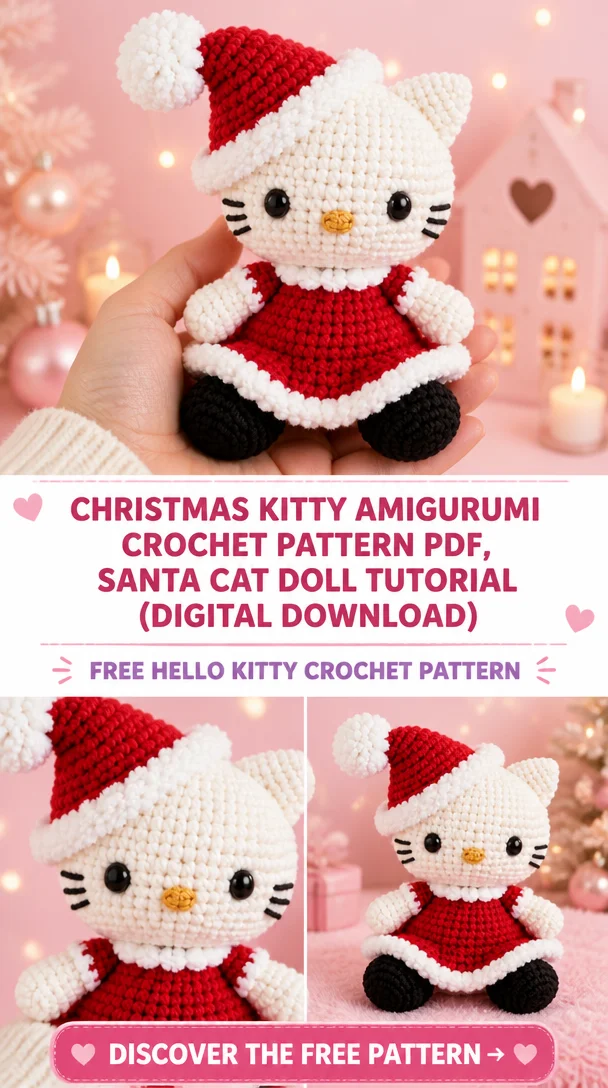
    Bring holiday cheer to your home with the adorable Christmas Kitty Amigurumi Crochet Pattern! This delightful project features a charming white cat wearing a festive red Santa hat, a stylish Christmas dress with fluffy white trim, and tiny black feet. Perfect for both beginners and experienced crocheters, this pattern is an excellent way to create a unique holiday decoration, a sweet collectible, or a handmade gift for friends and family. With its kawaii charm and festive spirit, the Christmas Kitty will undoubtedly brighten any room or add a special touch to your holiday décor. Get ready to embark on a cozy crochet project that captures the joy of the season!

    Hello Kitty Crochet Pattern Overview

    • Skill Level: Beginner to Intermediate
    • Finished Size: Approximately suitable for display or gifting
    • Crochet Hook Size: Recommended size (as per the pattern)
    • Yarn Type: Worsted weight yarn
    • Yarn Weight: Medium
    • Main Colors: White (body), Red (hat and dress), Black (feet)
    • Construction Method: Worked in rounds and individual pieces
    • Approximate Completion Time: Variable based on experience
    • Project Type: Amigurumi plush toy

    Materials You’ll Need

    • Worsted weight yarn in white, red, and black
    • Crochet hook (size as recommended in the pattern)
    • Yarn needle
    • Stitch markers
    • Scissors
    • Stuffing
    • Safety eyes (if specified)
    • Embroidery thread (for facial details)
    • Felt details (if specified)

    Crochet Abbreviations

    • MR = magic ring
    • ch = chain
    • sc = single crochet
    • hdc = half double crochet
    • dc = double crochet
    • sl st = slip stitch
    • inc = increase
    • dec = decrease
    • st = stitch
    • rep = repeat

    Before You Start

    Before diving into your crocheting, make sure to gather all your materials and set up a comfortable workspace. Some helpful tips for this project include:

    • Work in Continuous Rounds: For a seamless look, maintain round continuity where applicable.
    • Use a Stitch Marker: This helps in tracking the start of rounds effectively.
    • Maintain Even Tension: Ensuring consistent stitches will enhance your project’s final look.
    • Stuff Carefully: When shaping the amigurumi, add stuffing gradually to achieve the desired firmness without overstuffing.

    Free Hello Kitty Crochet Pattern

    Foundation or Magic Ring

    Start your project with a magic ring to create a tight center, perfect for the head and body.

    Head

    Round 1: MR 6 sc
    Round 2: inc around (12 st)
    Round 3: [sc, inc] around (18 st)
    Round 4: [2 sc, inc] around (24 st)

    Body

    Round 1: MR 6 sc
    Round 2: inc around (12 st)
    Round 3: [sc, inc] around (18 st)
    Round 4: [2 sc, inc] around (24 st)
    Continue with body pattern to reach desired height.

    Ears

    For each ear:
    Round 1: MR 4 sc
    Round 2: inc around (8 st)
    Round 3: [sc, inc] around (12 st)

    Arms

    Round 1: MR 6 sc
    Round 2: inc around (12 st)
    Continue until the arm reaches desired length.

    Legs

    For each leg, follow similar steps as the arms but adjust the length as necessary.

    Facial Details

    Attach crafted safety eyes, and use embroidery thread for the nose and mouth.

    Bow

    Crochet a small bow using the leftover red yarn to accentuate your kitty’s festive look.

    Clothing or Outfit

    Make the Christmas dress using red yarn, ensuring it fits snugly around the body of the cat.

    Joining the Pieces

    Sew together the head, body, arms, and legs using a yarn needle. Securely attach the ears onto the head in the desired position.

    Finishing Details

    Weave in all loose ends, and ensure everything is securely attached. It might also be worth giving your plush kitty a light press if the yarn allows.

    How to Use Your Hello Kitty Crochet Project

    This charming Christmas Kitty makes an excellent holiday decoration, a unique gift for loved ones, or even a collectible item for enthusiasts of kawaii characters. Display it on your mantel, hang it from your tree, or offer it as a thoughtful handmade gift.

    Tips for a Better Result

    • Maintain consistent stitch tension throughout to ensure an even finish.
    • Keep facial features symmetrical for a balanced look.
    • Secure yarn ends properly to avoid unraveling.

    Customization Ideas

    Consider using different yarn colors to create various versions of the Christmas Kitty or alter the outfit to reflect different occasions.

    Common Problems and Troubleshooting

    • Uneven stitch counts: Regularly check and count your stitches for accuracy.
    • Visible stuffing: Ensure to use the right amount of stuffing for even shape.
    • Difficulty attaching small details: Use a finer yarn needle for precision.

    Care and Safety

    Always check the yarn manufacturer’s instructions for care specifics. If your kitty has removable parts or embellishments, ensure they are securely attached to avoid any safety hazards.

    Frequently Asked Questions

    • Is this Hello Kitty crochet pattern beginner-friendly?
      Yes, it is suitable for beginners who have basic crochet skills.

    • What yarn is best for this crochet project?
      A medium-weight, soft yarn works best for achieving that signature amigurumi look.

    • How long does it take to crochet this design?
      Depending on your skill level, it can take a few hours to complete.

    • Can I customize this project?
      Absolutely! You can change yarn colors and style the outfit differently.

    • How do I keep the finished crochet doll in shape?
      Storing it in a cool place and keeping it away from direct sunlight is advisable.

    • Can I turn this design into a keychain or bag charm?
      Yes, by adding keychain hardware, your adorable kitty can double as a charm!

    Conclusion

    Embarking on the Christmas Kitty Amigurumi Crochet Pattern will surely fill your holidays with joy and creativity. This lovely Santa cat design combines cuteness with seasonal flair, ideal for decorations or gifting. Grab your yarn and crochet hook, and let the festive crafting begin!


    SEO Title: Adorable Christmas Kitty Amigurumi Crochet Pattern

    Meta Description: Create your own Christmas Kitty with this easy amigurumi pattern! Download the tutorial and crochet a festive Santa doll perfect for the holidays.

    URL Slug: christmas-kitty-amigurumi-crochet-pattern

    Primary Keyword: Christmas Kitty Amigurumi Crochet Pattern

    Secondary Keywords: Hello Kitty crochet pattern, Santa Kitty amigurumi, cute crochet project, handmade crochet doll

    Image 1 Alt Text: Finished Christmas Kitty amigurumi with Santa hat and dress

    Image 2 Alt Text: Detailed view of crochet pattern instructions for Christmas Kitty

  • Amigurumi Hello Kitty for Christmas Free Pattern-1

    Amigurumi Hello Kitty for Christmas Free Pattern-1

    Amigurumi Hello Kitty for Christmas Free Pattern-1

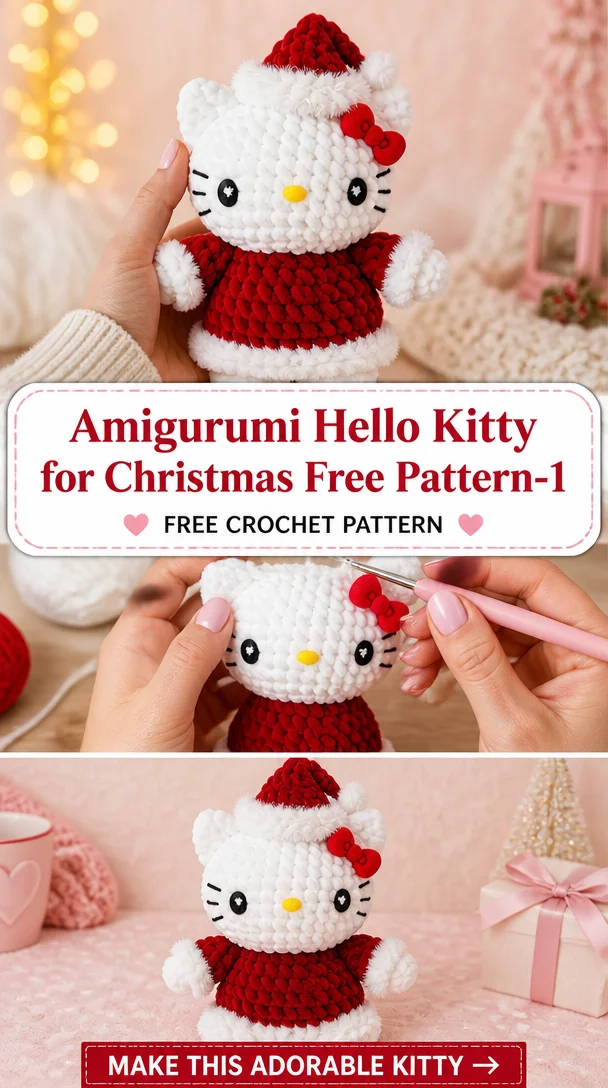
    Hello, dear Amigurumi followers! Today, we are excited to share a delightful crochet project that combines the charm of Hello Kitty with the festive spirit of Christmas. This Amigurumi Hello Kitty for Christmas design is irresistibly cute, adorned with festive attire, and perfect for adding a touch of kawaii to your holiday décor. Crocheting this little plushie makes for a fun project suitable for all skill levels, whether you’re a beginner or a seasoned crocheter. Its versatility allows it to serve as a decorative ornament, a lovable gift, or even a collectible addition to your crochet collection. So grab your supplies, and let’s get started on this enchanting holiday-themed Hello Kitty!

    Hello Kitty Crochet Pattern Overview

    • Skill Level: Beginner-friendly
    • Finished Size: Approximately 6 inches tall
    • Crochet Hook Size: 3.5 mm (E)
    • Yarn Type: Acrylic yarn
    • Yarn Weight: Worsted weight (Category 4)
    • Main Colors: White, pink, red
    • Construction Method: Worked in rounds
    • Approximate Completion Time: 3-5 hours

    Materials You’ll Need

    • White acrylic yarn
    • Pink acrylic yarn
    • Red acrylic yarn
    • Crochet hook (3.5 mm)
    • Yarn needle
    • Stitch markers
    • Scissors
    • Stuffing material
    • Safety eyes
    • Embroidery thread (for nose and whiskers)
    • Decorative bow materials (optional)

    Crochet Abbreviations

    • MR = magic ring
    • ch = chain
    • sc = single crochet
    • inc = increase
    • dec = decrease
    • st = stitch
    • st(s) = stitch/stitches
    • sl st = slip stitch

    Before You Start

    Before diving into your Amigurumi Hello Kitty project, here are a few tips to ensure a smooth crochet experience:

    • Working in Continuous Rounds: This pattern uses continuous rounds, so make sure to place a stitch marker at the beginning of each round to keep track.
    • Even Tension: Maintaining consistent tension throughout will help your stitches look neat and even.
    • Assembly Prep: Prepare individual pieces before assembly for a more organized process.

    Free Hello Kitty Crochet Pattern

    Foundation or Magic Ring

    Start with a magic ring to form the base of the head, which will allow for a neat and tight center.

    Head

    Round 1: MR 6
    Round 2: inc in each st around (12)
    Round 3: sc in next 2 st, inc (18)
    Round 4: sc in next 3 st, inc (24)
    Round 5-7: sc in each st around (24)
    Round 8: sc in next 3 st, dec (18)
    Round 9: sc in next 2 st, dec (12)
    Stuff the head firmly and continue.
    Round 10: dec in each st around (6)
    Fasten off, leaving a long tail for assembly.

    Body

    Round 1: MR 6
    Round 2: inc in each st around (12)
    Round 3: sc in next 3 st, inc (15)
    Round 4-7: sc in each st around (15)
    Stuff lightly before starting the next round.
    Round 8: sc in next 3 st, dec (12)
    Round 9: dec in each st around (6)
    Fasten off.

    Ears (make 2)

    Round 1: MR 4
    Round 2: inc in each st around (8)
    Round 3: sc in each st around (8)
    Fasten off, leaving a tail for sewing.

    Arms (make 2)

    Round 1: MR 4
    Round 2: inc in each st around (8)
    Round 3-4: sc in each st around (8)
    Fasten off, leaving a tail for sewing.

    Legs (make 2)

    Round 1: MR 6
    Round 2: inc in each st around (12)
    Round 3-4: sc in each st around (12)
    Fasten off, leaving a tail for sewing.

    Facial Details

    Sew safety eyes securely on the head and embroider the nose and whiskers using embroidery thread.

    Bow

    Using pink yarn, crochet a small bow or use pre-made bow material.

    Stuffing and Shaping

    Stuff each piece as you work, ensuring a nice shape and form is retained.

    Joining the Pieces

    • Attach the head to the body securely.
    • Sew on the ears at the top of the head.
    • Attach the arms beside the body and the legs underneath.

    Finishing Details

    Make sure to weave in all ends securely and check for any loose stitches.

    How to Use Your Hello Kitty Crochet Project

    This adorable Amigurumi Hello Kitty makes a delightful handmade decoration for your Christmas tree or can serve as a charming gift for loved ones. It can also be a lovely backpack charm or added to your collection of cute plushies.

    Tips for a Better Result

    • Keep a consistent tension to ensure all pieces look uniform.
    • Take your time attaching facial features to maintain symmetry.
    • Stuff carefully to avoid visible stuffing through the stitches.

    Customization Ideas

    • Experiment with different color combinations and yarn textures to create unique looks.
    • Try crocheting an outfit for Hello Kitty to celebrate different holidays or special occasions.

    Common Problems and Troubleshooting

    • If your stitches are too loose, consider using a smaller hook or tightening your tension.
    • Ensure facial features are positioned symmetrically for a charming look.

    Care and Safety

    When caring for your Amigurumi, always check the yarn manufacturer’s washing instructions. Be mindful of any small parts, like safety eyes, that could be a choking hazard for young children.

    Frequently Asked Questions

    • Is this Hello Kitty crochet pattern beginner-friendly?
      Yes, it is suitable for beginners with clear instructions.

    • What yarn is best for this crochet project?
      Acrylic yarn works well for durability and ease of use.

    • How long does it take to crochet this design?
      It takes approximately 3-5 hours, depending on your skill level.

    • Can I make this crochet project larger or smaller?
      Yes, you can adjust the yarn and hook size accordingly.

    • How do I attach the bow?
      Sew the bow onto the head or use a simple slip stitch to secure it.

    • Can I use different yarn colors?
      Absolutely! Feel free to customize with your favorite colors.

    • How do I keep the finished crochet doll in shape?
      Ensure proper stuffing and shaping during assembly for best results.

    Conclusion

    Crocheting the Amigurumi Hello Kitty for Christmas is a delightful project that infuses your holiday celebrations with whimsy and charm. Whether you keep it as a decoration or gift it to a friend, this adorable plushie is sure to bring smiles. Get started today and add a touch of cuteness to your Christmas festivities!


    SEO Title: Amigurumi Hello Kitty for Christmas – Free Crochet Pattern
    Meta Description: Crochet your own festive Amigurumi Hello Kitty with this free pattern! Perfect for decorations, gifts, or collectibles. Easy for beginners!
    URL Slug: hello-kitty-christmas-crochet-pattern
    Primary Keyword: Amigurumi Hello Kitty for Christmas Free Pattern
    Secondary Keywords: free Hello Kitty crochet pattern, Hello Kitty crochet plushie, kawaii crochet project, Hello Kitty crochet doll, crochet gift ideas
    Image 1 Alt Text: Amigurumi Hello Kitty for Christmas completed project
    Image 2 Alt Text: Materials needed for Hello Kitty crochet pattern

  • Crochet Hello Kitty Santa Amigurumi

    Crochet Hello Kitty Santa Amigurumi

    Crochet Hello Kitty Santa Amigurumi

    Get ready for the festive season with this adorable Crochet Hello Kitty Santa Amigurumi! This cute handmade ornament combines the charm of Hello Kitty with delightful Santa-inspired details, making it the perfect decoration for the holidays. Whether you’re looking to add a touch of kawaii to your Christmas decorations or searching for a heartfelt gift for a fellow crochet enthusiast, this pattern is sure to delight. Ideal for both beginner and experienced crocheters, this project can be used as a charming ornament, a collectible piece, or a unique handmade gift that embodies the spirit of the season.

    Hello Kitty Crochet Pattern Overview

    • Skill Level: Beginner to Intermediate
    • Finished Size: Approximately 6 inches tall
    • Crochet Hook Size: 3.5 mm (E)
    • Yarn Type: Acrylic or Cotton yarn
    • Yarn Weight: DK or Light Worsted
    • Main Colors: White (for body), Red (for Santa outfit), Black (for facial features), Pink (for bow)
    • Construction Method: Worked in rounds
    • Approximate Completion Time: 4-6 hours
    • Beginner-Friendly: Yes
    • Worked In: Continuous rounds
    • Type of Finished Item: Amigurumi ornament

    Materials You’ll Need

    • Yarn (white, red, black, pink)
    • Crochet hook (3.5 mm/E)
    • Yarn needle
    • Stitch markers
    • Scissors
    • Safety eyes (8 mm)
    • Stuffing
    • Embroidery thread (black and pink for facial details)
    • Felt for bow embellishments (optional)

    Crochet Abbreviations

    • MR = magic ring
    • ch = chain
    • sc = single crochet
    • hdc = half double crochet
    • dc = double crochet
    • sl st = slip stitch
    • inc = increase
    • dec = decrease
    • st = stitch
    • rep = repeat
    • BLO = back loop only

    Before You Start

    Before you begin your Crochet Hello Kitty Santa Amigurumi, here are some helpful tips to ensure a smooth crafting experience:

    • Work in continuous rounds for a seamless finish.
    • Use a stitch marker to mark your rounds.
    • Maintain even yarn tension to avoid uneven stitches.
    • Before assembling, ensure all individual pieces are stuffed evenly and securely.
    • Plan how you will position features like the eyes and bow for best results.

    Free Hello Kitty Crochet Pattern

    Foundation or Magic Ring

    Round 1: Make a magic ring, ch 1, work 6 sc into the ring.
    Round 2: Inc in each st around (12 st).
    Round 3: (Sc in next st, inc) 6 times (18 st).
    Round 4: (Sc in next 2 st, inc) 6 times (24 st).
    Round 5-10: Sc in each st around (24 st).

    Head

    Round 11: (Sc in next 2 st, dec) 6 times (18 st).
    Round 12: (Sc in next st, dec) 6 times (12 st).
    Round 13: Dec around (6 st).

    Body

    Round 1: (Using red yarn) Attach yarn, ch 1, work 6 sc in the first round.
    Round 2: Inc in each st (12 st).
    Rounds 3-6: Sc in each st around (12 st).
    Rounds 7-10: (Change to white) Sc in each st around (12 st).

    Ears (Make 2)

    Round 1: (Using white yarn) Make a magic ring, ch 1, work 4 sc into the ring.
    Round 2: Inc in each st (8 st).
    Round 3: Sc in each st around (8 st).

    Arms (Make 2)

    Round 1: (Using white yarn) Work 4 sc in a magic ring.
    Rounds 2-4: Sc in each st around (4 st).

    Legs (Make 2)

    Round 1: (Using red yarn) Work 6 sc in a magic ring.
    Rounds 2-5: Sc in each st around (6 st).

    Bow

    Using pink yarn, create a simple bow with a 4” length. Attach it to the head.

    Facial Details

    Sew on safety eyes between rounds 5 and 6 of the head. Use embroidery thread to add nostrils and whiskers.

    Stuffing and Shaping

    Stuff the head, body, arms, and legs lightly with stuffing. Make sure to shape them for a good appearance.

    Joining the Pieces

    • Attach the head to the body using yarn and a yarn needle.
    • Sew on arms and legs at your desired placement.
    • Securely attach the bow on top of the head.

    Finishing Details

    Weave in all loose ends and ensure everything is secure for your final touch.

    How to Use Your Hello Kitty Crochet Project

    Your Crochet Hello Kitty Santa Amigurumi makes a delightful decoration for your festive tree, a playful collectible in your home, or a heartwarming gift for friends and family!

    Tips for a Better Result

    • Ensure that your stitches are tight to avoid stuffing peeking out.
    • Keep facial features symmetrical.
    • Double-check your yarn tension for a neat, clean finish.

    Customization Ideas

    Get creative with your Hello Kitty Santa Amigurumi! Consider using different colors for the outfit or changing the bow’s style to match your personality or decor.

    Common Problems and Troubleshooting

    • Uneven Stitches: Check your tension and practice on scrap yarn if necessary.
    • Misaligned Features: Mark placement with pins before sewing to ensure symmetry.

    Care and Safety

    Clean your Hello Kitty Santa Amigurumi according to yarn care instructions, especially if using synthetic fibers. Be cautious with small parts such as safety eyes, especially around young children.

    Frequently Asked Questions

    • Is this Hello Kitty crochet pattern beginner-friendly?
      Yes, it’s suitable for beginners looking to improve their skills.

    • What yarn is best for this crochet project?
      A light worsted cotton or acrylic yarn works best.

    • How long does it take to crochet this design?
      Approximately 4-6 hours depending on your skill level.

    • Can I make this crochet project larger or smaller?
      Yes, using different yarn weights and hooks allows for size adjustments.

    • How do I attach the bow?
      You can sew it onto the head using a yarn needle for secure placement.

    Conclusion

    The Crochet Hello Kitty Santa Amigurumi is not just a lovely ornament; it combines creativity with the charm of a beloved character. Gather your materials, follow the pattern, and create a festive treasure that you can cherish or gift this holiday season.


    SEO Title: Cute Crochet Hello Kitty Santa Amigurumi Pattern

    Meta Description: Create a festive Hello Kitty Santa Amigurumi with this easy crochet pattern! Perfect as a holiday decoration or a handmade gift.

    URL Slug: hello-kitty-santa-amigurumi

    Primary Keyword: Crochet Hello Kitty Santa Amigurumi

    Secondary Keywords: free Hello Kitty crochet pattern, Hello Kitty amigurumi, Hello Kitty crochet doll, kawaii crochet project

    Image 1 Alt Text: Crochet Hello Kitty Santa Amigurumi completed project with festive details.

    Image 2 Alt Text: Close-up of Hello Kitty Santa Amigurumi’s facial features and bow.

  • Crochet hello kitty🌸💞

    Crochet hello kitty🌸💞

    Crochet hello kitty🌸💞

    Welcome to the whimsical world of crochet with our delightful Hello Kitty crochet pattern! This charming project is perfect for fans of the iconic character. With its adorable aesthetic, crocheting Hello Kitty not only provides a fun crafting experience but also results in a stunning piece that can brighten up any space. Whether you plan to use it as a decorative item, a unique gift, or a collectible for your own collection, this crochet pattern embodies the essence of kawaii culture. Suitable for crocheters of various skill levels, this project invites both beginners and seasoned crafters to unleash their creativity while enjoying the captivating process of bringing Hello Kitty to life.

    Hello Kitty Crochet Pattern Overview

    • Skill Level: Beginner to Intermediate
    • Finished Size: Approximately 6 inches tall
    • Crochet Hook Size: G/4.0 mm
    • Yarn Type: Cotton or acrylic yarn
    • Yarn Weight: Worsted weight
    • Main Colors: White (for the body), pink (for the bow), and black (for facial details)
    • Construction Method: Worked in rounds
    • Approximate Completion Time: 3-5 hours
    • Beginner-Friendly: Yes
    • Type of Finished Item: Amigurumi doll

    Materials You’ll Need

    • Worsted weight yarn in white, pink, black, and yellow
    • Crochet hook size G/4.0 mm
    • Yarn needle
    • Stitch markers
    • Scissors
    • Stuffing
    • Safety eyes (optional, if desired for the facial features)
    • Embroidery thread (for the whiskers and mouth)

    Crochet Abbreviations

    • MR = magic ring
    • ch = chain
    • sc = single crochet
    • inc = increase
    • dec = decrease
    • st = stitch
    • rep = repeat

    Before You Start

    Before you dive into crocheting Hello Kitty, it’s important to understand a few key techniques. First, familiarize yourself with working in continuous rounds to achieve a smooth and seamless look. Using a stitch marker can help keep track of your rounds, guiding you as you create. It’s essential to maintain even tension in your stitches for a polished final product. Lastly, planning color changes, especially for the bow and facial features, will ensure a neat finish.

    Free Hello Kitty Crochet Pattern

    Foundation or Magic Ring

    Create a magic ring and chain 1.

    Head

    Round 1: 6 sc in the ring (6)
    Round 2: inc in each st around (12)
    Round 3: sc in next st, inc in next st repeat around (18)
    Round 4: sc in next 2 sts, inc in next st repeat around (24)
    Continue for approximately 12 rounds or until desired size is achieved.

    Ears (Make 2)

    Round 1: 5 sc in a magic ring (5)
    Round 2: inc in each st around (10)
    Round 3: sc in next st, inc in next st repeat around (15)
    Fasten off, leaving a long tail for sewing.

    Body

    Continue from the head and attach the body directly.

    Round 1: 24 sc (24)
    Round 2: sc in next st, inc in next st repeat around (36)
    Continue down for 6 additional rounds.

    Arms (Make 2)

    Round 1: 5 sc in a magic ring (5)
    Round 2: 1 inc in each st around (10)
    Fasten off and leave a tail for attaching.

    Legs (Make 2)

    Identify the body base used for attaching.

    Round 1: 6 sc in a magic ring (6)
    Round 2: inc in each st around (12)
    Fasten off, leaving long tails for attaching.

    Facial Details

    Using black embroidery thread, sew the safety eyes into place. For the nose, use yellow yarn to create a small stitch or fabric piece. Add whiskers with additional embroidery thread.

    Bow

    Using pink yarn, create a small bow with a several chain stitches. Attach at the top side of the head.

    Stuffing and Shaping

    Before completely closing the piece, stuff with fiberfill. Adjust the shape as necessary to achieve a rounded head.

    Joining the Pieces

    Sew on the ears, arms, and legs securely using the long tails left from previous steps.

    Finishing Details

    Weave in any remaining yarn ends and adjust shapes as needed.

    How to Use Your Hello Kitty Crochet Project

    Once your Hello Kitty amigurumi is complete, it can serve many delightful purposes. Use it as a charming decoration for your home, a cute ornament for your backpack, or even a special gift for a friend who adores Hello Kitty!

    Tips for a Better Result

    • Maintain even tension to keep stitches consistent.
    • Review how to make clean color changes for the bow.
    • Ensure all features are symmetrical, especially facial elements.
    • Secure any additional attachments firmly to avoid loose parts.

    Customization Ideas

    Feel free to personalize your Hello Kitty by experimenting with different yarn color combinations, patterns, and embellishments. Consider changing the bow design or adding textured accessories.

    Common Problems and Troubleshooting

    If you encounter uneven stitch counts, a common problem can be remedied by counting stitches frequently. Loose stitches might require you to adjust tension, while crooked features can often be realigned during the assembly phase.

    Care and Safety

    Care for your handmade Hello Kitty doll according to the yarn manufacturer’s guidelines. Keep in mind the safety of small detachable parts, especially if the doll is intended for younger audiences.

    Frequently Asked Questions

    • Is this Hello Kitty crochet pattern beginner-friendly?
      Yes, this pattern works well for both beginners and intermediate crocheters.
    • What yarn is best for this crochet project?
      Worsted weight cotton or acrylic yarn is preferred.
    • How long does it take to crochet this design?
      Typically, the project takes 3-5 hours to complete.
    • Can I make this crochet project larger or smaller?
      You can adjust the hook size and yarn weight for size variations.
    • How do I attach the bow?
      The bow can be pinned or sewn to the head’s top side.

    Conclusion

    This Hello Kitty crochet project provides an engaging crafting experience while resulting in a wonderfully cute finished product. It’s perfect for expressing your love for this beloved character. Grab your materials, and let the crochet fun begin!


    SEO Title: Adorable Hello Kitty Crochet Pattern for All Skill Levels
    Meta Description: Learn how to crochet a delightful Hello Kitty doll with our easy-to-follow pattern! Perfect for gifting or as a cute accessory.
    URL Slug: hello-kitty-crochet-pattern
    Primary Keyword: Hello Kitty crochet pattern
    Secondary Keywords: free Hello Kitty crochet pattern, Hello Kitty amigurumi, kawaii crochet project, handmade crochet doll
    Image 1 Alt Text: Finished crochet Hello Kitty doll displayed in a colorful setting.
    Image 2 Alt Text: Close-up of crochet details including facial features and bow.

  • Crochet Christmas Cat Keychain with Candy Cane

    Crochet Christmas Cat Keychain with Candy Cane

    Crochet Christmas Cat Keychain with Candy Cane

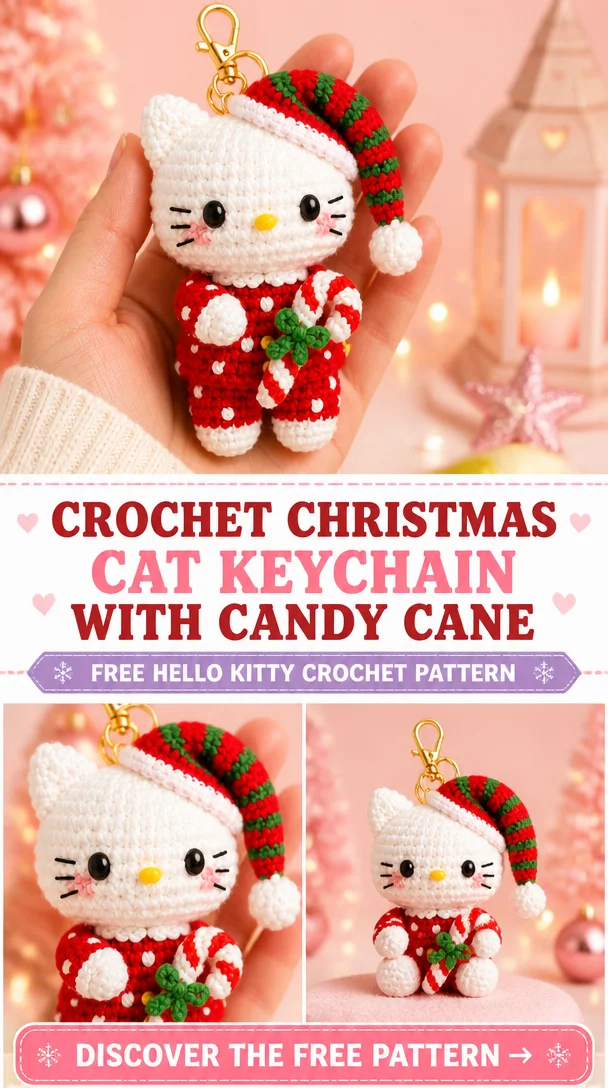
    Get ready to add a festive touch to your holiday season with this adorable Crochet Christmas Cat Keychain with Candy Cane! This cute crochet project features a whimsical Christmas cat design, complete with a striped Santa hat, a charming red polka-dot outfit, and a delightful candy cane, all tied together with a vibrant green bow. It’s not just a fun craft; this keychain makes a perfect handmade gift or a delightful decoration for your Christmas bags and backpacks. Whether you’re an experienced crocheter or a beginner looking for a fun challenge, this pattern offers an enjoyable way to spread holiday cheer with your crochet skills!

    Hello Kitty Crochet Pattern Overview

    • Skill Level: Intermediate
    • Finished Size: Approximately 4 inches tall
    • Crochet Hook Size: G/4.0 mm
    • Yarn Type: 100% acrylic yarn
    • Yarn Weight: Worsted weight (Category 4)
    • Main Colors: White, red, green, and black
    • Construction Method: Worked in rounds
    • Approximate Completion Time: 4-6 hours
    • Beginner-Friendly: No
    • Type of Finished Item: Keychain

    Materials You’ll Need

    • Yarn:
      • White (for the cat’s body and face)
      • Red (for the hat and outfit)
      • Green (for the bow)
      • Black (for the facial features)
    • Crochet Hook: G/4.0 mm
    • Yarn Needle: For sewing and weaving in ends
    • Stitch Markers: To mark your rounds
    • Scissors: For trimming yarn
    • Stuffing: Polyester fiberfill
    • Safety Eyes: 6 mm (optional, can be embroidered)
    • Keychain Hardware: Small keyring or keychain clasp
    • Embroidery Thread: For details if not using safety eyes
    • Decorative Bow Materials: Small ribbon or yarn

    Crochet Abbreviations

    • MR = magic ring
    • ch = chain
    • sc = single crochet
    • inc = increase
    • dec = decrease
    • sl st = slip stitch
    • st = stitch
    • rep = repeat

    Before You Start

    Before diving into your crochet project, here are some handy tips:

    • Use a Stitch Marker: Keep track of your rounds to maintain an even shape.
    • Maintain Even Tension: This will help avoid any gaps or unevenness in your stitches.
    • Check Your Stitch Counts: Regularly check your counts to ensure you don’t lose track as you work.
    • Plan Your Color Changes: Decide early on how you want your hat and outfit to contrast for a delightful effect.
    • Stuffing: Make sure to stuff your pieces firmly but not overly tight to avoid distortion.

    Free Hello Kitty Crochet Pattern

    Foundation or Magic Ring

    1. Start with a magic ring.

    Head

    1. Round 1: 6 sc in MR (6)
    2. Round 2: inc in each st around (12)
    3. Round 3: (sc 1, inc) repeat around (18)
    4. Round 4: (sc 2, inc) repeat around (24)
    5. Round 5: (sc 3, inc) repeat around (30)
    6. Rounds 6-11: sc around (30)
    7. Round 12: (sc 3, dec) repeat around (24)
    8. Round 13: (sc 2, dec) repeat around (18)

    Body

    1. Round 1: 6 sc in MR (6)
    2. Round 2: inc in each st around (12)
    3. Rounds 3-6: sc around (12)
    4. Round 7: (sc 1, dec) repeat around (8)

    Ears (Make 2)

    1. Round 1: 6 sc in MR (6)
    2. Round 2: (sc 1, inc) repeat around (9)
    3. Round 3: sc around (9)
    4. Fasten off leaving a tail for sewing.

    Arms (Make 2)

    1. Round 1: 6 sc in MR (6)
    2. Round 2: inc in each st around (12)
    3. Rounds 3-4: sc around (12)
    4. Fasten off.

    Legs (Make 2)

    1. Follow the same instructions as for the arms.

    Bow

    1. Chain 8 and sc back along the chain.
    2. Wrap a piece of yarn around the center to form a bow shape.

    Finishing Details

    1. Attach safety eyes and embroider features if desired.
    2. Sew the head to the body and secure all pieces well.

    Construction and Assembly

    • Joining Pieces: Attach the head to the body by sewing securely.
    • Positioning Ears: Place the ears on the top of the head and sew into place.
    • Attaching Arms and Legs: Sew the arms at the sides and legs at the bottom.
    • Stuffing: Ensure that each piece is stuffed adequately before closing them.
    • Attaching the Bow: Position the bow on the cat’s head and sew in place.

    Facial Features and Decorative Details

    • Eyes: Sew or glue on safety eyes.
    • Nose and Whiskers: Embroider with black thread for details.
    • Hat: Create a festive striped pattern on the Santa hat.

    How to Use Your Hello Kitty Crochet Project

    This charming Christmas cat keychain can be a delightful accessory for your backpack, a perfect addition to your holiday-themed decor, or a special handmade gift for those who love cute crochet designs.

    Tips for a Better Result

    • Maintain Even Tension: This prevents gaps and helps your keychain retain its shape.
    • Position Facial Details Symmetrically: Ensure that the eyes, nose, and mouth are centered for a cute appearance.
    • Attaching the Bow Neatly: Use a small dab of glue or sew it carefully to keep it in place.

    Customization Ideas

    • Experiment with different yarn colors for the cat’s outfit.
    • Use various textures in your yarn to add unique details.
    • Personalize the bow by using patterned or glittery materials.

    Common Problems and Troubleshooting

    • If you find uneven stitch counts, check your worked rounds and correct steadily.
    • Ensure all decorative elements are securely attached to prevent them from coming off over time.

    Care and Safety

    For care, follow the yarn manufacturer’s washing instructions. Always consider the safety of small parts, especially if gifting to children. Ensure that all components like safety eyes and keychain hardware are securely fastened.

    Frequently Asked Questions

    • Is this Hello Kitty crochet pattern beginner-friendly? No, it is best suited for intermediate crocheters.
    • What yarn is best for this crochet project? Any worsted weight acrylic yarn works well.
    • How long does it take to crochet this design? Expect to spend 4-6 hours depending on your skill level.
    • Can I make this crochet project larger or smaller? Adjust your hook size and yarn weight for different sizes.
    • How do I attach the bow? Position the bow securely on the head with either glue or yarn.
    • Can I use different yarn colors? Absolutely! Feel free to customize with your favorite color combinations.

    Conclusion

    Crocheting the Crochet Christmas Cat Keychain with Candy Cane is a delightful way to celebrate the festive season. Not only will you create an adorable accessory, but you’ll also add a personal touch to your holiday gifts. So gather your materials, follow the pattern, and enjoy the satisfaction of making a unique piece that will bring smiles to everyone this holiday season!


    SEO Title: Crochet Christmas Cat Keychain with Candy Cane Pattern
    Meta Description: Create an adorable Crochet Christmas Cat Keychain with a candy cane. Perfect for holiday gifts! Explore the free pattern and customization ideas.
    URL Slug: crochet-christmas-cat-keychain
    Primary Keyword: Crochet Christmas Cat Keychain
    Secondary Keywords: Hello Kitty crochet pattern, Hello Kitty crochet accessories, kawaii crochet pattern, cute crochet project, handmade crochet gift
    Image 1 Alt Text: Cute Crochet Christmas Cat Keychain with Candy Cane
    Image 2 Alt Text: Finished Crochet Christmas Cat Keychain on display

  • Vintage örgü | Bere modelleri, Bebek kedi, Örgü şapka

    Vintage örgü | Bere modelleri, Bebek kedi, Örgü şapka

    Vintage örgü | Bere modelleri, Bebek kedi, Örgü şapka

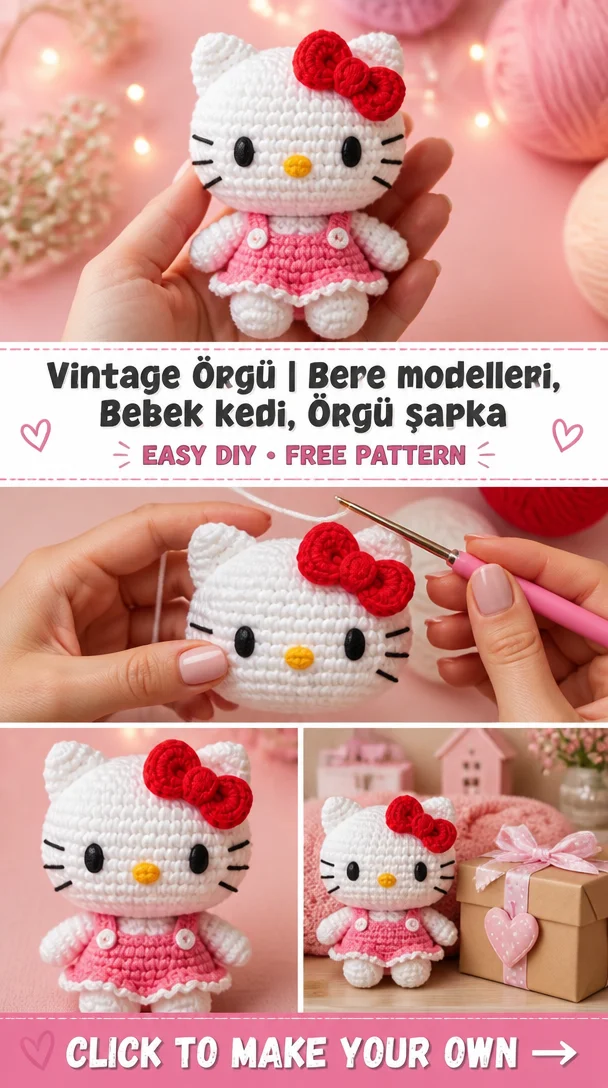
    Are you ready to dive into the adorable world of Hello Kitty crochet projects? This Vintage örgü | Bere modelleri, Bebek kedi, Örgü şapka embodies the charm and sweetness of the beloved character, making it a delightful addition to your crochet collection. The playful design features Hello Kitty’s iconic face, offering a cute and stylish accessory perfect for anyone who loves kawaii aesthetics. This crochet project is not only a wonderful way to express your creativity but also makes for a thoughtful gift for friends and family or a collectible for any Hello Kitty fan. Ideal for crochers at all skill levels, this pattern is a fantastic opportunity to create something unique and heartwarming!

    Hello Kitty Crochet Pattern Overview

    • Skill Level: Intermediate
    • Finished Size: Approximately 8 inches tall
    • Crochet Hook Size: 4.0 mm (G)
    • Yarn Type: Acrylic
    • Yarn Weight: Light worsted (Category 3)
    • Main Colors: White, pink, yellow, and black
    • Construction Method: Worked in rounds
    • Approximate Completion Time: 4-6 hours
    • Beginner-Friendly: Some experience required
    • Project Type: Crochet plushie

    Materials You’ll Need

    • Yarn (in white, pink, yellow, and black)
    • Crochet hook (4.0 mm / G)
    • Yarn needle
    • Stitch markers
    • Scissors
    • Stuffing
    • Safety eyes (9 mm)
    • Embroidery thread (black for facial details)
    • Felt for interior bows (optional)

    Crochet Abbreviations

    • MR = magic ring
    • ch = chain
    • sc = single crochet
    • inc = increase
    • dec = decrease
    • st = stitch
    • rep = repeat

    Before You Start

    Before starting your Hello Kitty crochet project, ensure your work is set up for success! Begin with a magic ring; it gives your project a neat beginning. Utilize a stitch marker to keep track of your rounds, especially since this design is worked in continuous rounds. Maintaining even yarn tension is key to achieving a beautiful finish, so make sure your tension remains consistent throughout. If your pattern requires color changes, plan them out to ensure a smooth transition.

    Free Hello Kitty Crochet Pattern

    Foundation or Magic Ring

    • Create a magic ring and secure it with a slip stitch.

    Head

    Round 1: sc 6 in MR
    Round 2: inc in each st (12)
    Round 3: sc 1, inc repeat from * to * (18)
    Round 4: sc 2, inc repeat from * to * (24)
    Round 5-10: sc in each st (24)
    Round 11: sc 2, dec repeat from * to * (18)
    Round 12: sc 1, dec repeat from * to * (12)

    Body

    Round 1: sc 6 in MR
    Round 2: inc in each st (12)
    Round 3: sc 1, inc repeat from * to * (18)
    Round 4-8: sc in each st (18)
    Round 9: sc 1, dec repeat from * to * (12)

    Ears (Make 2)

    Round 1: sc 3 in MR
    Round 2: inc in each st (6)
    Round 3: sc in each st (6)

    Arms (Make 2)

    Round 1: sc 4 in MR
    Round 2: inc in each st (8)
    Round 3-5: sc in each st (8)

    Legs (Make 2)

    Round 1: sc 5 in MR
    Round 2: inc in each st (10)
    Round 3-5: sc in each st (10)

    Facial Details

    Using the embroidery thread, add two black stitches for the eyes and a small triangle for the nose.

    Bow

    Using pink yarn, make a small bow around the top of the head.

    Joining the Pieces

    To assemble your Hello Kitty, attach the ears at the top of the head, sew the arms on the sides, and the legs at the bottom. Ensure everything is securely fastened.

    How to Use Your Hello Kitty Crochet Project

    Your completed Hello Kitty crochet project can serve multiple purposes! Use it as a charming decoration in your home, a unique collectible, or even a keychain accessory that showcases your love for Hello Kitty. It also makes a lovely handmade gift for special occasions.

    Tips for a Better Result

    • Maintain even tension to keep your stitches looking neat.
    • Use a yarn needle to secure your end threads meticulously.
    • Avoid stuffing your head too tightly to prevent deformation.
    • When attaching pieces, check alignment for a well-proportioned look.

    Customization Ideas

    Feel free to personalize your Hello Kitty masterpiece! Try using different yarn colors or adding decorative accessories. You might also experiment with various bow styles or even create unique outfits to give your Hello Kitty a fresh look.

    Common Problems and Troubleshooting

    • If your stitches feel loose, consider using a smaller hook.
    • Uneven edges can often be fixed by tightening your tension.
    • For misplaced facial features, gently pull and readjust during assembly.

    Care and Safety

    To keep your Hello Kitty crochet project looking fresh, follow cleaning methods based on yarn manufacturer instructions. For safety, ensure any detachable pieces, like safety eyes, are securely attached to avoid hazards, especially if children are in the vicinity.

    Frequently Asked Questions

    • Is this Hello Kitty crochet pattern beginner-friendly?
      While the pattern is suited for intermediate crocheters, beginners with some experience may find it enjoyable as well.

    • What yarn is best for this crochet project?
      Using light worsted acrylic yarn will give your project the best results.

    • How long does it take to crochet this design?
      Most crocheters will complete this project in about 4-6 hours.

    • Can I make this crochet project larger or smaller?
      You can adjust the hook size and yarn weight to modify the dimensions.

    • How do I attach the bow?
      Sew the bow securely onto the head using a yarn needle.

    • Can I use different yarn colors?
      Absolutely! Feel free to mix and match colors for a unique look.

    • How do I keep the finished crochet doll in shape?
      Ensure it is stuffed adequately but not overly tight to maintain its shape.

    • Can I turn this design into a keychain or bag charm?
      Yes, simply attach a keychain hardware to the finished piece!

    Conclusion

    This Vintage örgü | Bere modelleri, Bebek kedi, Örgü şapka crochet project is not only a delightful way to express your love for Hello Kitty but also serves as a wonderful handmade gift or charming decoration. With its charming design and engaging crafting experience, you’re sure to enjoy adding this cute crochet piece to your collection.


    SEO Title: Adorable Hello Kitty Crochet Pattern for All Levels
    Meta Description: Discover this vintage Hello Kitty crochet pattern. Create a cute plushie perfect for gifts and decorations. Ideal for intermediate crocheters!
    URL Slug: hello-kitty-crochet-pattern
    Primary Keyword: Hello Kitty crochet pattern
    Secondary Keywords: free Hello Kitty crochet pattern, Hello Kitty amigurumi, kawaii crochet projects, crochet gift ideas, handmade crochet doll
    Image 1 Alt Text: Vintage Hello Kitty crochet plushie design
    Image 2 Alt Text: Close-up of the Hello Kitty crochet bow and facial features

  • Crocheted Hello Kitty Dolls with Pumpkins and Jack-o’-lanterns | Halloween hello kitty crochet, Crochet hello kitty plushies, Kawaii crochet

    Crocheted Hello Kitty Dolls with Pumpkins and Jack-o’-lanterns | Halloween hello kitty crochet, Crochet hello kitty plushies, Kawaii crochet

    Crocheted Hello Kitty Dolls with Pumpkins and Jack-o’-lanterns | Halloween hello kitty crochet, Crochet hello kitty plushies, Kawaii crochet

    Welcome to the delightful world of crocheted Hello Kitty dolls dressed up with pumpkins and jack-o’-lanterns! This charming Halloween-themed project combines the timeless appeal of Hello Kitty with the whimsical spirit of the fall season. Perfect as decorations, gifts, or unique collectibles, these adorable plushies are sure to light up any space. Whether you’re a seasoned crocheter or a beginner looking for a cute project, this pattern can spark your creativity and bring a smile. With their sweet designs and playful elements, crocheted Hello Kitty dolls make for enchanting additions to any crochet lover’s collection, especially during Halloween!

    Hello Kitty Crochet Pattern Overview

    • Skill Level: Intermediate
    • Finished Size: Approximately 7 inches tall (depending on yarn used)
    • Crochet Hook Size: 3.5mm (E)
    • Yarn Type: 100% acrylic
    • Yarn Weight: Medium (worsted weight)
    • Main Colors: White, black, pink (for bow), orange (for pumpkin)
    • Construction Method: Worked in rounds with assembly required
    • Approximate Completion Time: 4-6 hours
    • Beginner-Friendly: Some experience recommended
    • Worked In: Continuous rounds for body; flat pieces for accessories
    • Type of Finished Item: Plushie doll featuring Halloween motifs

    Materials You’ll Need

    • 1 skein white yarn (for body)
    • 1 skein orange yarn (for pumpkin)
    • 1 skein black yarn (for facial details)
    • 1 skein pink yarn (for bow)
    • 3.5mm crochet hook
    • Yarn needle
    • Stitch markers (optional)
    • Scissors
    • Stuffing (polyester fiberfill)
    • Safety eyes (optional)
    • Embroidery thread (for facial details)

    Crochet Abbreviations

    • MR = magic ring
    • ch = chain
    • sc = single crochet
    • hdc = half double crochet
    • dc = double crochet
    • sl st = slip stitch
    • inc = increase
    • dec = decrease
    • st = stitch
    • rep = repeat

    Before You Start

    Before diving into your Hello Kitty crochet project, it’s essential to prepare and plan your approach:

    • Working in Continuous Rounds: Start by making a magic ring for a seamless finish.
    • Use a Stitch Marker: Place a stitch marker to keep track of your rounds.
    • Even Tension: Maintain consistent tension to ensure neat stitches and an even shape.
    • Separate Pieces Preparation: Plan ahead for separate components like the head, body, and accessories.
    • Assembling Pieces: Familiarize yourself with the assembly instructions to make the process smoother.

    Free Hello Kitty Crochet Pattern

    Foundation or Magic Ring

    Start with a magic ring to form your base.

    Head

    1. Round 1: 6 sc in MR.
    2. Round 2: Inc in each st around (12).
    3. Round 3: (Sc in next st, inc) rep around (18).
    4. Round 4: (Sc in next 2 st, inc) rep around (24).
    5. Rounds 5-10: Sc in each st around (24).
    6. Round 11: (Sc in next 2 st, dec) rep around (18).
    7. Round 12: (Sc in next st, dec) rep around (12).
    8. Add safety eyes and stuffing.
    9. Round 13: Dec around (6). Fasten off and weave in ends.

    Body

    1. Round 1: 6 sc in MR.
    2. Round 2: Inc in each st around (12).
    3. Round 3: (Sc in next st, inc) rep around (18).
    4. Rounds 4-8: Sc in each st around (18).
    5. Round 9: (Sc in next st, dec) rep around (12).
    6. Round 10: Dec around (6). Fasten off, leave a long tail for sewing.

    Ears (Make 2)

    1. Round 1: 4 sc in MR.
    2. Round 2: Inc in each st around (8).
    3. Rounds 3-4: Sc in each st around (8).
    4. Fasten off and leave a long tail for sewing.

    Arms (Make 2)

    1. Round 1: 6 sc in MR.
    2. Round 2: Inc in each st around (12).
    3. Rounds 3-5: Sc in each st around (12).
    4. Fasten off and leave a long tail for sewing.

    Legs (Make 2)

    1. Round 1: 6 sc in MR.
    2. Round 2: Inc in each st around (12).
    3. Rounds 3-5: Sc in each st around (12).
    4. Fasten off and leave a long tail for sewing.

    Facial Details

    • Eyes: Use safety eyes or embroider using black thread.
    • Nose: Use black yarn or embroidery thread for a small nose.
    • Whiskers: Embroider three whiskers on each side.

    Bow

    1. Chain 12.
    2. Row 1: Sc in second ch from hook and across (11).
    3. Fold the bow and stitch the center with pink yarn.

    Assembly

    • Attach the head to the body and sew securely.
    • Position and sew on the arms and legs.
    • Secure the ears on top of the head.
    • Sew on facial features and the bow.

    How to Use Your Hello Kitty Crochet Project

    These adorable crocheted Hello Kitty dolls can serve multiple purposes, from being charming decorations to delightful gifts. They can adorn your Halloween setup, serve as conversation starters, and bring a festive touch to your home. Additionally, they can be lovable companions or unique collectibles for any Hello Kitty fan.

    Tips for a Better Result

    • Maintain even tension throughout to keep your stitches uniform.
    • Check that the stuffing remains even inside the plushie without visible lumps.
    • When attaching facial features, keep them symmetrical for a cute appearance.
    • Secure all yarn ends properly to avoid unraveling.

    Customization Ideas

    Feel free to customize your Hello Kitty dolls! Consider using different colors for the pumpkins or experimenting with various yarn textures. You might create themed bows or outfits to personalize your plushies further.

    Common Problems and Troubleshooting

    • Uneven Stitch Counts: Double-check your stitches at the end of each round.
    • Loose Stitches: Ensure you’re maintaining consistent tension.
    • Misaligned Pieces: Position pieces before sewing to confirm placements.

    Care and Safety

    For maintaining your crochet project, consider gentle hand washing and laying it flat to dry. Ensure you supervise children around the plush toys, especially if you’ve added small emotional elements or safety eyes.

    Frequently Asked Questions

    • Is this Hello Kitty crochet pattern beginner-friendly? No, some prior crochet experience is recommended due to the assembly involved.
    • What yarn is best for this crochet project? Medium-weight acrylic yarn is preferred for crafting durable plushies.
    • How long does it take to crochet this design? It typically takes 4-6 hours.
    • Can I make this crochet project larger or smaller? Yes, by adjusting the hook size and yarn weight.
    • How do I attach the bow? Use a yarn needle to sew it onto the head securely.
    • Can I use different yarn colors? Absolutely! Customizing colors can create unique looks for your dolls.
    • How do I keep the finished crochet doll in shape? Proper stuffing and even tension will help maintain its shape.

    Conclusion

    We hope you enjoy making these delightful crocheted Hello Kitty dolls with pumpkins and jack-o’-lanterns. With their enchanting designs and vibrant colors, they are sure to bring joy, whether as gifts or fall decor. Let your creativity shine as you create adorable additions to your crochet repertoire!


    SEO Title: Adorable Hello Kitty Crochet Dolls for Halloween
    Meta Description: Discover a cute Hello Kitty crochet pattern featuring pumpkins! Perfect for Halloween decorations or gifts. Get started on your adorable plushie today!
    URL Slug: hello-kitty-crochet-dolls-halloween
    Primary Keyword: Hello Kitty crochet pattern
    Secondary Keywords: free Hello Kitty crochet pattern, Hello Kitty amigurumi, crochet gift ideas, kawaii crochet project, Hello Kitty crochet plushie
    Image 1 Alt Text: Crocheted Hello Kitty doll with pumpkin for Halloween decoration
    Image 2 Alt Text: Close-up of Hello Kitty plushie with jack-o’-lantern features

  • Crochet costumes | Hello kitty crochet, Easy crochet animals, Cute animals

    Crochet costumes | Hello kitty crochet, Easy crochet animals, Cute animals

    Crochet Costumes | Hello Kitty Crochet, Easy Crochet Animals, Cute Animals

    Welcome to the wonderful world of Hello Kitty crochet! This project brings the beloved Sanrio character to life through delightful crochet techniques, making it perfect for fans of all ages. The adorable design features Hello Kitty’s signature look with her iconic bow, big eyes, and sweet expression, making it an attractive addition to anyone’s collection. Whether used as a charming decoration, a gift for friends, or even a fun accessory, this Hello Kitty crochet pattern is sure to inspire creativity. It’s suitable for crocheters of various skill levels, especially beginners looking to enhance their skills while crafting a cute and collectible item.

    Hello Kitty Crochet Pattern Overview

    • Skill Level: Beginner-friendly
    • Finished Size: Approximately 6 inches tall
    • Crochet Hook Size: G/4.0 mm
    • Yarn Type: Acrylic or cotton yarn
    • Yarn Weight: Worsted weight (medium)
    • Main Colors: White, pink, black, yellow
    • Construction Method: Worked in the round
    • Approximate Completion Time: 3-5 hours
    • Project Type: Amigurumi toy

    Materials You’ll Need

    • Worsted weight yarn in white, pink, black, and yellow
    • G/4.0 mm crochet hook
    • Yarn needle
    • Stitch markers
    • Scissors
    • Stuffing
    • Safety eyes (12 mm)
    • Embroidery thread (for whiskers)

    Crochet Abbreviations

    • MR = magic ring
    • ch = chain
    • sc = single crochet
    • inc = increase
    • dec = decrease
    • st = stitch
    • rep = repeat

    Before You Start

    Before diving into your Hello Kitty crochet project, here are a few tips to keep in mind:

    • Work in Continuous Rounds: This technique helps avoid a visible seam, giving your project a more polished look.
    • Use a Stitch Marker: Place a stitch marker at the beginning of each round to keep your stitch counts accurate.
    • Maintain Even Tension: Consistent yarn tension will improve the overall appearance of your project.
    • Prepare for Assembly: Consider how you will position the ears and other features while crocheting, making assembly easier later on.

    Free Hello Kitty Crochet Pattern

    Foundation or Magic Ring

    Round 1: MR, 6 sc in ring (6)
    Round 2: Inc in each st around (12)
    Round 3: Sc in next st, inc in next st repeat around (18)

    Head

    Round 4: Sc in next 2 st, inc in next st repeat around (24)
    Round 5-8: Sc in each st around (24)
    Round 9: Sc in next 2 st, dec repeat around (18)
    Round 10: Sc in next st, dec repeat around (12)

    Ears (Make 2)

    Round 1: MR, 4 sc in ring (4)
    Round 2: Sc in each st around (4)
    Round 3: Ch 1, turn, sc across (4)
    Row 4: Fold ear in half and sew closed.

    Arms (Make 2)

    Round 1: MR, 6 sc in ring (6)
    Round 2-4: Sc in each st around (6)
    Finish off, leaving a long tail for sewing.

    Bow

    Using pink yarn, make a rectangular shape, then pinch the center and secure with thread. Attach to the head.

    Joining the Pieces

    • Attach the ears to the top of the head, maintaining even spacing.
    • Sew the arms to the sides of the body, ensuring they are positioned correctly for a natural look.

    Finishing Details

    Use embroidery thread to add facial features such as the eyes, nose, and whiskers. Secure all ends and tidy up your work.

    How to Use Your Hello Kitty Crochet Project

    Your handcrafted Hello Kitty can serve various purposes, such as:

    • A sweet home decoration
    • A unique and thoughtful gift
    • A playful backpack charm
    • An adorable keychain accessory

    Tips for a Better Result

    • Keep Stitches Neat: Try to maintain an even stitch size.
    • Positioning: Ensure the facial features are symmetrical for a refined look.
    • Secure Yarn Ends: Weave in all ends to finish your project cleanly.

    Customization Ideas

    • Experiment with different yarn colors to create various Hello Kitty characters.
    • Add unique accessories to personalize your piece, such as a different bow or clothing elements.

    Common Problems and Troubleshooting

    • Uneven Stitch Counts: Use a stitch marker or regularly count your stitches to avoid discrepancies.
    • Visible Stuffing: Work tightly to prevent stuffing from showing through.
    • Misaligned Features: Take your time positioning facial elements before sewing them in place.

    Care and Safety

    For maintaining your Hello Kitty crochet piece, follow the yarn manufacturer’s cleaning instructions. Be mindful of small parts and ensure that safety eyes and decorative elements are securely attached, especially if the item will be around young children.

    Frequently Asked Questions

    1. Is this Hello Kitty crochet pattern beginner-friendly?
      Yes, it offers clear instructions suitable for beginners.

    2. What yarn is best for this crochet project?
      Acrylic or cotton worsted weight yarn works best.

    3. How long does it take to crochet this design?
      Approximately 3-5 hours, depending on your skill level.

    4. Can I make this crochet project larger or smaller?
      Adjusting the yarn weight and hook size can change the dimensions of your Hello Kitty.

    5. How do I attach the bow?
      Simply sew the bow onto the head using the yarn tail from the bow.

    Conclusion

    Embrace your creativity by making this delightful Hello Kitty crochet project! Not only is it an enjoyable way to spend your time, but it also results in a charming piece that showcases your crochet skills. Happy hooking!


    SEO Title: Adorable Hello Kitty Crochet Pattern – Easy Amigurumi

    Meta Description: Enjoy this beginner-friendly Hello Kitty crochet pattern! Perfect for gifts, decor, or collectibles. Start crafting today!

    URL Slug: hello-kitty-crochet-pattern

    Primary Keyword: Hello Kitty crochet pattern

    Secondary Keywords: free Hello Kitty crochet pattern, Hello Kitty amigurumi, crochet gift ideas

    Image 1 Alt Text: Finished Hello Kitty crochet doll on display

    Image 2 Alt Text: Close-up of Hello Kitty crochet facial features

Crochet Hello Kitty

Your free crochet ebook

Leave your email address to request your free crochet ebook.

Your email address will be used to handle your ebook request.Privacy policy