Tag: cute designs

  • Hello Kitty Pattern

    Hello Kitty Pattern

    Hello Kitty Crochet Pattern

    If you’re a fan of all things kawaii, this Hello Kitty crochet pattern is perfect for you! With its adorable features and charming design, this little plushie makes a wonderful addition to your home decor or a heartfelt handmade gift. Whether you’re new to crocheting or have some experience, this project is accessible and enjoyable for everyone. Plus, you can customize this cutie in multiple ways! Want to create a spooky vibe? Consider a zombie-themed Hello Kitty by simply altering the yarn colors for a unique twist. Dive into a world of creativity with this delightful crochet pattern that promises to bring joy to any Hello Kitty enthusiast!

    Hello Kitty Crochet Pattern Overview

    • Skill Level: Beginner to Intermediate
    • Finished Size: Approximately 6 inches tall
    • Crochet Hook Size: G (4.0 mm)
    • Yarn Type: 100% Acrylic Yarn
    • Yarn Weight: Worsted Weight (Category 4)
    • Main Colors: White, Pink, Yellow, Black (for features)
    • Construction Method: Worked in separate pieces and joined
    • Approximate Completion Time: 3-5 hours
    • Beginner-Friendly: Yes
    • Worked: In rounds and separate pieces
    • Type of Finished Crochet Item: Amigurumi plushie

    Materials You’ll Need

    • Yarn in main colors (white, pink, yellow, black)
    • Crochet hook (size G, 4.0 mm)
    • Yarn needle
    • Stitch markers
    • Scissors
    • Stuffing material
    • Safety eyes (optional)
    • Embroidery thread for facial features
    • Decorative bow materials (optional)

    Crochet Abbreviations

    • MR = magic ring
    • ch = chain
    • sc = single crochet
    • inc = increase
    • dec = decrease
    • sl st = slip stitch
    • st = stitch
    • rep = repeat

    Before You Start

    Before beginning your Hello Kitty crochet project, consider these helpful tips:

    • Make a Swatch: Crochet a small test piece to check your tension and gauge.
    • Use Stitch Markers: Mark the beginning of your rounds to keep track of your progress.
    • Color Changes: Plan where you want to make color changes, especially for features.
    • Stuffing: If you plan to stuff your plushie, do this gradually to maintain an even shape throughout.

    Free Hello Kitty Crochet Pattern

    Foundation or Magic Ring

    1. Begin with a magic ring.
    2. Round 1: 6 sc into the ring. (6 sts)

    Head

    1. Round 2: inc in each st around. (12 sts)
    2. Round 3: (1 sc, inc) repeat around. (18 sts)
    3. Round 4: (2 sc, inc) repeat around. (24 sts)
    4. Rounds 5-8: sc in each st around. (24 sts)
    5. Round 9: (2 sc, dec) repeat around. (18 sts)
    6. Round 10: (1 sc, dec) repeat around. (12 sts)
    7. Stuff the head.
    8. Round 11: dec around. (6 sts)
    9. Finish off and weave in the end.

    Body

    1. Repeat similar steps as the head but make it larger (40-48 sts in the final rounds).

    Ears (Make 2)

    1. Round 1: 6 sc in a magic ring. (6 sts)
    2. Round 2: 2 sc in each st around. (12 sts)
    3. Round 3: sc in each st around. (12 sts)
    4. Finish off, leaving a long end for attaching.

    Arms (Make 2)

    1. Round 1: 5 sc in a magic ring. (5 sts)
    2. Rounds 2-5: sc in each st around.
    3. Finish off, leaving a long end for attaching.

    Legs (Make 2)

    1. Round 1: 6 sc in a magic ring. (6 sts)
    2. Rounds 2-5: sc in each st around.
    3. Finish off, leaving a long end for attaching.

    Facial Details

    • Use embroidery thread to sew on the eyes and nose.
    • Position the safety eyes at an appropriate distance.
    • Stitch the mouth with black thread.

    Bow

    1. Chain 6, turn, and sc back into the chain.
    2. Fold the piece into a bow shape and secure the center with a small piece of yarn.

    Joining the Pieces

    • Sew the ears on top of the head.
    • Join the arms to the sides of the body.
    • Attach the legs to the body base.
    • Secure the facial features and bow in place.

    Finishing Details

    Weave in any loose ends, and ensure that everything is securely stitched.

    How to Use Your Hello Kitty Crochet Project

    You can display your Hello Kitty plushie as a delightful decorative piece, use it as a keychain, or even gift it to a friend! Its versatility makes it suitable for various occasions, from birthdays to home decor.

    Tips for a Better Result

    • Maintain even tension to achieve a neater finish.
    • Stuff the head and body gradually to avoid lumps.
    • Keep facial details symmetrical for a balanced look.

    Customization Ideas

    • Try different yarn colors for a personalized touch.
    • Experiment with various bow styles and colors.
    • Create Hello Kitty in themed costumes for holidays or events.

    Common Problems and Troubleshooting

    • If you notice uneven stitches, try practicing tension techniques.
    • For crooked facial features, count your stitches carefully to ensure symmetry.
    • If stuffing is visible, work on distributing it evenly.

    Care and Safety

    To keep your Hello Kitty crochet project looking its best, follow the washing instructions based on your yarn type. Be cautious with small parts like safety eyes for younger children.

    Frequently Asked Questions

    • Is this Hello Kitty crochet pattern beginner-friendly?
      Yes, it is suitable for beginners with basic crochet skills.

    • What yarn is best for this crochet project?
      Worsted weight acrylic yarn is recommended for a soft finish.

    • How long does it take to crochet this design?
      On average, it takes about 3-5 hours depending on your skill level.

    • Can I make this crochet project larger or smaller?
      Yes, adjust your hook size and yarn weight to create a different size.

    • How do I attach the bow?
      Position the bow securely at the top of the head and stitch it on.

    Conclusion

    Creating your very own Hello Kitty plushie offers a delightful way to unleash your creative spirit through crochet. With the ability to customize and personalize your plushie, you’re sure to have a fun time crafting this kawaii character!


    SEO Title: Adorable Hello Kitty Crochet Pattern for Beginners
    Meta Description: Learn how to crochet a cute Hello Kitty plushie with this step-by-step guide! Perfect for all skill levels and customizable for extra fun!
    URL Slug: hello-kitty-crochet-pattern
    Primary Keyword: Hello Kitty crochet pattern
    Secondary Keywords: free Hello Kitty crochet pattern, Hello Kitty amigurumi, kawaii crochet project, handmade crochet doll, crochet gift ideas
    Image 1 Alt Text: Cute Hello Kitty crochet plushie on a pastel background
    Image 2 Alt Text: Close-up of crochet Hello Kitty showing facial features and bow
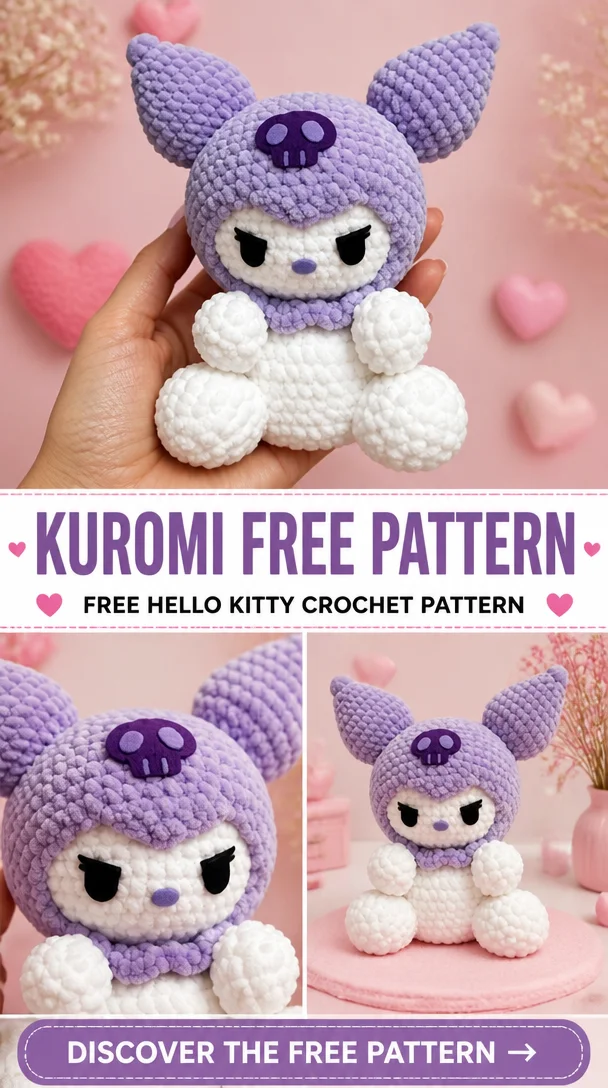
  • kuromi free pattern

    kuromi free pattern

    Kuromi Free Pattern

    Are you ready to dive into the whimsical world of crochet with a touch of kawaii? The Kuromi free crochet pattern is not only adorable but also an ultimate crafting delight for fans of Hello Kitty and her friends. With its charming design and vibrant colors, this project appeals to both seasoned crocheters and beginners alike. Whether you’re looking for a cute plushie to add to your collection or a handmade gift for a friend, this Kuromi crochet pattern is perfect for all occasions. Grab your yarn and hook, as this delightful project will surely bring joy and creativity to your crafting journey!

    Hello Kitty Crochet Pattern Overview

    • Skill Level: Beginner-friendly
    • Finished Size: Varies based on individual stitches and yarn choice
    • Crochet Hook Size: 3.5 mm (or size to match yarn gauge)
    • Yarn Type: Acrylic or cotton yarn
    • Yarn Weight: Worsted weight
    • Main Colors: Black, pink, white, and green
    • Construction Method: Worked in rounds
    • Approximate Completion Time: 2-3 hours
    • Project Type: Amigurumi (plushie)

    Materials You’ll Need

    • Yarn in black, pink, white, and green
    • 3.5 mm crochet hook
    • Yarn needle
    • Scissors
    • Stuffing
    • Safety eyes
    • Embroidery thread for facial details
    • Decorative bow material (optional)

    Crochet Abbreviations

    • MR = magic ring
    • ch = chain
    • sc = single crochet
    • hdc = half double crochet
    • dc = double crochet
    • sl st = slip stitch
    • inc = increase
    • dec = decrease
    • st = stitch
    • rep = repeat
    • BLO = back loop only

    Before You Start

    Before you embark on your Kuromi crochet project, it’s essential to be prepared. Make sure to:

    • Use a stitch marker to keep track of rounds, especially in continuous work.
    • Maintain even yarn tension to ensure your plushie is uniform.
    • Prepare for color changes if you’re integrating various shades into your design.

    Free Hello Kitty Crochet Pattern

    Foundation or Magic Ring

    Start with a magic ring…

    Head

    Round 1: 6 sc in MR
    Round 2: inc in each st (12)
    Round 3: (sc in next, inc) repeat (18)
    Round 4: (sc in next 2, inc) repeat (24)
    …

    Body

    Round 1: 6 sc in MR
    …

    Ears

    Round 1: 4 sc in MR
    …

    Arms

    Round 1: 6 sc in MR
    …

    Legs

    Round 1: 6 sc in MR
    …

    Facial Details

    Attach safety eyes and embroider the nose with embroidery thread…

    Bow

    Using pink yarn, create a bow using the following steps…

    Stuffing and Shaping

    Ensure your plushie has adequate stuffing…

    Joining the Pieces

    Carefully sew the head to the body…

    Construction and Assembly

    To assemble your Kuromi plushie, follow these steps:

    • Position and attach the ears securely.
    • Sew the arms and legs in place.
    • Stuff each piece firmly but not overly so.
    • Position the bow on the head and secure it neatly.

    Facial Features and Decorative Details

    • For the eyes, attach safety eyes, ensuring they are aligned.
    • Use embroidery on the facial details to enhance Kuromi’s character.
    • Add accents of green to her attire for that extra pop!

    How to Use Your Hello Kitty Crochet Project

    Your completed Kuromi plushie can serve many purposes:

    • A cute addition to your room decor
    • A lovely gift for a friend or loved one
    • A charming backpack accessory

    Tips for a Better Result

    • Keep stitches neat and consistent.
    • Make clean color transitions when changing yarn hues.
    • Secure yarn ends properly to ensure durability.

    Customization Ideas

    Give your Kuromi design a personal touch by:

    • Experimenting with different yarn colors and textures.
    • Creating seasonal outfits or bows.
    • Adding personalized embroidery details for a unique flair.

    Common Problems and Troubleshooting

    If you encounter issues, consider:

    • Uneven stitches—check your tension and take it slow.
    • Difficulties aligning the facial features— ensure they are symmetrically placed.

    Care and Safety

    Care for your crochet project with gentle hands. Always follow the yarn care label for washing instructions, and be wary of small parts like safety eyes if the plushie is intended for younger audiences.

    Frequently Asked Questions

    • Is this Hello Kitty crochet pattern beginner-friendly?
      Yes, it is designed for those who are new to crochet.

    • What yarn is best for this crochet project?
      Using a worsted-weight acrylic or cotton yarn works best.

    • How long does it take to crochet this design?
      Approximately 2-3 hours, depending on your crochet speed.

    • Can I make this crochet project larger or smaller?
      Yes, by adjusting your hook size or yarn weight.

    • How do I attach the bow?
      Simply sew it onto the head using a needle and yarn.

    Conclusion

    The Kuromi free crochet pattern is a delightful project bursting with personality and charm. Whether you gift it or keep it for yourself, this crochet creation will bring a smile to anyone who sees it. Don’t hesitate to grab your materials and start crocheting this adorable character today!


    SEO Title: Free Kuromi Crochet Pattern – Adorable Kawaii Project
    Meta Description: Discover the free Kuromi crochet pattern, perfect for beginners! Create your own plushie and add a touch of kawaii to your collection.
    URL Slug: free-kuromi-crochet-pattern
    Primary Keyword: kuromi free pattern
    Secondary Keywords: free Hello Kitty crochet pattern, Hello Kitty amigurumi, kawaii crochet pattern, cute crochet project, handmade crochet doll
    Image 1 Alt Text: Finished Kuromi Crochet Plushie
    Image 2 Alt Text: Crocheting the Kuromi Bow

Crochet Hello Kitty

Your free crochet ebook

Leave your email address to request your free crochet ebook.

Your email address will be used to handle your ebook request.Privacy policy