Tag: cute toys

  • My Melody Crochet – Cute and Cuddly Plushie 💕

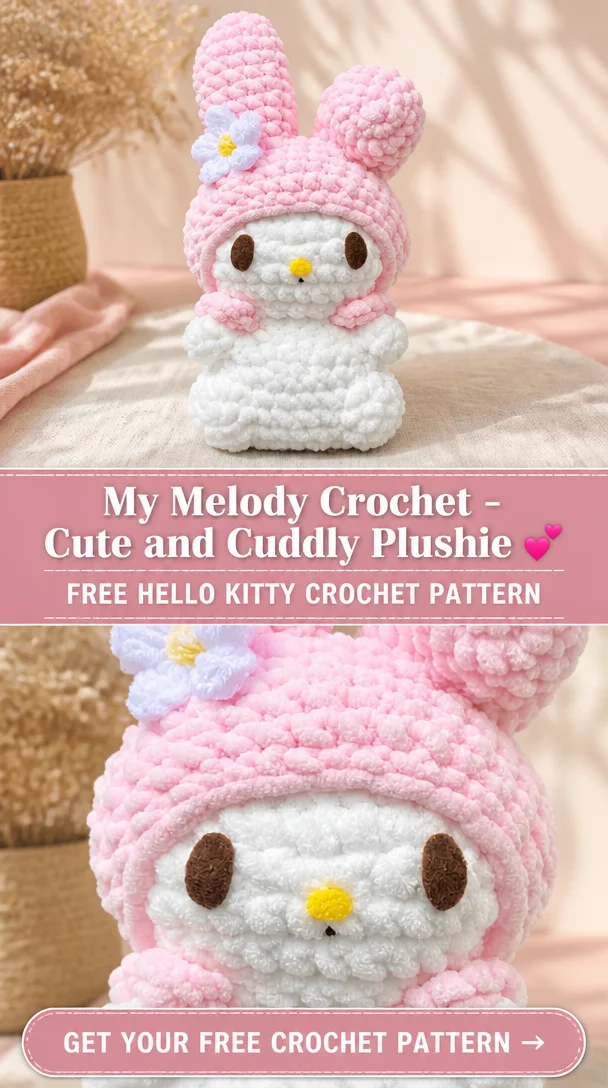
    My Melody Crochet – Cute and Cuddly Plushie 💕

    My Melody Crochet – Cute and Cuddly Plushie 💕

    Are you ready to bring a cuddly piece of Sanrio joy into your home? The My Melody Crochet pattern allows you to create a delightful plushie that is not just adorable but also filled with love. With its charming design and soft textures, this My Melody plushie is perfect for fans of the beloved character, making it a wonderful decoration, a collectible item, or a heartfelt gift for friends and family. Ideal for crocheters of all skill levels, this project offers an enjoyable and fulfilling experience that culminates in creating a huggable masterpiece for your collection or as a unique present.

    Hello Kitty Crochet Pattern Overview

    • Skill Level: Beginner to Intermediate
    • Finished Size: Approximately 10 inches tall
    • Crochet Hook Size: 3.5 mm
    • Yarn Type: 100% acrylic yarn
    • Yarn Weight: Worsted weight (4)
    • Main Colors: Pink, white, and other color accents as desired
    • Construction Method: Worked in rounds and seams
    • Approximate Completion Time: 4-6 hours
    • Project Type: Soft, cuddly plushie

    Materials You’ll Need

    • 100% acrylic yarn (various colors: pink, white, etc.)
    • 3.5 mm crochet hook
    • Yarn needle
    • Stitch markers
    • Scissors
    • Stuffing (polyester fiberfill)
    • Safety eyes (12mm)
    • Embroidery thread (for facial details)
    • Felt for additional decorations (if desired)

    Crochet Abbreviations

    • MR = magic ring
    • ch = chain
    • sc = single crochet
    • inc = increase
    • dec = decrease
    • st = stitch
    • rep = repeat

    Before You Start

    Before you begin crocheting, it’s essential to get comfortable with the magic ring technique, as many of the patterns will start with this method. Utilizing a stitch marker is recommended to keep track of your rounds. Pay attention to your yarn tension for uniform stitches and consider planning out any color changes in advance. Assemble all your materials beforehand, and remember to leave some time for stuffing and shaping towards the end of your project to achieve that cuddly look.

    Free Hello Kitty Crochet Pattern

    Foundation or Magic Ring

    • Start with a magic ring.

    Head

    1. Round 1: 6 sc into the magic ring.
    2. Round 2: inc 6 times (12 sts).
    3. Round 3: sc in next st, inc; repeat around (18 sts).
    4. Round 4: sc in next 2 sts, inc; repeat around (24 sts).
    5. Rounds 5-10: sc in each st around (24 sts).

    Body

    1. Round 1: 6 sc into a magic ring.
    2. Round 2: inc 6 times (12 sts).
    3. Round 3: sc in next st, inc; repeat around (18 sts).
    4. Rounds 4-8: sc in each st around (18 sts).

    Ears (Make 2)

    1. Ch 5, then turn.
    2. Row 1: starting from the second ch, sc in each ch (4 sts).
    3. Row 2: inc in first st, sc in next 2 sts, inc in last st (6 sts).
    4. Row 3: sc in next 2 sts, inc; repeat (8 sts).

    Arms (Make 2)

    • Use a simple rectangle of 10 sts wide; shape and attach to the body.

    Legs (Make 2)

    • Similar to arms, but slightly longer.

    Facial Details

    • Use safety eyes, and embroider the mouth and nose.

    Bow

    • Crochet a small rectangle, shape it, and attach it to the head.

    Assembly and Stuffing

    Assemble by joining the head to the body, placing ears at the top, and then securely attaching the arms and legs. Stuff each piece as you go to ensure they maintain shape.

    How to Use Your Hello Kitty Crochet Project

    Once completed, your My Melody plushie can act as a charming decoration in your home or office, a delightful cuddly companion, or even a playful gift for a fellow Sanrio fan.

    Tips for a Better Result

    • Keep your stitches tight to ensure the stuffing doesn’t show through.
    • Make symmetrical placements for facial features for an appealing look.
    • Secure all ends firmly to prevent unraveling.

    Customization Ideas

    Feel free to play with color variations or add unique accessories, like a different bow design or personal embroidery, to make your My Melody plushie truly special.

    Common Problems and Troubleshooting

    If you experience uneven stitch counts, try counting your stitches after every few rounds to catch mistakes early. For crooked features, ensure to align your pieces before securing them in place.

    Care and Safety

    When caring for your plushie, refer to the yarn manufacturer’s washing instructions. Supervise young children when using toys with small parts, like safety eyes.

    Frequently Asked Questions

    • Is this Hello Kitty crochet pattern beginner-friendly?
      Yes! This pattern is approachable for beginners with some crochet experience.

    • What yarn is best for this crochet project?
      A soft, worsted-weight acrylic yarn works best.

    • How long does it take to crochet this design?
      Expect around 4-6 hours for completion.

    • Can I make this crochet project larger or smaller?
      Yes, adjust the hook size and yarn weight for your desired size.

    • How do I attach the bow?
      Position the bow where you’d like it, using a needle and thread to sew it securely in place.

    Conclusion

    Creating the My Melody Crochet plushie is a fulfilling way to express your love for the iconic character. Not only will you enjoy the creative process, but you’ll also end up with a charming collectible that brings a smile to everyone who sees it. So grab your yarn and hook, and let the crocheting fun begin!


    SEO Title: My Melody Crochet Pattern – Cute and Cuddly Plushie
    Meta Description: Discover the adorable My Melody crochet pattern! Perfect for fans, this plushie project makes a delightful gift and charming collectible.
    URL Slug: my-melody-crochet-plushie
    Primary Keyword: My Melody crochet pattern
    Secondary Keywords: Hello Kitty crochet pattern, kawaii crochet project, crochet amigurumi, cute crochet accessories
    Image 1 Alt Text: My Melody crochet plushie featuring cute design
    Image 2 Alt Text: Engaging yarn and crochet tools for plushie making
  • Cute Hello Kitty Amigurumi Crochet Pattern | Step-by-Step DIY Plush

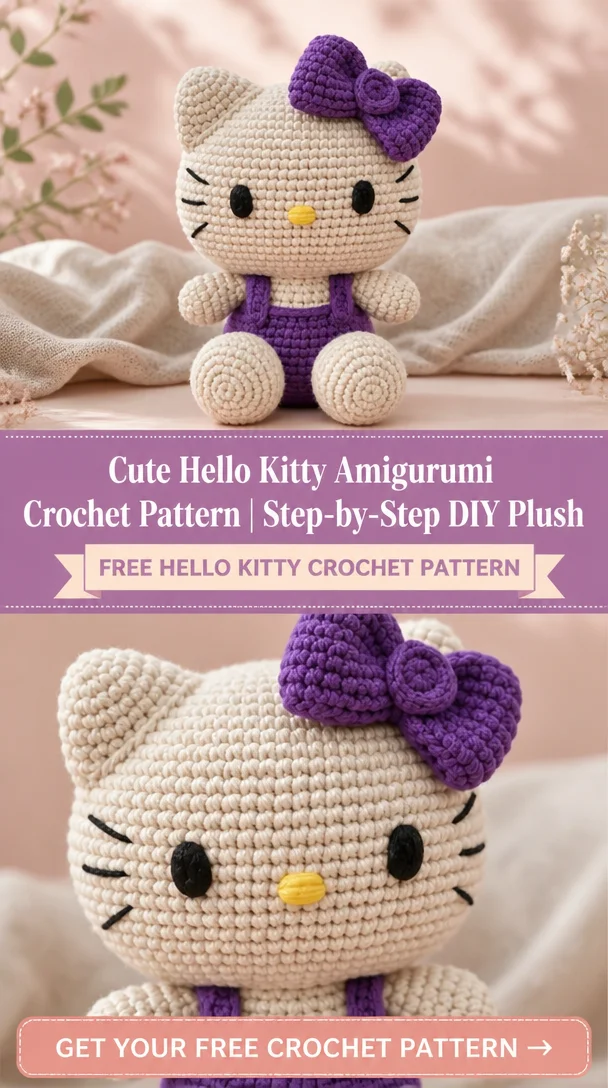
    Cute Hello Kitty Amigurumi Crochet Pattern | Step-by-Step DIY Plush

    Cute Hello Kitty Amigurumi Crochet Pattern | Step-by-Step DIY Plush

    Unleash your creativity with this adorable Hello Kitty amigurumi crochet pattern! 🐱🎀 Perfect for fans of all ages, this charming plush doll stands 15 cm tall and features Hello Kitty’s iconic colors, smooth construction, and her signature bow – making her an irresistibly cute addition to any collection. Crocheting this delightful toy offers a satisfying way to unwind during your weekend, and it’s also an ideal handmade gift for loved ones. Regardless of your skill level, this beginner-friendly pattern will help you create a huggable, delightful keepsake you’ll be proud to display or gift.

    Hello Kitty Crochet Pattern Overview

    • Skill Level: Beginner
    • Finished Size: Approximately 15 cm
    • Crochet Hook Size: Standard size (refer to yarn label)
    • Yarn Type: Acrylic or cotton (recommended for a soft finish)
    • Yarn Weight: Medium (worsted)
    • Main Colors: White, pink, and yellow (for the bow)
    • Construction Method: Worked in rounds
    • Approximate Completion Time: 3-5 hours
    • Project Type: Amigurumi plush toy

    Materials You’ll Need

    • Yarn in white, pink, and yellow
    • Crochet hook (appropriate size for yarn)
    • Yarn needle
    • Stitch markers
    • Scissors
    • Stuffing
    • Safety eyes (optional)
    • Embroidery thread (for facial features)

    Crochet Abbreviations

    • MR = magic ring
    • ch = chain
    • sc = single crochet
    • hdc = half double crochet
    • dc = double crochet
    • sl st = slip stitch
    • inc = increase
    • dec = decrease
    • st = stitch
    • rep = repeat
    • BLO = back loop only
    • FLO = front loop only

    Before You Start

    To ensure your Hello Kitty amigurumi turns out just right, keep a few tips in mind:

    • Work in Continuous Rounds: This helps to avoid visible seams.
    • Use a Stitch Marker: Keep track of your rounds easily to maintain your stitch count.
    • Maintain Even Yarn Tension: This will help create a neat finish.
    • Plan for Color Changes: Note where your design requires changes to avoid confusion later.
    • Stuff Pieces Firmly: Make sure to stuff your pieces well but not overly tight to maintain their shape.

    Free Hello Kitty Crochet Pattern

    Head

    Round 1: MR, 6 sc in the ring (6)
    Round 2: Inc in each st (12)
    Round 3: Sc in next st, inc repeat around (18)
    Round 4-7: Sc in each st (18)
    Round 8: Sc in next st, dec repeat around (12)
    Round 9: Dec around (6)
    Finish: Stuff and cut yarn, pulling through the remaining loops.

    Body

    Round 1: MR, 6 sc in the ring (6)
    Round 2: Inc in each st (12)
    Round 3: Sc in next st, inc repeat around (18)
    Round 4-8: Sc in each st (18)
    Round 9: Sc in next st, dec repeat around (12)
    Round 10: Dec around (6)
    Finish: Stuff as you go and close.

    Ears (Make 2)

    Round 1: MR, 4 sc in the ring (4)
    Round 2: Inc in each st (8)
    Finish: Leave long tail for sewing.

    Bow

    Round 1: MR, 4 sc in the ring (4)
    Round 2: Inc in each st (8)
    Finish: Fold and stitch to create a bow shape.

    Construction and Assembly

    1. Attach the Head to the Body: Use the tail from the head to sew securely.
    2. Position the Ears: Sew them on the head, spacing evenly apart.
    3. Add the Bow: Securely stitch the bow to one ear or the side of the head.
    4. Stuff the Body: Ensure it’s snug but smooth.
    5. Secure All Ends: Weave in any remaining yarn ends.

    Facial Features and Decorative Details

    • Attach safety eyes or embroider eyes with thread.
    • Use black embroidery thread for whiskers and a small ‘V’ shape for the nose.
    • Ensure features are symmetrical for a polished look.

    How to Use Your Hello Kitty Crochet Project

    This delightful Hello Kitty plush can be used as:

    • A unique decoration for a child’s room.
    • A keychain accessory to brighten your backpack.
    • A collectible item for Hello Kitty fans.
    • A handmade gift that conveys love and care.

    Tips for a Better Result

    • Keep your stitches tight to avoid gaps.
    • Make sure to position the facial features symmetrically.
    • Experiment with different yarn colors or textures to personalize your plush.

    Customization Ideas

    • Use different shades for Hello Kitty’s body.
    • Experiment with various yarn textures for a unique feel.
    • Add seasonal accessories or outfits for a themed look.

    Common Problems and Troubleshooting

    • Uneven stitch counts: Double-check your counting after each round.
    • Crooked features: Lay pieces out before sewing to achieve symmetry.
    • Difficulty working with small pieces: Try using a smaller hook for better control.

    Care and Safety

    To keep your Hello Kitty amigurumi looking its best, follow washing instructions specific to your yarn’s fiber content. Be cautious with any small parts, especially if intended for children, and avoid using the item as a toy for infants without ensuring safety.

    Frequently Asked Questions

    • Is this Hello Kitty crochet pattern beginner-friendly?
      Yes, it’s designed for beginners!

    • What yarn is best for this crochet project?
      A medium-weight acrylic yarn works well.

    • How long does it take to crochet this design?
      Approximately 3-5 hours, depending on your skill level.

    • Can I use different yarn colors?
      Absolutely! Customize with your favorite colors.

    • How do I attach the bow?
      Securely stitch it onto the head after all other components are assembled.

    Conclusion

    With this cute Hello Kitty amigurumi crochet pattern, you have everything you need to create a delightful plush toy that captures the timeless charm of this beloved character. Whether for decoration, a gift, or simply for crocheting enjoyment, this project is sure to bring joy to your crafting experience. Grab your yarn and hook, and let the magic begin!


    SEO Title: Cute Hello Kitty Amigurumi Crochet Pattern
    Meta Description: Create a huggable Hello Kitty plush with this beginner-friendly crochet pattern. Perfect for gifts or personal collection!
    URL Slug: hello-kitty-amigurumi-crochet-pattern
    Primary Keyword: Hello Kitty crochet pattern
    Secondary Keywords: Hello Kitty amigurumi, cute crochet project, handmade crochet doll

    Image 1 Alt Text: Finished Hello Kitty amigurumi plush toy
    Image 2 Alt Text: Step-by-step crochet pattern illustration for Hello Kitty

  • Sanrio Unisex Stuffed animal

    Sanrio Unisex Stuffed animal

    Sanrio Unisex Stuffed Animal

    Are you ready to bring some kawaii charm into your home? Meet the delightful Hello Kitty pumpkin plushie, featuring an adorable black jack-o’-lantern face! This crochet project is perfect for fans of Hello Kitty and those who appreciate the whimsical charm of handmade items. The pumpkin design combines festive Halloween spirit with the iconic look of Hello Kitty, making it an attractive decorative piece. Crocheting this plushie can be a wonderful way to create a unique gift, a playful décor item, or even a collector’s piece for fans. Whether you’re an experienced crocheter or just starting, this pattern is an engaging project that you won’t want to miss!

    Hello Kitty Crochet Pattern Overview

    • Skill Level: Intermediate
    • Finished Size: Approximately 8 inches
    • Crochet Hook Size: US size G (4.0 mm)
    • Yarn Type: Worsted weight yarn
    • Yarn Weight: #4
    • Main Colors: Orange, black, white
    • Construction Method: Worked in rounds
    • Approximate Completion Time: 3-5 hours
    • Beginner-Friendly: No
    • Type of Finished Item: Plushie

    Materials You’ll Need

    • Medium-weight yarn in orange, black, and white
    • Crochet hook (size G)
    • Yarn needle
    • Stitch markers
    • Scissors
    • Stuffing (fiberfill)
    • Safety eyes (optional)

    Crochet Abbreviations

    • MR = magic ring
    • ch = chain
    • sc = single crochet
    • inc = increase
    • dec = decrease
    • st = stitch
    • rep = repeat

    Before You Start

    Before diving into your Hello Kitty pumpkin plushie, it’s helpful to prepare yourself for the process. Work in continuous rounds to maintain a neat finish, and use a stitch marker to keep track of your rounds. Ensure you have even yarn tension to help achieve a clean finish, and familiarize yourself with the assembly process for a seamless outcome!

    Free Hello Kitty Crochet Pattern

    Foundation or Magic Ring

    Start with a magic ring.

    Round 1: 6 sc into the MR.

    Head

    Round 2: Inc in each st around (12).

    Round 3: Sc in next st, inc in the next st; repeat around (18).

    Round 4: Sc in next 2 sts, inc in the next st; repeat around (24).

    Rounds 5-7: Sc in each st around (24).

    Round 8: Sc in next 2 sts, dec; repeat around (18).

    Body

    Round 1: Sc in each st around (18).

    Round 2: Sc in next st, inc; repeat around (27).

    Continue working the body in sc until you reach the desired length.

    Ears

    Round 1: With white yarn, ch 4.

    Round 2: Sc in the 2nd ch from hook and next 2 sts. Ch 1 and turn.

    Repeat until desired ear size is achieved.

    Facial Details

    Attach safety eyes and embroider facial features using black yarn for whiskers and a small yellow thread for the nose.

    Bow

    Create a small bow using red yarn. Attach it to the right ear.

    Stuffing and Shaping

    Stuff your plushie firmly and shape as desired.

    Construction and Assembly

    Carefully join the head to the body using a yarn needle. Secure the ears at the top of the head, ensuring they are positioned symmetrically. Attach the bow to the right ear and weave in any loose ends.

    Facial Features and Decorative Details

    To add expressive features, embroider eyes, a nose, and whiskers. Make sure to position them to achieve that quintessential Hello Kitty appearance!

    How to Use Your Hello Kitty Crochet Project

    Your Hello Kitty pumpkin plushie can serve multiple purposes: use it as a festive decoration, a charming collectible, or a thoughtful handmade gift for a fan of the character.

    Tips for a Better Result

    • Maintain an even tension when crocheting.
    • Work carefully on small facial details for neatness.
    • Ensure the plushie is well stuffed without exposing fibers.
    • Take your time to align pieces accurately for a polished look.

    Customization Ideas

    Feel free to play around with colors or textures! Consider using different shades of orange or adding unique embellishments like glittery yarn for a fun twist.

    Common Problems and Troubleshooting

    • If stitches are uneven, try changing your hook size.
    • For crooked facial features, re-embroider for balance.
    • If the plushie isn’t holding shape, check for adequate stuffing.

    Care and Safety

    For cleaning, always follow yarn care instructions. Be cautious of small parts, especially if the plushie is intended for children.

    Frequently Asked Questions

    • Is this Hello Kitty crochet pattern beginner-friendly?
      This pattern is more suited for intermediate crocheters.

    • What yarn is best for this crochet project?
      Medium-weight yarn works best for a plush outcome.

    • How long does it take to crochet this design?
      It typically takes 3-5 hours.

    • Can I make this crochet project larger or smaller?
      Yes, adjust your hook size and yarn weight accordingly.

    • How do I attach the bow?
      Use a yarn needle to securely stitch it to the right ear.

    • Can I use different yarn colors?
      Absolutely! Feel free to experiment with colors.

    Conclusion

    Creating the Hello Kitty pumpkin plushie is a fun and rewarding project that combines craftsmanship with the playful essence of Halloween. Once finished, you’re left with a striking, collectible piece that embodies the charm of Hello Kitty. Grab your materials, and start crocheting today!


    SEO Title: Adorable Hello Kitty Pumpkin Plushie Crochet Pattern

    Meta Description: Discover this enchanting Hello Kitty pumpkin plushie crochet pattern! Perfect for fans and perfect as a festive decoration or handmade gift.

    URL Slug: hello-kitty-pumpkin-plushie

    Primary Keyword: Hello Kitty pumpkin plushie

    Secondary Keywords: Hello Kitty crochet pattern, cute crochet project, Hello Kitty amigurumi

    Image 1 Alt Text: Hello Kitty pumpkin plushie crochet project

    Image 2 Alt Text: Finished Hello Kitty plushie with jack-o’-lantern face

Crochet Hello Kitty

Your free crochet ebook

Leave your email address to request your free crochet ebook.

Your email address will be used to handle your ebook request.Privacy policy