Tag: DIY Crafts

  • Free Hello Kitty Crochet Pattern – A Cute Turtle Amigurumi You’ll Love

    Free Hello Kitty Crochet Pattern – A Cute Turtle Amigurumi You’ll Love

    Free Crochet Turtle Amigurumi

    Embrace your creativity with this delightful Free Crochet Turtle Amigurumi pattern, inspired by the adorable Hello Kitty! This charming amigurumi project is perfect for those who love all things kawaii and want to add a touch of cuteness to their handmade collection. The design features a lovely turtle that can be used as a decoration, a collectible piece, or even as a unique gift for a friend. An easy pattern suitable for beginners, this crochet turtle offers a fun way to practice your skills while creating something truly special for yourself or loved ones.

    Hello Kitty Crochet Pattern Overview

    • Skill Level: Beginner
    • Finished Size: Approximately 6 inches
    • Crochet Hook Size: 3.5 mm (E)
    • Yarn Type: Acrylic yarn
    • Yarn Weight: Worsted weight
    • Main Colors: Green for the shell, white for the body, and black for details
    • Construction Method: Worked in rounds
    • Approximate Completion Time: 2-4 hours
    • Type of Finished Item: Amigurumi plushie

    Materials You’ll Need

    • Acrylic yarn (green, white, black)
    • Crochet hook (3.5 mm)
    • Yarn needle
    • Safety eyes (if desired)
    • Scissors
    • Stuffing (fiberfill)

    Crochet Abbreviations

    • MR = magic ring
    • ch = chain
    • sc = single crochet
    • inc = increase
    • dec = decrease
    • st = stitch
    • rep = repeat

    Before You Start

    Before beginning your Hello Kitty crochet project, make sure to familiarize yourself with working in continuous rounds, as this technique will keep your stitches neat and your turtle seamless. Using a stitch marker can help you keep track of your rounds. Remember to maintain even tension while working to prevent gaps in your stitches, especially when creating smaller pieces.

    Free Hello Kitty Crochet Pattern

    Foundation or Magic Ring

    1. Round 1: Create a magic ring and make 6 sc into the ring.
    2. Round 2: Inc in each st around (12).
    3. Round 3: Sc in next st, inc in next st (repeat around) (18).
    4. Round 4: Sc in next 2 sts, inc in next st (repeat around) (24).
    5. Round 5-8: Sc in each st around (24).

    Body

    1. Round 9: Sc in next 3 sts, inc in next st (repeat around) (30).
    2. Round 10-14: Sc in each st around (30).
    3. Round 15: Sc in next 3 sts, dec in next st (repeat around) (24).
    4. Round 16: Sc in each st around (24).
    5. Round 17: Sc in next 2 sts, dec in next st (repeat around) (18).
    6. Round 18: Stuff the body with fiberfill lightly.
    7. Round 19: Sc in next st, dec in next st (repeat around) (12).
    8. Round 20: Dec in each st around (6).

    Arms (Make 2)

    1. Round 1: Create a magic ring and make 4 sc into the ring.
    2. Round 2: Sc in each st around (4).
    3. Round 3-5: Sc in each st around (4).
    4. Fasten off and leave a long tail for sewing.

    Legs (Make 2)

    1. Round 1: Create a magic ring and make 6 sc into the ring.
    2. Round 2: Sc in each st around (6).
    3. Round 3-4: Sc in each st around (6).
    4. Fasten off and leave a long tail for sewing.

    Head

    1. Round 1: Create a magic ring and make 6 sc into the ring.
    2. Round 2: Inc in each st around (12).
    3. Round 3: Sc in next st, inc in next st (repeat around) (18).
    4. Round 4-5: Sc in each st around (18).
    5. Round 6: Sc in next st, dec in next st (repeat around) (12).
    6. Stuff the head lightly before closing.
    7. Round 7: Dec around to close the head (6).

    Facial Details

    1. Attach safety eyes between rounds 3 and 4 of the head.
    2. Use black yarn to embroider a simple smile or other facial features as desired.

    Joining the Pieces

    • Sew the arms and legs to the body securely.
    • Attach the head to the body with the long tail from the head.
    • Position the arms and legs in a way that the turtle can sit or stand properly.

    How to Use Your Hello Kitty Crochet Project

    This adorable turtle can serve many purposes! Use it as a plush toy for decoration in a child’s room, or add it as a cute charm to your bag or keychain. It also makes for a heartfelt handmade gift for friends or family. Each unfinished project is an opportunity to bring joy and personality into your handcrafted creations.

    Tips for a Better Result

    • Maintain even tension in your stitches to keep your project looking neat.
    • Take extra care when sewing the pieces together to ensure a sturdy finished plushie.
    • Use contrasting colors to highlight specific details and enhance the cuteness factor.

    Customization Ideas

    Feel free to personalize your turtle! Try using different shades for the shell or add unique patterns. You might also consider creating custom clothing or embellishments like tiny hats or bows to make it even more special.

    Common Problems and Troubleshooting

    • Uneven stitch counts? Track your rounds with a stitch marker.
    • Loose stitches? Keep your tension consistent while working.
    • Stuffing visible? Ensure you stuff evenly, and consider using a smaller hook for tighter stitches in delicate areas.

    Care and Safety

    For care, follow the yarn manufacturer’s instructions. Ensure any small detachable parts are securely attached to prevent choking hazards with small children. This project is best suited for decorative use rather than as a toy for infants.

    Frequently Asked Questions

    • Is this Hello Kitty crochet pattern beginner-friendly?
      Yes, this pattern is designed for beginners with simple instructions.

    • What yarn is best for this crochet project?
      Worsted weight acrylic yarn works well for this pattern.

    • How long does it take to crochet this design?
      It typically takes 2-4 hours to complete.

    • Can I make this crochet project larger or smaller?
      Adjustments can be made by using different yarn weights and hook sizes.

    • How do I attach the bow?
      You can create a small bow using yarn and simply sew it onto the turtle’s head.

    • Can I use different yarn colors?
      Absolutely! Experimenting with colors can make your project unique.

    • How do I keep the finished crochet doll in shape?
      Use appropriate stuffing and ensure stitches are not too loose.

    • Can I turn this design into a keychain or bag charm?
      Simply attach a keychain clip to the finished turtle for a fun accessory.

    Conclusion

    This Free Crochet Turtle Amigurumi offers a delightful way to express your creativity while crafting a charming piece reminiscent of Hello Kitty’s whimsical nature. Whether you choose to keep it for yourself or give it as a gift, this project showcases the joy and warmth that crocheting brings. Start making your own turtle today and let your crochet imagination flourish!


    SEO Title: Free Crochet Turtle Amigurumi Pattern for Cuteness
    Meta Description: Create your adorable Hello Kitty turtle amigurumi with this easy, free crochet pattern! Perfect for beginners and great as a gift or decoration.
    URL Slug: free-crochet-turtle-amigurumi
    Primary Keyword: Free Crochet Turtle Amigurumi
    Secondary Keywords: free Hello Kitty crochet pattern, Hello Kitty amigurumi, cute crochet project, handmade crochet doll
    Image 1 Alt Text: Crochet turtle amigurumi next to a Hello Kitty plushie
    Image 2 Alt Text: Finished teddy turtle amigurumi on a colorful background

  • Easy crochet hello kitty snowman keychain free amigurumi pattern

    Easy crochet hello kitty snowman keychain free amigurumi pattern

    Easy crochet hello kitty snowman keychain free amigurumi pattern

    Welcome to the charming world of crochet where today’s project is the delightful Easy Crochet Hello Kitty Snowman Keychain! This adorable amigurumi combines the beloved character Hello Kitty with the whimsical charm of a snowman, making it a perfect addition to your crochet collection. With its cute design, this keychain not only serves as a fun accessory but also acts as a lovely handmade gift for friends and family. Whether you’re an experienced crocheter or a beginner looking for a cute project, this pattern is accessible and enjoyable. Let’s dive into creating this delightful keychain that embodies cuteness in every stitch!

    Hello Kitty Crochet Pattern Overview

    • Skill Level: Easy
    • Finished Size: Approximately 3-4 inches tall
    • Crochet Hook Size: 3.0 mm (D/3)
    • Yarn Type: Acrylic yarn
    • Yarn Weight: Medium (Worsted)
    • Main Colors: White, pink, and blue for details
    • Construction Method: Worked in continuous rounds
    • Approximate Completion Time: 1-2 hours
    • Beginner-Friendly: Yes
    • Type of Finished Item: Keychain

    Materials You’ll Need

    • Acrylic yarn (white, pink, blue)
    • Crochet hook (3.0 mm)
    • Yarn needle
    • Stitch markers
    • Scissors
    • Stuffing (optional)
    • Keychain hardware

    Crochet Abbreviations

    • MR = magic ring
    • ch = chain
    • sc = single crochet
    • inc = increase
    • dec = decrease
    • st = stitch
    • rep = repeat

    Before You Start

    Before starting your Hello Kitty snowman keychain, it’s important to gather all materials and read through the pattern thoroughly. Ensure you are comfortable with working in continuous rounds and using a stitch marker to keep track of your rounds. Maintaining even tension will help achieve a neat finish, especially with smaller pieces. Lastly, prepare to stuff the body lightly if desired to give it a nice shape.

    Free Hello Kitty Crochet Pattern

    Foundation or Magic Ring

    Round 1: 6 sc in a magic ring.

    Round 2: Inc in each st around (12)

    Head

    Round 3: Sc, inc around (18)

    Round 4: 2 sc, inc around (24)

    Round 5: 3 sc, inc around (30)

    Round 6-8: Sc in each st around (30)

    Body

    Round 9: 4 sc, inc around (36)

    Round 10-12: Sc in each st around (36)

    Arms

    Make two:

    Round 1: 6 sc in a magic ring.

    Round 2: Sc in each st around (6)

    Fasten off and leave a long tail for sewing.

    Ears

    Make two:

    Round 1: 4 sc in a magic ring.

    Round 2: Sc in each st around (4)

    Fasten off and leave a long tail for sewing.

    Facial Details

    • Eyes: Use safety eyes or embroider them on.
    • Nose: Embroider a small triangle with pink yarn.

    Bow

    Round 1: Using pink yarn, chain 4, then sc in the 2nd chain from the hook and across.

    Fasten off, leaving a long tail for sewing.

    Keychain Attachment

    • Secure the keychain hardware to the top of the head before final assembly.

    Construction and Assembly

    1. Attach Ears: Sew the ears to the top of the head.
    2. Attach Arms: Position and sew the arms to the body.
    3. Attach Facial Details: Secure eyes and nose.
    4. Sew Bow: Position the bow on one ear and stitch it securely.
    5. Final Assembly: Lightly stuff the body if desired, then attach the head to the body.

    How to Use Your Hello Kitty Crochet Keychain

    Your finished Hello Kitty snowman keychain is perfect for adding charm to your backpack, purse, or as a decorative charm for your keys. It’s also a thoughtful handmade gift for fellow fans of Hello Kitty and handmade crafts.

    Tips for a Better Result

    • Maintain even tension throughout to avoid a misshaped keychain.
    • Position facial details symmetrically for a balanced look.
    • Securely attach all parts to avoid detachments.

    Customization Ideas

    • Use different yarn colors for a unique look.
    • Experiment with different-sized bows or embellishments.
    • Create a mini Hello Kitty snowman family with various colors.

    Common Problems and Troubleshooting

    • Uneven Stitch Counts: Ensure you count your stitches at the end of each round.
    • Loose Stitches: Maintain consistent tension to avoid gaps.
    • Visible Stuffing: Make sure to use enough yarn and maintain tight stitches.

    Care and Safety

    To keep your Hello Kitty keychain clean, follow the yarn manufacturer’s care instructions. As it includes small parts like safety eyes, keep it out of reach of small children.

    Frequently Asked Questions

    • Is this Hello Kitty crochet pattern beginner-friendly?
      Yes, it is easy and suitable for beginners.

    • What yarn is best for this crochet project?
      Acrylic yarn in medium weight works perfectly for this project.

    • How long does it take to crochet this design?
      Generally, around 1-2 hours depending on your skill level.

    • Can I make this crochet project larger or smaller?
      Yes, adjusting your hook size and yarn can change the dimension.

    • How do I attach the bow?
      Sew the bow securely onto the ear with a yarn needle.

    Conclusion

    We hope you enjoyed this Easy Crochet Hello Kitty Snowman Keychain pattern! This project not only adds a delightful touch to your crochet collection but also serves as a charming gift for loved ones. So gather your materials and start creating this adorable keychain that brings joy and cuteness to your everyday life!


    SEO Title: Easy Crochet Hello Kitty Snowman Keychain Pattern
    Meta Description: Create this adorable Hello Kitty snowman keychain with our free crochet pattern. Perfect as a cute accessory or gift!
    URL Slug: hello-kitty-snowman-keychain-pattern
    Primary Keyword: Easy crochet hello kitty snowman keychain free amigurumi pattern
    Secondary Keywords: free Hello Kitty crochet pattern, Hello Kitty amigurumi, Hello Kitty crochet keychain
    Image 1 Alt Text: Finished Hello Kitty snowman keychain crochet project
    Image 2 Alt Text: Close-up of Hello Kitty snowman keychain with bow attached

  • Crochet Hello Kitty Amigurumi Pattern Idea

    Crochet Hello Kitty Amigurumi Pattern Idea

    Crochet Hello Kitty Amigurumi Pattern Idea

    If you’re a fan of adorable amigurumi or just love Hello Kitty, this crochet pattern is perfect for you! This cute and cozy Hello Kitty amigurumi features a charming red bow, a sunny yellow shirt, and classic blue overalls, making it a delightful addition to any kawaii crochet collection. Whether you want to create a handmade gift for a friend or indulge in a fun crafting session, this pattern is sure to inspire. It’s an excellent choice for beginners and experienced crafters alike, serving as a delightful decoration, collectible item, or a playful accessory that can bring smiles everywhere it goes.

    Hello Kitty Crochet Pattern Overview

    • Skill Level: Beginner
    • Finished Size: Approximately 6 inches tall
    • Crochet Hook Size: 3.5 mm (E)
    • Yarn Type: 100% Acrylic
    • Yarn Weight: Worsted Weight
    • Main Colors: White, red, yellow, and blue
    • Construction Method: Worked in rounds
    • Approximate Completion Time: 3-4 hours
    • Type of Finished Item: Amigurumi doll

    Materials You’ll Need

    • Yarn in white, red, yellow, and blue
    • Crochet hook (3.5 mm)
    • Yarn needle
    • Scissors
    • Stuffing (fiber fill)
    • Safety eyes (12 mm)
    • Embroidery thread (black for facial details)
    • Stitch markers

    Crochet Abbreviations

    • MR = magic ring
    • ch = chain
    • sc = single crochet
    • hdc = half double crochet
    • dc = double crochet
    • sl st = slip stitch
    • inc = increase
    • dec = decrease
    • st = stitch
    • rep = repeat

    Before You Start

    Before diving into this charming Hello Kitty crochet project, make sure you understand how to work in continuous rounds and use a stitch marker to keep track of your rounds. Maintaining even yarn tension will greatly help in finishing a neater project. Plan your color changes carefully, and gather all the materials before you begin to ensure a smoother crafting experience.

    Free Hello Kitty Crochet Pattern

    Foundation or Magic Ring

    Start with a magic ring.

    Head

    1. Round 1: 6 sc in MR (6)
    2. Round 2: Inc in each st around (12)
    3. Round 3: Sc in next st, inc in next repeat around (18)
    4. Round 4-8: Sc in each st around (18)
    5. Round 9: Sc in next st, dec repeat around (12)
    6. Add safety eyes and stuff the head.

    Body

    1. Round 1: 6 sc in MR (6)
    2. Round 2: Inc in each st around (12)
    3. Round 3: Sc in next st, inc in next repeat around (18)
    4. Round 4-6: Sc in each st around (18)
    5. Round 7: Sc in next st, dec repeat around (12)
    6. Stuff the body.

    Ears (Make 2)

    1. Round 1: 4 sc in MR (4)
    2. Round 2: Inc in each st around (8)
    3. Round 3: Sc in each st around (8) and leave long tail for sewing.

    Arms (Make 2)

    1. Round 1: 5 sc in MR (5)
    2. Round 2: Sc in each st around (5) and leave long tail for sewing.

    Legs (Make 2)

    1. Round 1: 6 sc in MR (6)
    2. Round 2: Inc in each st around (12)
    3. Round 3-4: Sc in each st around (12) and leave long tail for sewing.

    Bow

    1. Ch 6, turn and sc back down.
    2. Fold and stitch the middle for shaping and attach the bow to the head.

    Joining the Pieces

    • Use your yarn needle to sew the head onto the body.
    • Attach the ears on top of the head, and then join the arms and legs to desired positions.

    Facial Details

    • Use embroidery thread to stitch on a nose and whiskers. Position features symmetrically for best results.

    How to Use Your Hello Kitty Crochet Project

    This adorable Hello Kitty amigurumi can serve as a delightful decoration for your home, a charming collectible, or even a sweet accessory for your bags. It also makes for a unique handmade gift for friends and loved ones who share a love for kawaii culture.

    Tips for a Better Result

    • Maintain even yarn tension to ensure smooth lines.
    • Keep stitches neat and avoid visible stuffing.
    • Position facial features symmetrically.
    • Attach the bow carefully to avoid any misalignment.

    Customization Ideas

    • Experiment with different yarn colors, textures, or patterns for the clothing.
    • Add personalized accessories like different bows or outfits to make your creation unique.

    Common Problems and Troubleshooting

    • For uneven stitch counts, regularly count stitches.
    • Use extra stuffing if your amigurumi appears limp.
    • Ensure symmetry in facial features for a balanced look.

    Care and Safety

    Care for your Hello Kitty amigurumi depends on the yarn used. Generally, gentle spot cleaning is best. Be cautious with small detachable parts, especially if the item is intended for young children.

    Frequently Asked Questions

    • Is this Hello Kitty crochet pattern beginner-friendly?
      Yes, this pattern is designed for beginners and includes easy-to-follow instructions.

    • What yarn is best for this crochet project?
      A medium-weight acrylic yarn is ideal for this design.

    • How long does it take to crochet this design?
      Approximately 3 to 4 hours, depending on your skill level.

    • Can I make this crochet project larger or smaller?
      Yes, you can adjust the yarn weight and hook size accordingly.

    • How do I attach the bow?
      Sew the bow firmly to the front of the head using a yarn needle.

    Conclusion

    Creating this adorable Hello Kitty amigurumi is not only a fun project but also a fulfilling way to express your love for kawaii designs. With its charming colors and cute accessories, you’ll have a delightful piece that adds joy and whimsy to your collection. Dive into your yarn stash and start crocheting your own Hello Kitty today!


    SEO Title: Cute Hello Kitty Amigurumi Crochet Pattern

    Meta Description: Discover a charming Hello Kitty crochet pattern! Perfect for beginners, create your own adorable amigurumi with this step-by-step guide.

    URL Slug: hello-kitty-amigurumi-pattern

    Primary Keyword: Hello Kitty crochet pattern

    Secondary Keywords: free Hello Kitty crochet pattern, Hello Kitty amigurumi, cute crochet project, handmade gift

    Image 1 Alt Text: Crochet Hello Kitty amigurumi with red bow and blue overalls

    Image 2 Alt Text: Finished Hello Kitty crochet doll displayed on a cozy shelf

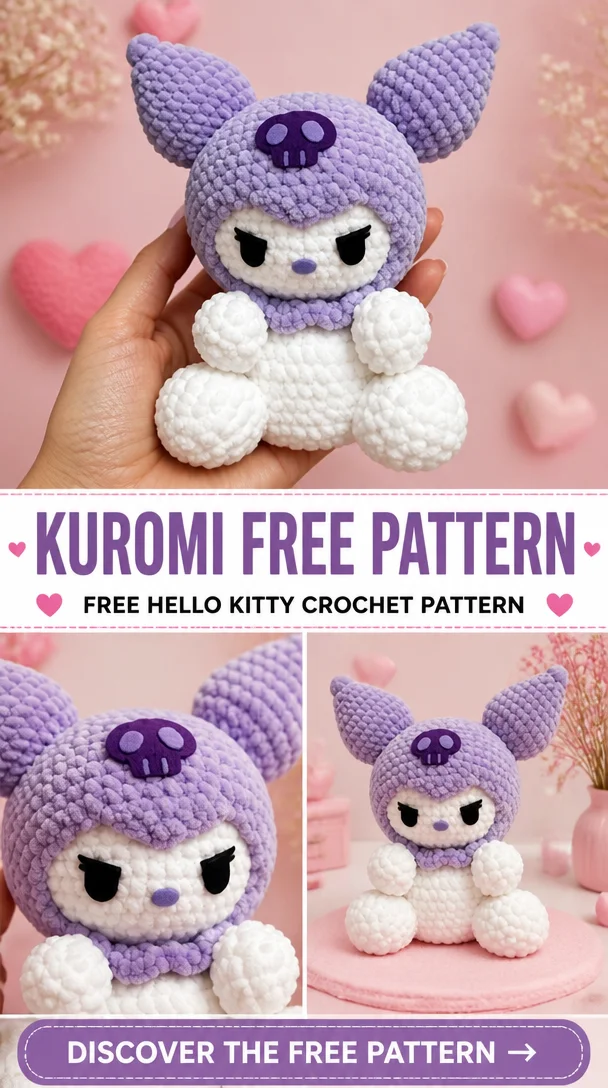
  • kuromi free pattern

    kuromi free pattern

    Kuromi Free Pattern

    Are you ready to dive into the whimsical world of crochet with a touch of kawaii? The Kuromi free crochet pattern is not only adorable but also an ultimate crafting delight for fans of Hello Kitty and her friends. With its charming design and vibrant colors, this project appeals to both seasoned crocheters and beginners alike. Whether you’re looking for a cute plushie to add to your collection or a handmade gift for a friend, this Kuromi crochet pattern is perfect for all occasions. Grab your yarn and hook, as this delightful project will surely bring joy and creativity to your crafting journey!

    Hello Kitty Crochet Pattern Overview

    • Skill Level: Beginner-friendly
    • Finished Size: Varies based on individual stitches and yarn choice
    • Crochet Hook Size: 3.5 mm (or size to match yarn gauge)
    • Yarn Type: Acrylic or cotton yarn
    • Yarn Weight: Worsted weight
    • Main Colors: Black, pink, white, and green
    • Construction Method: Worked in rounds
    • Approximate Completion Time: 2-3 hours
    • Project Type: Amigurumi (plushie)

    Materials You’ll Need

    • Yarn in black, pink, white, and green
    • 3.5 mm crochet hook
    • Yarn needle
    • Scissors
    • Stuffing
    • Safety eyes
    • Embroidery thread for facial details
    • Decorative bow material (optional)

    Crochet Abbreviations

    • MR = magic ring
    • ch = chain
    • sc = single crochet
    • hdc = half double crochet
    • dc = double crochet
    • sl st = slip stitch
    • inc = increase
    • dec = decrease
    • st = stitch
    • rep = repeat
    • BLO = back loop only

    Before You Start

    Before you embark on your Kuromi crochet project, it’s essential to be prepared. Make sure to:

    • Use a stitch marker to keep track of rounds, especially in continuous work.
    • Maintain even yarn tension to ensure your plushie is uniform.
    • Prepare for color changes if you’re integrating various shades into your design.

    Free Hello Kitty Crochet Pattern

    Foundation or Magic Ring

    Start with a magic ring…

    Head

    Round 1: 6 sc in MR
    Round 2: inc in each st (12)
    Round 3: (sc in next, inc) repeat (18)
    Round 4: (sc in next 2, inc) repeat (24)
    …

    Body

    Round 1: 6 sc in MR
    …

    Ears

    Round 1: 4 sc in MR
    …

    Arms

    Round 1: 6 sc in MR
    …

    Legs

    Round 1: 6 sc in MR
    …

    Facial Details

    Attach safety eyes and embroider the nose with embroidery thread…

    Bow

    Using pink yarn, create a bow using the following steps…

    Stuffing and Shaping

    Ensure your plushie has adequate stuffing…

    Joining the Pieces

    Carefully sew the head to the body…

    Construction and Assembly

    To assemble your Kuromi plushie, follow these steps:

    • Position and attach the ears securely.
    • Sew the arms and legs in place.
    • Stuff each piece firmly but not overly so.
    • Position the bow on the head and secure it neatly.

    Facial Features and Decorative Details

    • For the eyes, attach safety eyes, ensuring they are aligned.
    • Use embroidery on the facial details to enhance Kuromi’s character.
    • Add accents of green to her attire for that extra pop!

    How to Use Your Hello Kitty Crochet Project

    Your completed Kuromi plushie can serve many purposes:

    • A cute addition to your room decor
    • A lovely gift for a friend or loved one
    • A charming backpack accessory

    Tips for a Better Result

    • Keep stitches neat and consistent.
    • Make clean color transitions when changing yarn hues.
    • Secure yarn ends properly to ensure durability.

    Customization Ideas

    Give your Kuromi design a personal touch by:

    • Experimenting with different yarn colors and textures.
    • Creating seasonal outfits or bows.
    • Adding personalized embroidery details for a unique flair.

    Common Problems and Troubleshooting

    If you encounter issues, consider:

    • Uneven stitches—check your tension and take it slow.
    • Difficulties aligning the facial features— ensure they are symmetrically placed.

    Care and Safety

    Care for your crochet project with gentle hands. Always follow the yarn care label for washing instructions, and be wary of small parts like safety eyes if the plushie is intended for younger audiences.

    Frequently Asked Questions

    • Is this Hello Kitty crochet pattern beginner-friendly?
      Yes, it is designed for those who are new to crochet.

    • What yarn is best for this crochet project?
      Using a worsted-weight acrylic or cotton yarn works best.

    • How long does it take to crochet this design?
      Approximately 2-3 hours, depending on your crochet speed.

    • Can I make this crochet project larger or smaller?
      Yes, by adjusting your hook size or yarn weight.

    • How do I attach the bow?
      Simply sew it onto the head using a needle and yarn.

    Conclusion

    The Kuromi free crochet pattern is a delightful project bursting with personality and charm. Whether you gift it or keep it for yourself, this crochet creation will bring a smile to anyone who sees it. Don’t hesitate to grab your materials and start crocheting this adorable character today!


    SEO Title: Free Kuromi Crochet Pattern – Adorable Kawaii Project
    Meta Description: Discover the free Kuromi crochet pattern, perfect for beginners! Create your own plushie and add a touch of kawaii to your collection.
    URL Slug: free-kuromi-crochet-pattern
    Primary Keyword: kuromi free pattern
    Secondary Keywords: free Hello Kitty crochet pattern, Hello Kitty amigurumi, kawaii crochet pattern, cute crochet project, handmade crochet doll
    Image 1 Alt Text: Finished Kuromi Crochet Plushie
    Image 2 Alt Text: Crocheting the Kuromi Bow

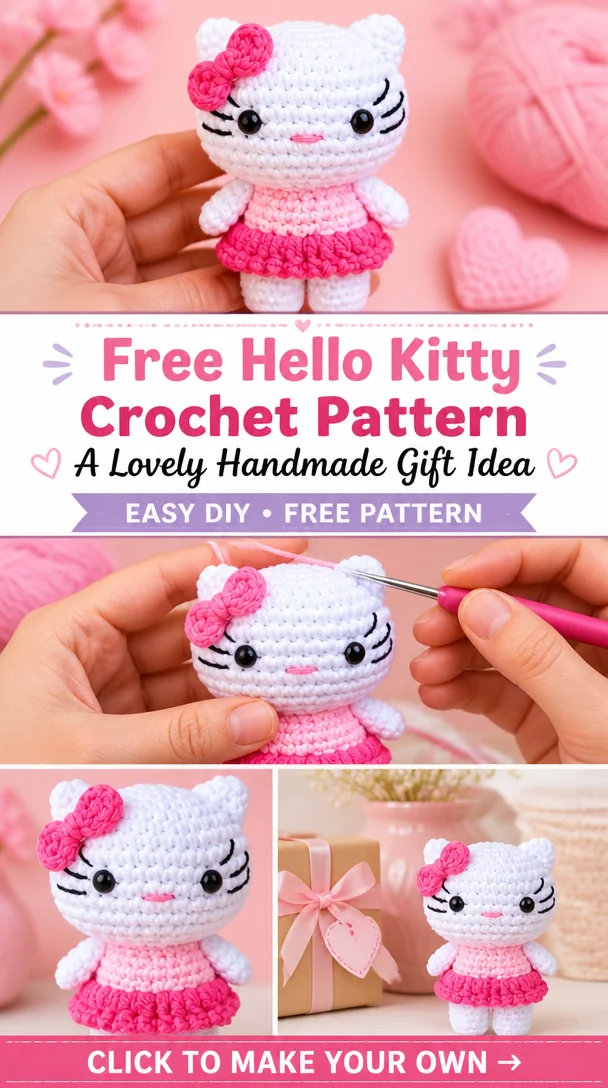
  • Free Hello Kitty Crochet Pattern A Lovely Handmade Gift Idea

    Free Hello Kitty Crochet Pattern A Lovely Handmade Gift Idea

    Hello Kitty Amigurumi Free Crochet PDF Pattern

    Hello everyone, friends! Today we’re diving into the delightful world of crochet with a project that’s both adorable and enjoyable: the Hello Kitty Amigurumi toy. This charming little doll is perfect for fans of the iconic character, and it makes a wonderful addition to any child’s collection or a heartfelt gift. With its sweet design, this crochet project brings a touch of cuteness to everyday life, ideal for use as a decoration, backpack charm, or keychain. What’s more, this pattern is designed specifically for beginners, making it simple to follow with detailed instructions and photos. Get ready to craft a lovely Hello Kitty that will surely bring smiles to the faces of your loved ones!

    Hello Kitty Crochet Pattern Overview

    • Skill Level: Easy
    • Finished Size: Approximately 4-5 inches tall
    • Crochet Hook Size: 2mm
    • Yarn Type: Medium weight (worsted)
    • Yarn Weight: #4
    • Main Colors: White, pink, yellow (for embellishments)
    • Construction Method: Worked in rounds
    • Approximate Completion Time: 2-4 hours
    • Beginner-Friendly: Yes
    • Type of Finished Item: Amigurumi toy

    Materials You’ll Need

    • Yarn: White, pink, and other colors for decoration
    • Crochet hook: 2mm
    • Yarn needle for weaving in ends
    • Stitch markers (optional)
    • Scissors
    • Stuffing material
    • Safety eyes (optional)
    • Embroidery thread (for facial features)
    • Decorative bow materials (as desired)

    Crochet Abbreviations

    • MR = Magic ring
    • ch = Chain
    • sc = Single crochet
    • hdc = Half double crochet
    • inc = Increase
    • dec = Decrease
    • st = Stitch
    • rep = Repeat

    Before You Start

    Before you begin your Hello Kitty amigurumi project, here are a few useful tips:

    • Work in Continuous Rounds: This helps avoid seams in your work, giving a neater appearance.
    • Use a Stitch Marker: Place a stitch marker at the beginning of each round to keep track of your progress.
    • Maintain Even Tension: Keeping your yarn tension consistent will help your stitches look uniform.
    • Plan Color Changes: If you’re using multiple colors, decide in advance where these changes will occur.
    • Stuff As You Go: Gently stuff your pieces as you work, ensuring they hold their shape without being overstuffed.

    Free Hello Kitty Crochet Pattern

    Foundation or Magic Ring

    1. Create a Magic Ring: Leave a long tail and wrap the yarn around your fingers, pulling through to create a ring.
    2. Round 1: 6 sc into the magic ring. Tighten the ring.

    Head

    1. Round 2: Inc in each st around (12 sts).
    2. Round 3: (sc in next st, inc in next st) around (18 sts).
    3. Rounds 4-6: Sc in each st around (18 sts).
    4. Round 7: (sc in next st, dec) around (12 sts).
    5. Round 8: (sc in next st, dec) around (8 sts).
    6. Stuff the head lightly and close with a yarn needle.

    Ears (Make 2)

    1. Magic Ring: 4 sc into the ring.
    2. Round 1: Inc in each st around (8 sts).
    3. Round 2: (sc, inc) around (12 sts).
    4. Fasten off and leave a long tail for sewing.

    Arms (Make 2)

    1. Magic Ring: 6 sc into the ring.
    2. Rounds 2-3: Sc in each st around (6 sts).
    3. Fasten off and leave a long tail for sewing.

    Legs (Make 2)

    1. Magic Ring: 6 sc into the ring.
    2. Rounds 2-4: Sc in each st around (6 sts).
    3. Fasten off and leave a long tail for sewing.

    Facial Details

    • Safety Eyes: If using, attach after stuffing.
    • Embroidery: Use embroidery thread to create the nose and whiskers.

    Bow

    • Ch 10: Join to form a loop.
    • Row 1: Sc across.
    • Row 2: Ch 1, turn, sc back.
    • Fasten off and secure to head.

    Stuffing and Shaping

    • Lightly stuff arms, legs, and head to maintain a cute shape.

    Joining the Pieces

    • Sew ears, arms, and legs onto the body securely, ensuring they are evenly spaced.

    How to Use Your Hello Kitty Crochet Project

    Your completed Hello Kitty amigurumi can be used in various creative ways:

    • Attach it to a backpack as a whimsical charm.
    • Use it as a pocket-sized companion.
    • Gift it to a child as a unique, handmade toy.
    • Display it on a shelf as a collectible.

    Tips for a Better Result

    • Keep Stitches Neat: Maintain an even tension to prevent gaps.
    • Avoid Visible Stuffing: Use just the right amount of stuffing to ensure a smooth surface.
    • Align Features Symmetrically: Pay attention to the placement of facial details for a cuter look.

    Customization Ideas

    Feel free to add your personal touch to your Hello Kitty:

    • Experiment with different color yarns.
    • Create themed outfits or accessories.
    • Add unique decorative elements, like a tiny scarf or purse.

    Common Problems and Troubleshooting

    • Crooked Facial Features: Adjust placement and secure firmly.
    • Uneven Stitches: Check your tension and adjust accordingly while crocheting.

    Care and Safety

    • Cleaning: Follow the yarn manufacturer’s instructions, typically suggesting hand washing.
    • Safety: Ensure any small parts, like safety eyes, are securely attached to avoid being choking hazards.

    Frequently Asked Questions

    Is this Hello Kitty crochet pattern beginner-friendly?

    Yes! It includes detailed instructions that are easy to follow.

    What yarn is best for this crochet project?

    A medium weight (#4) yarn works best for this design.

    How long does it take to crochet this design?

    Expect to spend about 2–4 hours to complete the entire amigurumi.

    Can I make this crochet project larger or smaller?

    You can adjust the hook size and yarn weight to change the dimensions.

    How do I attach the bow?

    Sew the bow firmly onto the head with the yarn tail after making it.

    Can I use different yarn colors?

    Absolutely! Feel free to create your own unique version of Hello Kitty.

    How do I keep the finished crochet doll in shape?

    Gently pack the stuffing to maintain shape and avoid overstuffing.

    Can I turn this design into a keychain or bag charm?

    Absolutely! Just add a keychain attachment for a cute accessory.

    Conclusion

    Creating this Hello Kitty amigurumi is a fun and rewarding crochet project that not only enhances your needlework skills but also brings joy to anyone who receives it. With its adorable design and ease of making, this pattern is perfect for novices and seasoned crocheters alike. So gather your materials and start crafting this lovable character today!


    SEO Title: Hello Kitty Amigurumi Free Crochet PDF Pattern
    Meta Description: Create your very own Hello Kitty amigurumi toy with this easy, free crochet pattern perfect for beginners. Craft a cute companion today!
    URL Slug: hello-kitty-amigurumi-free-crochet-pattern
    Primary Keyword: Hello Kitty Amigurumi Free Crochet PDF Pattern
    Secondary Keywords: free Hello Kitty crochet pattern, Hello Kitty crochet doll, kawaii crochet pattern, cute crochet project

    Image 1 Alt Text: Finished Hello Kitty amigurumi toy with a bow
    Image 2 Alt Text: Step-by-step crochet instructions for Hello Kitty amigurumi

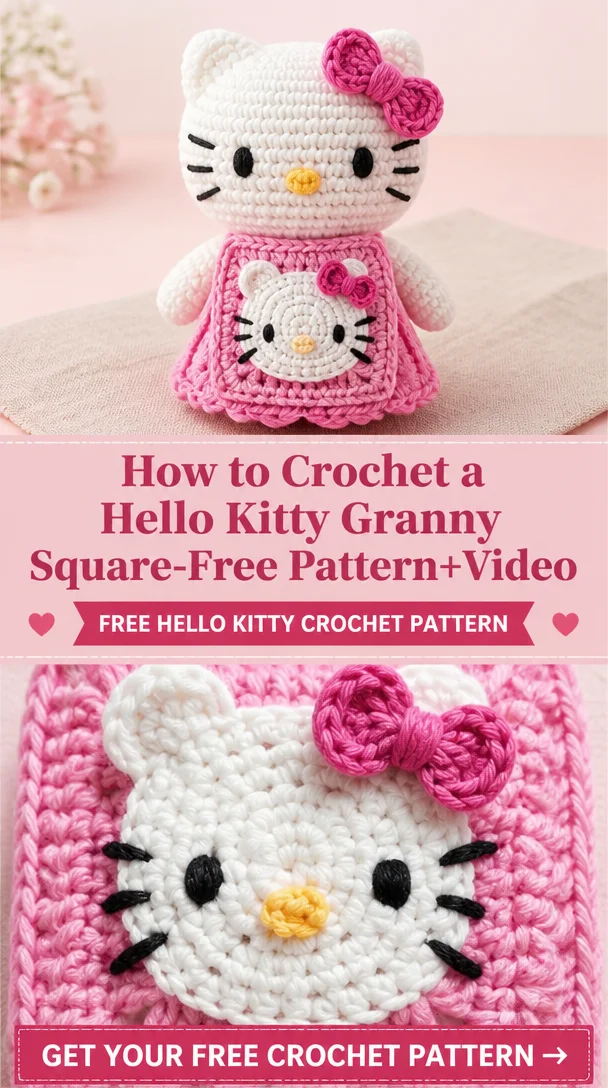
  • How to Crochet a Hello Kitty Granny Square-Free Pattern+Video

    How to Crochet a Hello Kitty Granny Square-Free Pattern+Video

    How to Crochet a Hello Kitty Granny Square-Free Pattern+Video

    I love Hello Kitty! I’m always buying things with her cute little face on them, like my umbrella, bag, and even my AirPods case! Hello Kitty truly fills my life with joy. In this article, I’ll guide you through a delightful crochet project: the Hello Kitty Granny Square. This charming design is not only adorable but also versatile enough to be used as a decoration, an accessory, or even a collectible gift! Suitable for crochet enthusiasts of all skill levels, this pattern enables you to create something magical that showcases your love for Hello Kitty.

    Hello Kitty Crochet Pattern Overview

    • Skill Level: Beginner-friendly
    • Finished Size: 6 x 6 inches (varies slightly)
    • Crochet Hook Size: G (4.0 mm)
    • Yarn Type: Acrylic or cotton yarn
    • Yarn Weight: Worsted weight (4)
    • Main Colors: White, pink, yellow, and black
    • Construction Method: Worked in rounds
    • Approximate Completion Time: 2-3 hours
    • Type of Finished Crochet Item: Granny square motif

    Materials You’ll Need

    • Yarn in white, pink, yellow, and black
    • G (4.0 mm) crochet hook
    • Yarn needle
    • Scissors
    • Stitch markers (optional)

    Crochet Abbreviations

    • MR = magic ring
    • ch = chain
    • sc = single crochet
    • dc = double crochet
    • sl st = slip stitch
    • inc = increase
    • dec = decrease
    • st = stitch
    • rep = repeat

    Before You Start

    Before diving into your crocheting, it’s vital to prepare. Start with a magic ring to form the base of your granny square. Keep a stitch marker handy to mark the beginning of rounds, and maintain even tension throughout your work. Planning your color changes and understanding how the characters are placed will significantly enhance the final look of your Hello Kitty granny square.

    Free Hello Kitty Crochet Pattern

    Foundation or Magic Ring

    1. Start with a magic ring.
    2. Round 1: Ch 3 (counts as first dc), 2 dc into MR, ch 1, (3 dc, ch 1) repeat twice, finish with 3 dc, pull the magic ring tight, and slip stitch to the top of the ch 3.

    Granny Square Motifs

    1. Round 2: Sl st into the ch-1 space, ch 3 (first dc), 2 dc, ch 1, 3 dc in the same space, (3 dc, ch 1, 3 dc) in next ch-1 space repeat around, finish with sl st in top of ch 3.

    2. Round 3: Repeat similar increments to create your square’s outer edge.

    Facial Details

    1. Use contrasting colors to crochet hello kitty’s eyes, nose, and whiskers:
      • Eyes: Crochet 2 black circles.
      • Nose: Crochet 1 yellow oval.

    Bow

    1. For the bow, crochet a small pink rectangle and gather it in the center. Sew it onto the head after securing the face details.

    Joining the Pieces

    1. Once all components are crocheted, assemble your granny squares together, ensuring everything aligns well.

    Finishing Details

    1. Weave in all yarn ends securely. If necessary, block your granny square to tighten the tension and shape its edges.

    How to Use Your Hello Kitty Crochet Project

    The charming Hello Kitty granny square can be a perfect decorative element in your home. You can use it as a coaster, room décor, or even stitch them together to make a blanket or throw. It also makes a delightful gift or a fun collectible for those who love Hello Kitty.

    Tips for a Better Result

    • Maintain consistent tension to achieve a neat square.
    • Secure different colors tightly to avoid loose ends.
    • Use a yarn needle for finishing touches to keep everything well positioned.

    Customization Ideas

    Feel free to experiment with various yarn colors, perhaps choosing darker or pastel shades. You can alter the size of the granny square by increasing or decreasing your stitch count or using a different yarn weight for a larger or smaller item.

    Common Problems and Troubleshooting

    • Uneven stitch counts: Regularly check your work as you go.
    • Visible stuffing: Ensure your stitches are tight enough, or use a thicker yarn for stuffing to help fill gaps.
    • Crooked features: Pay close attention while sewing facial details, positioning them symmetrically.

    Care and Safety

    Since your Hello Kitty granny square is handmade, refer to your yarn’s care label for cleaning directions. Be cautious with any small parts if considering this as a gift for young children.

    Frequently Asked Questions

    • Is this Hello Kitty crochet pattern beginner-friendly?
      Yes! This project is perfect for beginners wanting to learn basic granny square techniques.

    • What yarn is best for this crochet project?
      Acrylic or cotton worsted weight yarn works well for this pattern.

    • How long does it take to crochet this design?
      It typically takes 2-3 hours to complete.

    • Can I make this crochet project larger or smaller?
      Yes, you can adjust the size by altering the hook or yarn weight.

    • How do I attach the bow?
      Use a yarn needle to securely sew the bow onto the head.

    Conclusion

    Creating a Hello Kitty granny square is a delightful project that brings joy to both the maker and the receiver. It’s a perfect representation of kawaii aesthetics and handmade charm. I encourage you to dive into this fun crochet adventure and craft your unique Hello Kitty item today!


    SEO Title: Free Hello Kitty Granny Square Crochet Pattern

    Meta Description: Discover how to crochet a lovely Hello Kitty granny square! This free pattern is perfect for beginners. Get started on your kawaii project today!

    URL Slug: hello-kitty-granny-square-crochet-pattern

    Primary Keyword: How to Crochet a Hello Kitty Granny Square-Free Pattern

    Secondary Keywords: Hello Kitty crochet pattern, free Hello Kitty crochet pattern, kawaii crochet project, Hello Kitty crochet doll

    Image 1 Alt Text: Completed Hello Kitty granny square crochet design with vibrant colors.

    Image 2 Alt Text: Detailed view of the crocheted Hello Kitty face on a granny square, showcasing facial features.

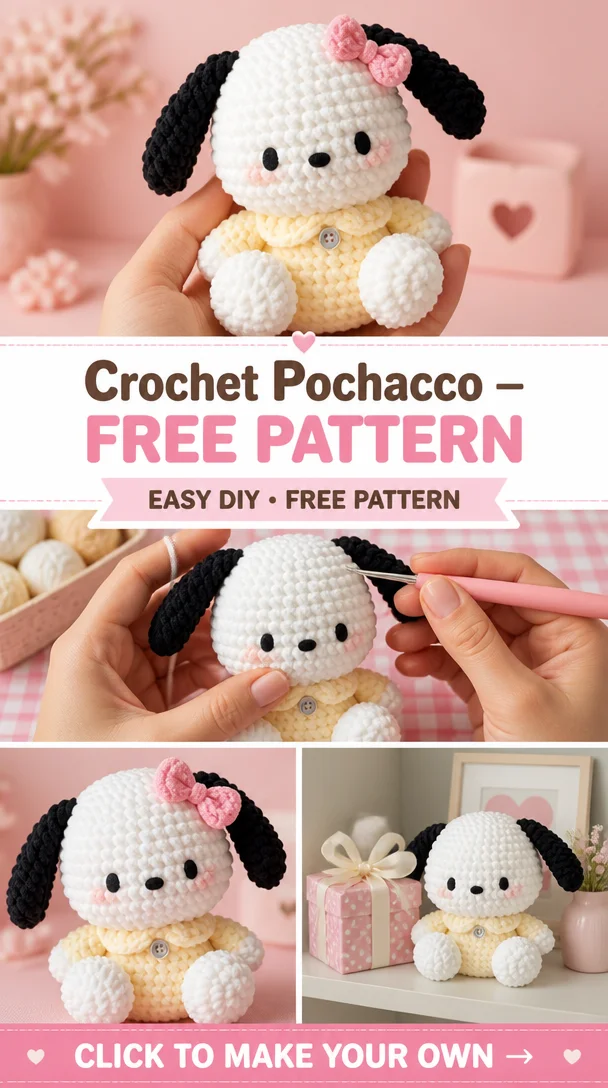
  • Crochet Pochacco — FREE PATTERN

    Crochet Pochacco — FREE PATTERN

    Crochet Pochacco — FREE PATTERN

    Are you ready to bring a dash of cuteness into your crochet collection? This Hello Kitty crochet project, featuring the adorable Pochacco, is not only an enjoyable way to hone your crafting skills but also results in a charming stuffed character. Known for its whimsical design, this crochet pattern will delight fans of all ages. Whether you plan to use it as a decoration, a heartfelt gift, or simply wish to collect your favorite Kawaii character, crocheting Pochacco is a fulfilling project. It’s suitable for crocheters with a basic understanding of the craft, allowing beginners and experienced crafters alike to create this timeless plushie.

    Hello Kitty Crochet Pattern Overview

    • Skill Level: Beginner to Intermediate
    • Finished Size: Approximately 8 inches tall
    • Crochet Hook Size: 4.0 mm (G)
    • Yarn Type: 100% acrylic yarn
    • Yarn Weight: Worsted weight (4)
    • Main Colors: White, black, yellow, and pink
    • Construction Method: Worked in continuous rounds
    • Approximate Completion Time: 5 – 7 hours
    • Type of Finished Item: Amigurumi plushie

    Materials You’ll Need

    • Yarn in white, black, yellow, and pink
    • 4.0 mm (G) crochet hook
    • Yarn needle
    • Stitch markers
    • Scissors
    • Polyfill stuffing
    • Safety eyes (9mm recommended)
    • Embroidery thread (black for features)
    • Felt cutouts (optional for bow)

    Crochet Abbreviations

    • MR = magic ring
    • ch = chain
    • sc = single crochet
    • inc = increase
    • dec = decrease
    • st = stitch
    • rep = repeat

    Before You Start

    Before you begin crocheting Pochacco, keep in mind a few essential tips:

    • Work in Continuous Rounds: Ensure that you do not join the rounds unless instructed; instead, use a stitch marker to mark your first stitch in each round.
    • Even Tension: Maintain consistent yarn tension for a smooth finish.
    • Color Changes: Be prepared for color transitions; make sure to carry the unused yarn along the side of your work to minimize weaving in ends later.

    Free Hello Kitty Crochet Pattern

    Foundation or Magic Ring

    Start with a magic ring.

    • Round 1: 6 sc into the magic ring (6)
    • Round 2: inc in each st around (12)
    • Round 3: (sc in next st, inc) repeat around (18)
    • Round 4: (sc in next 2 st, inc) repeat around (24)
    • Round 5 – 12: sc in each st around (24)

    Head

    • Round 13: (sc in next 2 st, dec) repeat around (18)
    • Round 14: (sc in next st, dec) repeat around (12)
    • Round 15: dec until closed, stuff head firmly.

    Body

    • Round 1: 6 sc in the magic ring (6)
    • Round 2: inc in each st around (12)
    • Round 3: (sc in next st, inc) repeat around (18)
    • Round 4 – 10: sc in each st around (18)
    • Round 11: (sc in next st, dec) repeat around (12)
    • Round 12: dec until closed, stuff lightly.

    Ears (Make 2)

    • Round 1: 4 sc in the magic ring (4)
    • Round 2: inc in each st around (8)
    • Round 3 – 5: sc in each st around (8)
    • Finish off, leaving a long tail for sewing.

    Arms (Make 2)

    • Round 1: 6 sc in the magic ring (6)
    • Round 2 – 7: sc in each st around (6)
    • Finish off, leaving a long tail for sewing.

    Legs (Make 2)

    • Round 1: 6 sc in the magic ring (6)
    • Round 2 – 8: sc in each st around (6)
    • Finish off, leaving a long tail for sewing.

    Facial Details

    • Attach safety eyes on the head.
    • Use black embroidery thread to create a nose and whiskers.

    Bow

    • Crochet a small bow using pink yarn, or use felt cutouts.
    • Sew to the head for a finishing touch.

    Construction and Assembly

    • Join Head to Body: Sew head to the top of the body securely.
    • Attach Ears: Position ears on top of the head, sewing them in place.
    • Add Arms and Legs: Sew arms on either side of the body and legs at the bottom.
    • Stuff and Shape: Ensure all parts are evenly stuffed and align before securing.

    How to Use Your Hello Kitty Crochet Project

    Pochacco can serve multiple purposes once completed:

    • As a charming home decoration
    • A thoughtful handmade gift for loved ones
    • A playful companion for children
    • An addition to your Kawaii collection

    Tips for a Better Result

    • Ensure your stitches are neat to avoid visible seams.
    • Pay attention to the stuffing to keep the shape without being overly stuffed.
    • When using colors, plan your changes before you start for a clean transition.

    Customization Ideas

    Personalize your Pochacco crochet doll by:

    • Experimenting with yarn colors.
    • Crafting unique clothing or accessories.
    • Adding different facial expressions.

    Common Problems and Troubleshooting

    • Uneven Stitches: Focus on maintaining an even tension; practice helps.
    • Visible Stuffing: Take caution when stuffing to avoid overfilling.
    • Misaligned Features: Use a mirror or reference images to ensure accuracy in placement.

    Care and Safety

    Care instructions may vary based on the yarn used. To clean your crochet Pochacco, spot-clean with a damp cloth or follow the manufacturer’s guidelines. Ensure that any small parts, like safety eyes, are securely attached to avoid choking hazards.

    Frequently Asked Questions

    • Is this Hello Kitty crochet pattern beginner-friendly?
      Yes, it’s suitable for beginners with basic crochet skills.

    • What yarn is best for this crochet project?
      Worsted weight, 100% acrylic yarn works perfectly.

    • How long does it take to crochet this design?
      Approximately 5 to 7 hours, depending on your speed.

    • Can I make this crochet project larger or smaller?
      Yes, adjust by using different yarn weights or hook sizes.

    • How do I attach the bow?
      Simply sew or glue the bow to the head securely.

    • Can I use different yarn colors?
      Absolutely! Customize it as you like.

    Conclusion

    Creating the Crochet Pochacco adds a delightful, playful character to your crochet repertoire. This pattern is not only easy to follow but also a perfect way to showcase your love for the Kawaii culture. Enjoy your crafting journey!


    SEO Title: Free Crochet Pochacco Pattern: Adorable Amigurumi Project
    Meta Description: Discover the free Crochet Pochacco pattern! Create your own cute Hello Kitty plushie and enjoy crafting this delightful Kawaii project.
    URL Slug: crochet-pochacco-free-pattern
    Primary Keyword: Crochet Pochacco — FREE PATTERN
    Secondary Keywords: free Hello Kitty crochet pattern, Hello Kitty amigurumi, kawaii crochet pattern, cute crochet project
    Image 1 Alt Text: Finished crochet Pochacco plushie with cute details
    Image 2 Alt Text: Step-by-step crochet process for the Pochacco pattern

Crochet Hello Kitty

Your free crochet ebook

Leave your email address to request your free crochet ebook.

Your email address will be used to handle your ebook request.Privacy policy