Tag: Free Patterns

  • Free Hello Kitty Crochet Pattern – An Adorable Amigurumi You’ll Love

    Free Hello Kitty Crochet Pattern – An Adorable Amigurumi You’ll Love

    Chart móc hello kitty | Hướng dẫn đan móc, Mẫu móc len amigurumi

    Welcome to the delightful world of crochet with our charming Hello Kitty crochet pattern! This adorable project encapsulates the spirit of Hello Kitty, featuring her iconic face and signature bow. Crocheting this cute character not only brings joy to your crafting but also results in a delightful finished piece that can be used as a decoration, a collectible, or a heartfelt handmade gift. Whether you’re a seasoned crocheter or a beginner eager to tackle new skills, this pattern offers a fun and fulfilling experience. Join us as we create a charming Hello Kitty amigurumi that will surely brighten anyone’s day!

    Hello Kitty Crochet Pattern Overview

    • Skill Level: Intermediate
    • Finished Size: Approximately 6 inches tall
    • Crochet Hook Size: 3.5 mm (E)
    • Yarn Type: 100% Cotton
    • Yarn Weight: Sport or DK weight
    • Main Colors: White, pink, and yellow
    • Construction Method: Amigurumi (worked in rounds)
    • Approximate Completion Time: 4-6 hours
    • Beginner-Friendly: Some crocheting experience recommended
    • Worked in: Continuous rounds
    • Type of Finished Item: Amigurumi doll

    Materials You’ll Need

    • Yarn (white, pink, yellow)
    • Crochet hook (3.5 mm)
    • Yarn needle
    • Stitch markers
    • Scissors
    • Stuffing (polyester fiberfill)
    • Safety eyes (12 mm)
    • Embroidery thread (black for facial features)
    • Craft felt (optional for bow)

    Crochet Abbreviations

    • MR = magic ring
    • ch = chain
    • sc = single crochet
    • inc = increase
    • dec = decrease
    • st = stitch
    • BLO = back loop only
    • FLO = front loop only

    Before You Start

    Before diving into the pattern, ensure you have all your materials prepared. Work in continuous rounds to create a smooth finish, and use a stitch marker to mark the beginning of each round. Keeping your tension even will help your pieces maintain their shape. As you complete the different components of Hello Kitty, plan how to assemble them later, and don’t forget to stuff them firmly for better shape.

    Free Hello Kitty Crochet Pattern

    Foundation or Magic Ring

    1. Round 1: Create a magic ring and crochet 6 sc into the ring. (6)
    2. Round 2: Inc in each st around. (12)

    Head

    1. Round 3: Sc in the next st, inc in the next st; repeat around. (18)
    2. Rounds 4-7: Sc in each st around. (18)
    3. Round 8: Sc in the next st, dec in the next st; repeat around. (12)
    4. Round 9: Dec around until closed, leave a small opening for stuffing. (No stitch count provided)
    5. Stuff the head before closing.

    Body

    1. Round 1: Create a magic ring and crochet 6 sc into the ring. (6)
    2. Round 2: Inc in each st around. (12)
    3. Rounds 3-5: Sc in each st around. (12)
    4. Stuff the body firmly, then close.

    Ears (Make 2)

    1. Round 1: Create a magic ring and crochet 4 sc into the ring. (4)
    2. Round 2: Inc in each st around. (8)
    3. Round 3: Sc in each st around, leave unstuffed.

    Arms (Make 2)

    1. Round 1: Create a magic ring and crochet 6 sc into the ring. (6)
    2. Round 2: Inc in each st around. (12)
    3. Rounds 3-4: Sc in each st. (12)
    4. Stuff lightly, then close.

    Legs (Make 2)

    1. Follow the same instructions as the arms but add a few more rounds for length.

    Facial Details

    • Eyes: Attach safety eyes between rounds 4 and 5 of the head.
    • Nose: Use yellow embroidery thread to create a small triangle on the head.
    • Whiskers: Attach black embroidery thread for whisker details.

    Bow

    • Crochet a small rectangle in pink, fold it, and secure the middle with a knot. Attach to one ear.

    Stuffing and Shaping

    • Ensure all pieces are stuffed and shaped adequately before assembling.

    Joining the Pieces

    • Use a yarn needle to sew the head onto the body, arms to the sides, and legs to the bottom. Secure all areas tightly.

    Finishing Details

    • Weave in any ends and ensure all components are securely attached.

    How to Use Your Hello Kitty Crochet Project

    Once finished, your Hello Kitty amigurumi can serve as a delightful decorative piece on a shelf, a fun collectible, or even a memorable gift for a loved one. Attach a keychain hardware to make it a fun accessory for bags or backpacks, or use it as a charming area accent in your home.

    Tips for a Better Result

    • Maintain even tension throughout your stitches to avoid uneven surfaces.
    • Keep all small features such as eyes and noses secure so they don’t come off.
    • Position facial features symmetrically for an appealing look.

    Customization Ideas

    • Experiment with different colors for Hello Kitty’s bow or body.
    • Add embellishments like clothing or unique accessories to make it more personal.
    • Play around with yarn textures to create a different feel.

    Common Problems and Troubleshooting

    • Uneven stitch counts can often be fixed by recounting and adjusting your stitches.
    • For visible stuffing, ensure you pack it tightly into all pieces and use the right size hook for your yarn.
    • If facial features look crooked, reposition them before finalizing assembly.

    Care and Safety

    For cleaning, follow the yarn manufacturer’s care instructions. Keep in mind that small detachable parts like safety eyes can be a choking hazard for young children.

    Frequently Asked Questions

    • Is this Hello Kitty crochet pattern beginner-friendly?

      • This pattern is designed for those with some crocheting experience, though diligent beginners can certainly attempt it.
    • What yarn is best for this crochet project?

      • A soft, medium-weight yarn such as cotton or acrylic is recommended for a supple finish.
    • How long does it take to crochet this design?

      • Typically, expect 4-6 hours based on your skill level and speed.
    • Can I make this crochet project larger or smaller?

      • Yes, adjust your hook size and yarn weight for size modifications.
    • How do I attach the bow?

      • Simply stitch the bow onto one ear using matching thread for a seamless look.
    • Can I use different yarn colors?

      • Absolutely! Feel free to explore your creativity with color choices.
    • How do I keep the finished crochet doll in shape?

      • Stuff the body parts well before closing and avoid overstuffing to maintain shape.
    • Can I turn this design into a keychain or bag charm?

      • Yes! Simply add a keychain hardware to the finished piece.

    Conclusion

    Embrace the joy of crocheting this adorable Hello Kitty amigurumi project! Whether for yourself or as a gift for someone special, this crochet pattern offers a fun way to celebrate one of the most beloved characters in the world. Enjoy creating your unique piece that can charm both young and old!


    SEO Title: Adorable Hello Kitty Crochet Amigurumi Pattern

    Meta Description: Discover this free Hello Kitty crochet pattern! Create a charming amigurumi doll that makes a perfect gift or decoration for fans of all ages.

    URL Slug: hello-kitty-crochet-pattern

    Primary Keyword: Hello Kitty crochet pattern

    Secondary Keywords: free Hello Kitty crochet pattern, Hello Kitty amigurumi, Hello Kitty crochet doll, cute crochet project

    Image 1 Alt Text: Finished Hello Kitty crochet doll showcasing adorable facial features and bow.

    Image 2 Alt Text: Crafting process for Hello Kitty amigurumi showing colors and stitches used.

  • Free Hello Kitty Crochet Pattern – A Cute Amigurumi Tree You’ll Love

    Free Hello Kitty Crochet Pattern – A Cute Amigurumi Tree You’ll Love

    5 Free Crochet Last Minute Christmas Amigurumi – Hello Kitty Tree

    Looking for a charming last-minute crochet project that captures the holiday spirit? The Hello Kitty Tree plushie is a delightful combination of the beloved character and festive cheer, featuring Hello Kitty adorned in an adorable tree costume! This crochet design is not only sweet and festive, but it also has a low-sew construction, making it beginner-friendly. With bobble stitch tiers adding texture and charm, Hello Kitty is depicted giving a cute look, perfect for enhancing your holiday decor. This cuddly plushie is a great gift idea for any Hello Kitty fan and works splendidly as a collectible or decoration that will brighten up any festive setup!

    Hello Kitty Crochet Pattern Overview

    • Skill level: Beginner-friendly
    • Finished size: Approximately 10 inches tall
    • Crochet hook size: G (4.0 mm)
    • Yarn type: Acrylic or cotton yarn
    • Yarn weight: Worsted weight (#4)
    • Main colors: Green for the tree, white for Hello Kitty’s body, red or pink for embellishments
    • Construction method: Crochet worked in rounds with minimal sewing required
    • Approximate completion time: 3-5 hours
    • Worked in: Continuous rounds
    • Type of finished crochet item: Plushie

    Materials You’ll Need

    • Yarn in various colors: green, white, red or pink
    • G (4.0 mm) crochet hook
    • Yarn needle for weaving in ends
    • Stitch markers
    • Scissors
    • Stuffing for the plushie
    • Optional: safety eyes

    Crochet Abbreviations

    • MR = magic ring
    • ch = chain
    • sc = single crochet
    • hdc = half double crochet
    • dc = double crochet
    • sl st = slip stitch
    • inc = increase
    • dec = decrease
    • st = stitch
    • rep = repeat

    Before You Start

    Before diving into the crochet pattern, it’s helpful to understand a few tips:

    • Work in continuous rounds to avoid seams.
    • Use a stitch marker to keep track of your rounds.
    • Keep your yarn tension even to maintain uniformity in size.
    • Prepare for color changes as you add decorative details.
    • Plan how you will assemble the pieces and position your embellishments.

    Free Hello Kitty Crochet Pattern

    Foundation or Magic Ring

    Start with a magic ring to form the base of your plushie.

    Body

    Round 1: Make 6 sc in the magic ring.
    Round 2: Inc in each st around (12).
    Round 3: Sc in next st, inc; repeat around (18).
    Round 4: Sc in next 2 st, inc; repeat around (24).
    Round 5-8: Sc in each st around (24).
    Round 9: Sc in next 2, dec; repeat around (18).
    Round 10: Sc in next st, dec; repeat around (12).
    Stuff the body lightly, then continue to final rounds.
    Round 11: Dec around (6). Fasten off securely and weave in ends.

    Head

    Repeat a similar structure as the body for the head, making it slightly smaller in rows for proportion.

    Arms

    Make two arms using small bobbles for a cute effect!
    Round 1: Make 5 sc in the magic ring.
    Round 2: Inc in each st around (10). Fasten off and leave a long tail for sewing.

    Legs

    Create two legs, similar to the arms but longer.

    Facial Details

    Embroider the eyes and nose, positioning them symmetrically on the head.

    Bow

    Create a small bow using a contrasting yarn color and sew it onto the head.

    Decorative Accessories

    Add the bobble stitch tiers around the body for a tree effect and attach small decorations like candy canes, stars, and pom-poms around the plushie for added fun.

    Stuffing and Shaping

    Ensure all parts are stuffed appropriately to maintain shape, especially the head.

    Joining the Pieces

    Sew the head onto the body securely. Attach arms and legs, ensuring alignment for an even look.

    Finishing Details

    Weave in any loose yarn ends and make sure all decorations are secure.

    How to Use Your Hello Kitty Crochet Project

    Your Hello Kitty Tree plushie makes an excellent handmade decoration for the holidays, a heartfelt gift for friends, or a charming collectible that will surely be the highlight of your decor.

    Tips for a Better Result

    • Maintain even tension for stitching to avoid gaps.
    • Position facial features symmetrically for balance.
    • Secure bows and decorations well to keep them from falling off.

    Customization Ideas

    Consider using different yarn colors for a unique twist on the design, or experiment with different accessories such as mini ornaments or varied embellishments.

    Common Problems and Troubleshooting

    • If your stitches seem uneven, focus on maintaining a consistent tension.
    • Use a safety needle for stitching if attaching small decorative parts feels challenging.

    Care and Safety

    Keep your Hello Kitty Tree plushie clean according to yarn care instructions. Monitor for small, detachable parts to ensure safety, particularly if around younger children.

    Frequently Asked Questions

    1. Is this Hello Kitty crochet pattern beginner-friendly?
      Yes, the design is suitable for beginners with basic crochet skills.

    2. What yarn is best for this crochet project?
      Acrylic or cotton worsted weight yarn works well for this plushie.

    3. How long does it take to crochet this design?
      Expect to spend about 3-5 hours on the entire project.

    4. Can I make this crochet project larger or smaller?
      Yes, adjusting your hook size and yarn weight can change the final dimensions.

    5. How do I attach the bow?
      You can sew it directly onto the head using a yarn needle.

    6. Can I use different yarn colors?
      Absolutely! Feel free to get creative with your color selections.

    7. Can I turn this design into a keychain or bag charm?
      Yes, simply create a smaller version and add a keychain attachment.

    Conclusion

    Making the Hello Kitty Tree plushie is a fun and engaging project that adds a touch of kawaii charm to any holiday celebration. Enjoy crafting this adorable piece and spreading joy through your handmade creations!


    SEO Title: Free Hello Kitty Christmas Amigurumi Crochet Pattern
    Meta Description: Create a cute Hello Kitty plushie in a Christmas tree costume! Perfect for decorations, gifts, or collectors. Easy and fun crochet pattern!
    URL Slug: hello-kitty-christmas-amigurumi
    Primary Keyword: Hello Kitty crochet pattern
    Secondary Keywords: free Hello Kitty crochet pattern, Hello Kitty amigurumi, cute crochet project, Christmas crochet decoration, handmade crochet gift
    Image 1 Alt Text: Hello Kitty plushie in a Christmas tree costume
    Image 2 Alt Text: Close-up of Hello Kitty decorations with candy canes and stars

  • Free Hello Kitty Crochet Pattern – An Adorable Amigurumi You’ll Love

    Free Hello Kitty Crochet Pattern – An Adorable Amigurumi You’ll Love

    Free Hello Kitty Crochet Pattern

    Welcome to the world of kawaii crochet! This Free Hello Kitty Crochet Pattern is perfect for fans of the adorable character that has captured hearts worldwide. This charming project allows you to create your very own Hello Kitty plush toy, bringing a piece of childhood nostalgia to life. With its cute design and charming details, this plushie can become a delightful decoration, a thoughtful handmade gift, or even a collectible item for avid Hello Kitty fans. Suitable for various skill levels, this pattern is an excellent choice for both beginners and experienced crocheters who wish to explore a fun, creative project.

    Hello Kitty Crochet Pattern Overview

    • Skill Level: Beginner to Intermediate
    • Finished Size: Approximately 6 inches tall
    • Crochet Hook Size: 3.5 mm (E)
    • Yarn Type: Acrylic or cotton yarn
    • Yarn Weight: Worsted weight
    • Main Colors: White, pink, yellow, and black
    • Construction Method: Amigurumi (worked in rounds)
    • Approximate Completion Time: 3-5 hours
    • Beginner-Friendly: Yes
    • Project Type: Hello Kitty plush toy

    Materials You’ll Need

    • Acrylic or cotton yarn in white, pink, yellow, and black
    • 3.5 mm crochet hook
    • Yarn needle
    • Stitch markers
    • Scissors
    • Fiberfill stuffing
    • Safety eyes (optional)
    • Embroidery thread for facial features
    • Felt for bow details (optional)

    Crochet Abbreviations

    • MR = magic ring
    • ch = chain
    • sc = single crochet
    • inc = increase
    • dec = decrease
    • st = stitch
    • rep = repeat

    Before You Start

    Before diving into your Hello Kitty crochet project, here are some tips to ensure a smooth crocheting experience:

    • Work in continuous rounds to avoid seams.
    • Use stitch markers to keep track of your rounds.
    • Maintain even tension for a neat finish.
    • Check your stitch counts after each round to avoid any mistakes.
    • If you’re using color changes, prepare your yarn in advance to make switching colors seamless.

    Free Hello Kitty Crochet Pattern

    Foundation or Magic Ring

    Begin with a magic ring to form the base of your Hello Kitty.

    Round 1: 6 sc in the magic ring.
    Round 2: Inc in each st around (12 sts).
    Round 3: Sc in next st, inc around (18 sts).
    Round 4: Sc in the next 2 sts, inc around (24 sts).

    Head

    Round 5: Sc in each st around (24 sts).
    Round 6: Sc in the next 3 sts, inc around (30 sts).
    Round 7-15: Sc in each st around (30 sts).
    Round 16: Sc in the next 3 sts, dec around (24 sts).
    Round 17: Sc in the next 2 sts, dec around (18 sts).
    Round 18: Sc in next st, dec around (12 sts).

    Stuffing and Shaping

    Before closing the head, stuff it firmly with fiberfill.

    Round 19: Dec around (6 sts).
    Fasten off and leave a long tail for sewing the head to the body.

    Body

    Join yarn to the bottom of the head.

    Round 1: 6 sc in the magic ring.
    Round 2: Inc in each st around (12 sts).
    Round 3: Sc in the next st, inc around (18 sts).
    Round 4-10: Sc in each st around (18 sts).

    Arms (Make 2)

    Round 1: 6 sc in the magic ring.
    Round 2: Inc in each st around (12 sts).
    Round 3-5: Sc in each st around (12 sts).
    Stuff lightly and fasten off, leaving a long tail for sewing.

    Ears (Make 2)

    Round 1: 4 sc in the magic ring.
    Round 2: Inc in each st around (8 sts).
    Round 3: Sc, inc around (12 sts).
    Fasten off, leaving a long tail.

    Facial Details

    Using black embroidery thread, stitch the eyes and nose to the head. For whiskers, use short black threads to create the desired look.

    Bow

    Using pink yarn or felt, create a small bow to attach to one of the ears.

    Construction and Assembly

    Carefully sew the head to the body using the long tail left. Attach arms on each side of the body, ensuring they are evenly spaced. Position the ears on top of the head and sew them securely. Attach the bow to one of the ears to complete the look.

    How to Use Your Hello Kitty Crochet Project

    Your finished Hello Kitty plush can serve multiple purposes:

    • A cute decoration for your home
    • A thoughtful gift for friends or family
    • A fun keychain accessory
    • A collectible piece for Hello Kitty enthusiasts

    Tips for a Better Result

    • Maintain even tension to ensure a consistent look throughout your work.
    • Keep your stitches neat, especially around the face and details.
    • Plan your color changes in advance to keep the project looking sharp.

    Customization Ideas

    • Experiment with different yarn colors for a unique twist on the classic design.
    • Add decorative bows in various colors or patterns.
    • Personalize your Hello Kitty with different embroidered facial expressions.

    Common Problems and Troubleshooting

    • For uneven stitch counts, reevaluate each round and count your stitches.
    • If the eyes are misaligned, carefully unravel and reposition them.
    • Ensure stuffing is uniform to avoid bulges.

    Care and Safety

    Clean your Hello Kitty plush according to the yarn manufacturer’s instructions. Be cautious with small parts, especially if the item is intended for children, as safety eyes can be a choking hazard.

    Frequently Asked Questions

    • Is this Hello Kitty crochet pattern beginner-friendly?
      Yes, it’s suitable for beginners with basic crochet skills.

    • What yarn is best for this crochet project?
      Acrylic or cotton yarn in worsted weight works well.

    • How long does it take to crochet this design?
      It typically takes 3-5 hours depending on your skill level.

    • Can I make this crochet project larger or smaller?
      Adjust yarn size and hook accordingly to change the size.

    • How do I attach the bow?
      Simply sew it securely to one of the ears using a yarn needle.

    Conclusion

    Crocheting this Hello Kitty plush is both rewarding and enjoyable, providing an opportunity to showcase your creativity. Whether you choose to keep it for yourself or give it as a gift, it’s sure to bring smiles and joy. Happy crocheting!


    SEO Title: Free Hello Kitty Crochet Pattern for Beginners
    Meta Description: Create your own adorable Hello Kitty plush with this free crochet pattern. Perfect for gifts or collectibles!
    URL Slug: hello-kitty-crochet-pattern
    Primary Keyword: Free Hello Kitty Crochet Pattern
    Secondary Keywords: Hello Kitty crochet plushie, Hello Kitty crochet pattern, kawaii crochet project, Hello Kitty amigurumi, handmade crochet doll
    Image 1 Alt Text: Crocheted Hello Kitty plush toy with cute details.
    Image 2 Alt Text: Close-up of Hello Kitty bow and facial features на plush toy.

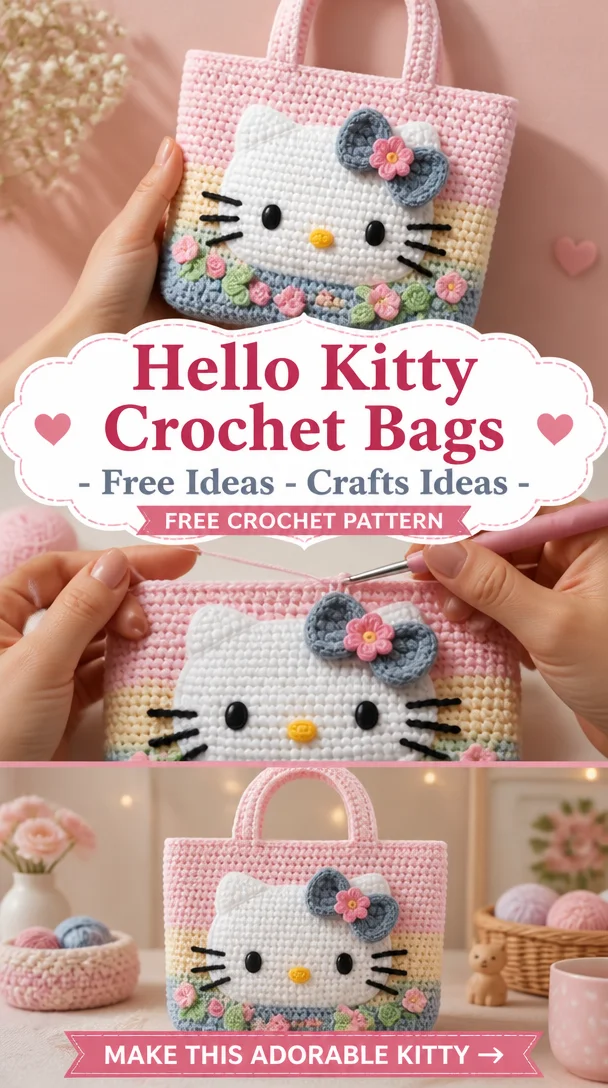
  • Hello Kitty Crochet Bags – Free Ideas – Crafts Ideas

    Hello Kitty Crochet Bags – Free Ideas – Crafts Ideas

    Hello Kitty Crochet Bags – Free Ideas – Crafts Ideas

    Hello Kitty crochet bags are an adorable way to incorporate the enchanting charm of this beloved character into your everyday lifestyle. With their cute design, these bags allow you to showcase your love for Hello Kitty while also being functional. They’re perfect for carrying essentials, making a delightful statement at any outing, or gifting to a fellow crochet enthusiast or Hello Kitty fan. Whether you’re a beginner or an experienced crocheter, these bags can add a unique, personalized flair to your collection of handmade accessories and collectibles. Plus, crafting these bags offers a great opportunity to practice your crochet skills while having fun.

    Hello Kitty Crochet Pattern Overview

    • Skill Level: Intermediate
    • Finished Size: Approximately 12 inches wide
    • Crochet Hook Size: G/4mm
    • Yarn Type: 100% acrylic, medium weight (Worsted)
    • Yarn Weight: Medium (4)
    • Main Colors: Pink, white, black, yellow
    • Construction Method: Worked in rows and turned
    • Approximate Completion Time: 4-6 hours
    • Project Type: Crochet bag
    • Beginner-Friendly: Some experience recommended
    • Worked in Rounds, Rows, or Separate Pieces: Rows and rounds

    Materials You’ll Need

    • 2 skeins of pink acrylic yarn
    • 1 skein of white acrylic yarn
    • Small amounts of black and yellow yarn for facial features
    • Crochet hook (G/4mm)
    • Yarn needle
    • Stitch markers
    • Scissors
    • Bag handles or straps (if specified)

    Crochet Abbreviations

    • ch = chain
    • sc = single crochet
    • hdc = half double crochet
    • dc = double crochet
    • sl st = slip stitch
    • inc = increase
    • dec = decrease
    • st = stitch
    • rep = repeat

    Before You Start

    Before diving into your Hello Kitty crochet bag project, it’s essential to familiarize yourself with a few key techniques and tips. Start by working in consistent rows to maintain even tension. Using a stitch marker can help you keep track of your rounds, particularly if you’re switching between different stitches. It’s also advisable to test the yarn’s elasticity by crocheting a small sample swatch first, especially if you’re new to using medium weight yarn. Planning your color changes in advance may help create the smooth transitions that are characteristic of Hello Kitty designs.

    Free Hello Kitty Crochet Pattern

    Foundation

    1. Start with a foundation chain of 30 stitches. This will form the base of your bag.

    Body

    1. Row 1: Work in hdc across the foundation chain (30 hdc).
    2. Row 2: Ch 2, turn. Work in hdc across (30 hdc).
    3. Repeat Row 2 until the body reaches 12 inches in height.

    Bag Sides

    1. Fold the piece in half, aligning the edges.
    2. Begin sewing the sides using a slip stitch or whip stitch to secure.

    Straps

    1. For each strap, chain 60 stitches and work in sc for 4 rows.
    2. Attach the straps to the top corners of the bag securely.

    Attaching Facial Features

    1. With white yarn, embroider two circles for the eyes approximately 5 rows down from the top.
    2. Use black yarn to create pupils and a nose in the center.
    3. For the whiskers, use a straight stitch with black yarn extending from either side of the nose.

    Bow

    1. Create a small bow using a chain of 10, then work sc into each chain.
    2. Tie off and attach the bow to the left ear area.

    Finishing Touches

    • Weave in all ends using the yarn needle to give your bag a clean finish.
    • If desired, embellish further with decorative button closures or additional appliqués.

    Construction and Assembly

    Once all your pieces are crocheted, assemble your bag by sewing or slip stitching the edges together. Make sure the bag retains its shape by ensuring the stitches are secure. Position and attach the straps evenly on both sides for balance and added comfort.

    Facial Features and Decorative Details

    To firmly establish the Hello Kitty identity on your bag, take care in creating and positioning the facial features as described. Be sure to position the eyes approximately halfway down from the top edge, maintaining symmetry for a cute, appealing look.

    How to Use Your Hello Kitty Crochet Project

    Your Hello Kitty crochet bag can serve multiple purposes: it’s a perfect accessory for casual outings, a fun gift for friends or family, or even a decorative piece to brighten up your room. The versatility of this design should inspire creativity on how you use it!

    Tips for a Better Result

    • Maintain even tension to ensure your stitches are uniform.
    • Keep your counting precise to avoid uneven sizes in your bag.
    • Securely attach all facial features so they stay intact during use.
    • Use colorful yarn combinations to personalize your bag even further.

    Customization Ideas

    Explore various customization options like using different colors, adding unique patterns, or incorporating your favorite Hello Kitty accessories. You can also experiment with yarn textures to modify the feel of the bag.

    Common Problems and Troubleshooting

    If you encounter uneven stitch counts or visible stuffing, consider reviewing your tension and placement to make any necessary adjustments. Ensuring all pieces line up correctly will help produce a neat finish.

    Care and Safety

    When washing your Hello Kitty crochet bag, refer to your yarn’s specific cleaning instructions to maintain its quality. For bags with small detachable parts, be cautious and store them safely away from young children.

    Frequently Asked Questions

    • Is this Hello Kitty crochet pattern beginner-friendly?

      • This pattern is suitable for intermediate crocheters but can be tackled by beginners willing to learn.
    • What yarn is best for this crochet project?

      • A medium-weight acrylic yarn works best for durability and ease of care.
    • How long does it take to crochet this design?

      • Expect around 4 to 6 hours for completion, depending on skill level.
    • Can I customize the bag with different yarn colors?

      • Absolutely! You can mix and match colors to create a unique look.
    • How do I attach the bow?

      • Simply sew it onto the desired spot after crocheting and securing all ends neatly.

    Conclusion

    Crafting your Hello Kitty crochet bag can be a delightful and rewarding experience, allowing you to create a personalized accessory that showcases your love for this iconic character. With a bit of creativity and the above instructions, you can produce a charming bag that blends functionality with the whimsical appeal of Hello Kitty.


    SEO Title: Adorable Hello Kitty Crochet Bags – Free Pattern Ideas

    Meta Description: Discover free Hello Kitty crochet bag patterns! Perfect for crocheters of all levels, these cute projects make great gifts or trendy accessories.

    URL Slug: hello-kitty-crochet-bags

    Primary Keyword: Hello Kitty crochet bags

    Secondary Keywords: free Hello Kitty crochet pattern, Hello Kitty crochet accessory, kawaii crochet project, cute crochet gift ideas, handmade crochet bag

    Image 1 Alt Text: Finished Hello Kitty crochet bag displayed artistically.

    Image 2 Alt Text: Close-up of Hello Kitty facial features on the crochet bag.

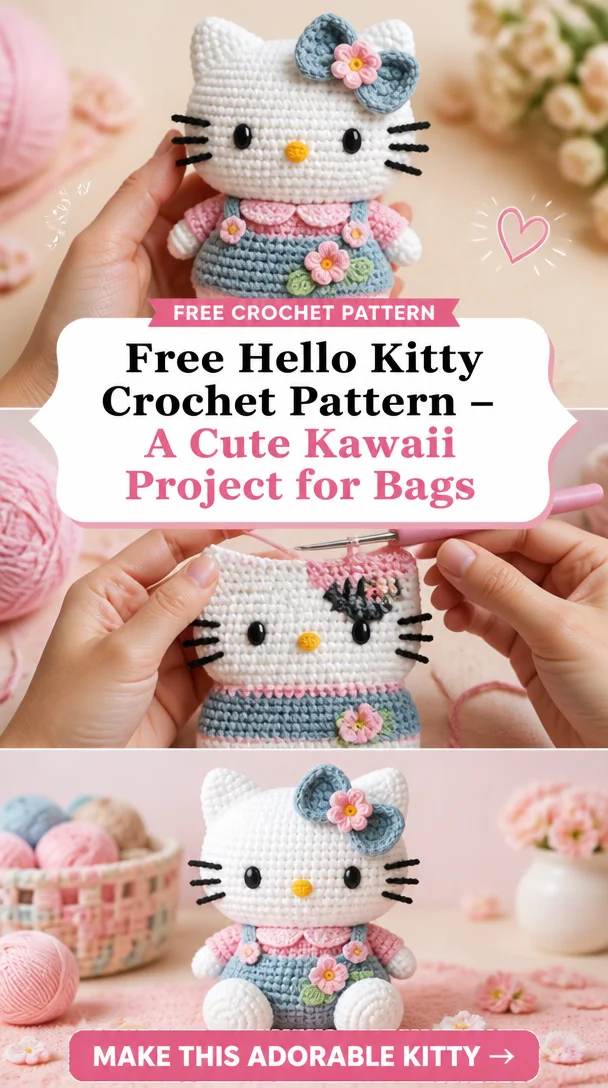
  • Free Hello Kitty Crochet Pattern – A Cute Kawaii Project for Bags

    Free Hello Kitty Crochet Pattern – A Cute Kawaii Project for Bags

    Hello Kitty Crochet Bags – Free Ideas – Crafts Ideas

    Welcome to the delightful world of Hello Kitty crochet! This Hello Kitty crochet bag project brings adorable charm and nostalgic appeal to crafters of all ages. With its cute design and playful colors, this bag is perfect for carrying your essentials or can be a lovely accessory to showcase your passion for kawaii culture. Crocheting this bag not only serves as a creative outlet but also makes for a heartfelt handmade gift for friends or family who adore all things Hello Kitty. Whether you’re looking to add a touch of whimsy to your wardrobe or create a collectible item, this crochet bag pattern is a must-try for enthusiasts of all skill levels.

    Hello Kitty Crochet Pattern Overview

    • Skill Level: Intermediate
    • Finished Size: Approximately 12 inches wide
    • Crochet Hook Size: 4 mm (G)
    • Yarn Type: Cotton yarn
    • Yarn Weight: Medium
    • Main Colors: White, pink, yellow, and black
    • Construction Method: Worked in rounds and panels
    • Approximate Completion Time: 4-6 hours
    • Beginner-Friendly: Some prior experience recommended
    • Construction Style: Combines rounds for the main body and separate panels for the details
    • Type of Finished Item: Crochet bag

    Materials You’ll Need

    • Cotton yarn in white, pink, yellow, and black
    • 4 mm crochet hook
    • Yarn needle for weaving in ends
    • Stitch markers to track rounds
    • Scissors
    • Bag handles or straps
    • Safety eyes (optional)
    • Decorative bow materials (if desired)

    Crochet Abbreviations

    • MR = magic ring
    • ch = chain
    • sc = single crochet
    • hdc = half double crochet
    • dc = double crochet
    • sl st = slip stitch
    • inc = increase
    • dec = decrease
    • st = stitch
    • rep = repeat

    Before You Start

    Before beginning the Hello Kitty crochet bag, ensure you’re comfortable with basic crochet stitches. This pattern works mainly in continuous rounds for the body, and you’ll need to create several panels for the bag’s details. Using a stitch marker helps keep track of your rounds, especially as you work on your main bag panel. Be sure to maintain even tension throughout to achieve a neat finish. If you decide to add decorative elements like eyes or a bow, plan their placement accordingly to ensure uniformity.

    Free Hello Kitty Crochet Pattern

    Foundation or Magic Ring

    Begin by creating a magic ring using your white yarn.

    Body

    Round 1: 6 sc in the magic ring.
    Round 2: Inc in each st around (12).
    Round 3: sc in next st, inc repeat around (18).
    Round 4: sc in next 2 sts, inc repeat around (24).
    Continue increasing until the diameter reaches approximately 12 inches, then switch to working in straight rounds without increases for 5-6 rounds.

    Bag Panels

    For the front panel, create a separate piece starting with a chain that matches the width of the bag. Repeat basic stitches to form the Hello Kitty face, using black yarn for eyes and a yellow yarn for the nose.

    Finishing Details

    Once the body and front panel are completed, it’s time to attach them together by sewing the edges using a yarn needle.

    Construction and Assembly

    To assemble your Hello Kitty crochet bag, attach the front panel to the body using a whip stitch or slip stitch to ensure a secure bond. Once attached, sew your bag handles or straps onto either side, ensuring they are evenly placed. Finally, weave in any loose yarn ends and secure all elements to ensure durability.

    Facial Features and Decorative Details

    To bring Hello Kitty to life, embroider the eyes and nose onto the front panel before attaching it. Position the eyes symmetrically to achieve the signature look. Add a cute bow by crocheting a small rectangle, twisting it, and securing it to the top of the head with a few stitches.

    How to Use Your Hello Kitty Crochet Project

    The finished Hello Kitty crochet bag can serve as a delightful accessory, a small project bag for your crochet supplies, or even a whimsical gift for a fellow Hello Kitty lover! It’s great for everyday use, stylish enough for casual outings, and a fun addition to any kawaii collection.

    Tips for a Better Result

    • Maintain even tension for smooth stitches.
    • Keep all finishing details aligned for a polished look.
    • Attach the bow securely to prevent it from coming loose during use.

    Customization Ideas

    Feel free to play with different yarn colors or add various decorative elements—such as a personalized name tag or unique embellishments—to give your bag a personal touch!

    Common Problems and Troubleshooting

    • If your bag is uneven, pay attention to stitch counts and adjust tension as needed.
    • For crooked features, check your initial placements before securing any pieces.

    Care and Safety

    Due to the use of yarn and decorative elements, this crochet bag should be spot cleaned according to yarn manufacturer instructions. Ensure that any small parts like safety eyes are securely attached to avoid any hazards.

    Frequently Asked Questions

    1. Is this Hello Kitty crochet pattern beginner-friendly?
      The pattern is intermediate and is suitable for those with some crochet experience.

    2. What yarn is best for this crochet project?
      A cotton medium-weight yarn works best for durability and ease of washing.

    3. How long does it take to crochet this design?
      This project typically takes around 4-6 hours depending on your skill level.

    4. Can I make this crochet project larger or smaller?
      Yes, you can adjust the size by altering the number of rounds or panels.

    5. How do I attach the bow?
      The bow can be sewn into place on the front panel with a few small stitches.

    6. Can I use different yarn colors?
      Absolutely! Feel free to choose colors that appeal to you.

    7. How do I keep the finished crochet doll in shape?
      Structure can be maintained by working with firm stuffing and ensuring secure stitching.

    8. Can I turn this design into a keychain or bag charm?
      Yes, simply reduce the size of the pattern, and add a keychain attachment.

    Conclusion

    With its irresistible charm and functionality, this Hello Kitty crochet bag project is perfect for adding a pop of cuteness to your everyday accessories. Utilize your creativity, experiment with colors, and have fun crafting this delightful item that embodies the joyful spirit of Hello Kitty.


    SEO Title: Charming Hello Kitty Crochet Bag Pattern – Free Ideas
    Meta Description: Discover a cute and creative Hello Kitty crochet bag pattern that’s perfect for any fan! Learn to make this adorable accessory today.
    URL Slug: hello-kitty-crochet-bag-pattern
    Primary Keyword: Hello Kitty crochet bags
    Secondary Keywords: free Hello Kitty crochet pattern, Hello Kitty crochet plushie, Hello Kitty crochet accessories, kawaii crochet project, crochet gift ideas
    Image 1 Alt Text: Finished Hello Kitty crochet bag showcasing vibrant colors and details
    Image 2 Alt Text: Close-up of the bow and facial features on the Hello Kitty crochet bag

Crochet Hello Kitty

Your free crochet ebook

Leave your email address to request your free crochet ebook.

Your email address will be used to handle your ebook request.Privacy policy