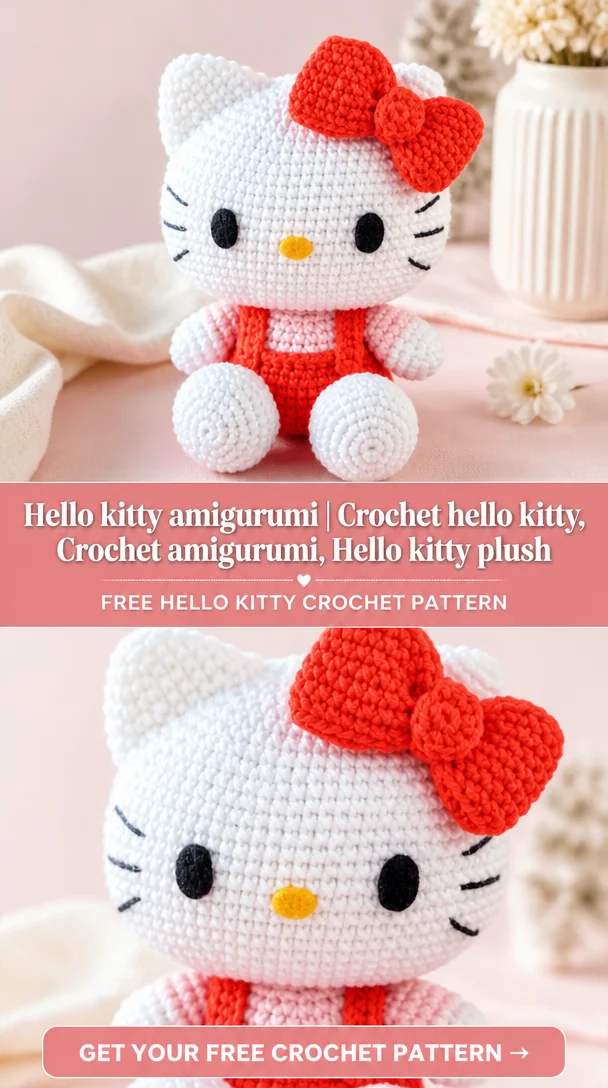
Hello Kitty Amigurumi | Crochet Hello Kitty, Crochet Amigurumi, Hello Kitty Plush
If you are a fan of cute and cuddly characters, then you’ll absolutely adore this Hello Kitty amigurumi crochet project! This charming design captures the adorable essence of Hello Kitty, making it the perfect addition to your crochet collection or as a delightful gift for friends and family. The elegant simplicity of Hello Kitty’s design, with her recognizable bow and sweet facial features, makes this project both fun and rewarding to create. Crocheting your very own Hello Kitty not only offers a therapeutic experience but can also serve as a decorative piece in your home, a lovely collectible, or a thoughtful, handmade present. This pattern is suitable for crocheters of all skill levels, so grab your yarn and let’s get started!
Hello Kitty Crochet Pattern Overview
- Skill Level: Beginner to Intermediate
- Finished Size: Approximately 6 inches tall
- Crochet Hook Size: G/6 (4mm)
- Yarn Type: Acrylic
- Yarn Weight: Worsted (Category 4)
- Main Colors: White, pink, yellow, black
- Construction Method: Worked in rounds
- Approximate Completion Time: 3-5 hours
- Beginner-Friendly: Yes
- Worked In: Continuous rounds
- Type of Finished Item: Amigurumi doll
Materials You’ll Need
- Yarn: White (main color), pink (bow), yellow (nose), black (eyes)
- Crochet Hook: Size G/6 (4mm)
- Yarn Needle
- Stitch Markers
- Scissors
- Stuffing
- Safety Eyes: 12mm black (optional)
- Embroidery Thread: For facial features
Crochet Abbreviations
- MR = magic ring
- ch = chain
- sc = single crochet
- inc = increase
- dec = decrease
- st = stitch
Before You Start
Before diving into your Hello Kitty amigurumi, take a moment to familiarize yourself with the following tips:
- Work in Continuous Rounds: This technique helps avoid a seam, keeping your amigurumi looking polished.
- Use a Stitch Marker: Place a stitch marker in the first stitch of each round to easily track where your rounds begin and end.
- Maintain Even Tension: Keeping your yarn tension consistent will result in a neater finish and prevent gaps.
- Planning Assembly: Each piece will need to be carefully stuffed and positioned during assembly, so keep these steps in mind as you create.
Free Hello Kitty Crochet Pattern
Foundation or Magic Ring
Begin with a magic ring.
Head
- Round 1: 6 sc in MR (6)
- Round 2: Inc in each st around (12)
- Round 3: sc in next st, inc in next st around (18)
- Round 4-8: Sc in each st around (18)
- Round 9: sc in next st, dec around (12)
- Round 10: Dec in each st around (6)
Finish off and leave a long tail for assembly.
Body
- Round 1: 6 sc in MR (6)
- Round 2: Inc in each st around (12)
- Round 3: sc in next st, inc in next st around (18)
- Round 4-7: Sc in each st around (18)
- Round 8: sc in next st, dec around (12)
- Round 9: Dec in each st around (6)
Finish off and leave a long tail for assembly.
Ears (Make 2)
- Round 1: 4 sc in MR (4)
- Round 2: Inc in each st around (8)
- Round 3: Sc in each st around (8)
Finish off and leave a long tail for assembly.
Arms (Make 2)
- Round 1: 5 sc in MR (5)
- Round 2: Sc in each st around (5)
Finish off and leave a long tail for assembly.
Legs (Make 2)
- Round 1: 6 sc in MR (6)
- Round 2: Inc in each st around (12)
Finish off and leave a long tail for assembly.
Facial Details
Attach safety eyes and embroider the nose using embroidery thread.
Bow
- Ch 6, turn, sc in each ch back across.
- Fold the rectangle and tie in the middle with a piece of yarn.
Stuffing and Shaping
Stuff the head, body, arms, and legs to your preferred firmness.
Joining the Pieces
Using your yarn needle, sew the head to the body, both arms, and legs in their desired positions.
Finishing Details
Add the bow to the head and weave in any remaining yarn ends.
How to Use Your Hello Kitty Crochet Project
This adorable Hello Kitty crochet can brighten your room as a decorative piece or transform into the perfect backpack charm or keychain accessory. It also makes a meaningful, handmade gift for any Hello Kitty enthusiast!
Tips for a Better Result
- Keep your stitches neat to prevent gaps.
- Take your time when positioning the facial features for symmetry.
- Secure any decorative elements tightly to avoid them becoming loose over time.
Customization Ideas
Feel free to personalize your Hello Kitty amigurumi by experimenting with different yarn colors for her bow or even creating a themed outfit. Varying the stitch pattern for the body can also add a unique flair!
Common Problems and Troubleshooting
- If you notice uneven stitch counts, count your stitches as you go.
- Ensure your stuffing is not visible by using the appropriate yarn weight.
- Align pieces carefully during assembly to maintain a balanced appearance.
Care and Safety
Ensure to follow the care instructions for your yarn type when washing your amigurumi. Pay particular attention to small parts like safety eyes or any removable accessories if presented to younger children.
Frequently Asked Questions
-
Is this Hello Kitty crochet pattern beginner-friendly?
Yes! It’s designed for all skill levels. -
What yarn is best for this crochet project?
A medium worsted acrylic yarn works well. -
How long does it take to crochet this design?
Expect around 3-5 hours to complete. -
Can I make this crochet project larger or smaller?
You can adjust the hook size or use different yarn weights for size variations. -
How do I attach the bow?
Simply sew the bow securely to the head.
Conclusion
Creating your very own Hello Kitty crochet amigurumi is not only a gratifying experience but also results in a charming piece of art that can add a whimsical touch to any environment. Take the time to enjoy the process and don’t hesitate to personalize it to reflect your unique style!
SEO Title: Adorable Hello Kitty Amigurumi Crochet Pattern – Free Guide
Meta Description: Create your own Hello Kitty amigurumi with this free crochet pattern! Perfect for gifts or as decor. Easy and fun for all skill levels.
URL Slug: hello-kitty-amigurumi-crochet-pattern
Primary Keyword: Hello Kitty amigurumi
Secondary Keywords: Hello Kitty crochet pattern, cute crochet project, handmade crochet doll, Hello Kitty plush, kawaii crochet pattern
Image 1 Alt Text: Handmade Hello Kitty amigurumi doll with a pink bow
Image 2 Alt Text: Close-up of Hello Kitty’s face showing embroidered features and safety eyes